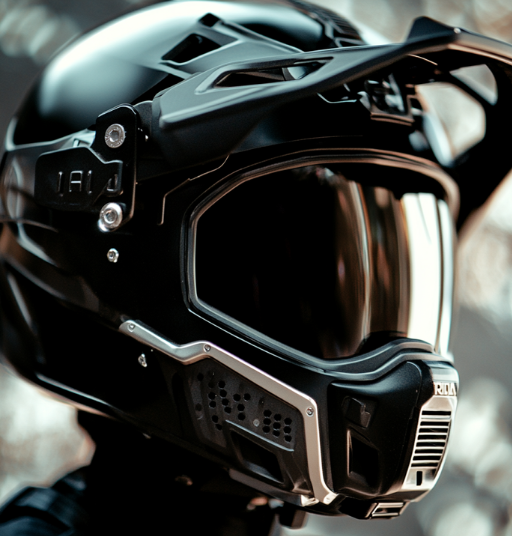
Helmet Safety Standards and Camera Mounts: What You Need to Know

Evolving Helmet Safety Standards and the Impact of Camera Integration

Helmets Are Certified Safety Equipment

Helmets sold for motorcycling, cycling, and other high-risk activities are typically certified against a recognized safety standard — DOT and Snell in the United States, ECE in much of the rest of the world, and various sport-specific standards for cycling and equestrian helmets. These standards test the helmet’s ability to absorb impact and protect the wearer in a crash. That certification applies to the helmet as manufactured — not necessarily to the helmet after aftermarket modification.

How Camera Mounting Can Interact With Helmet Safety

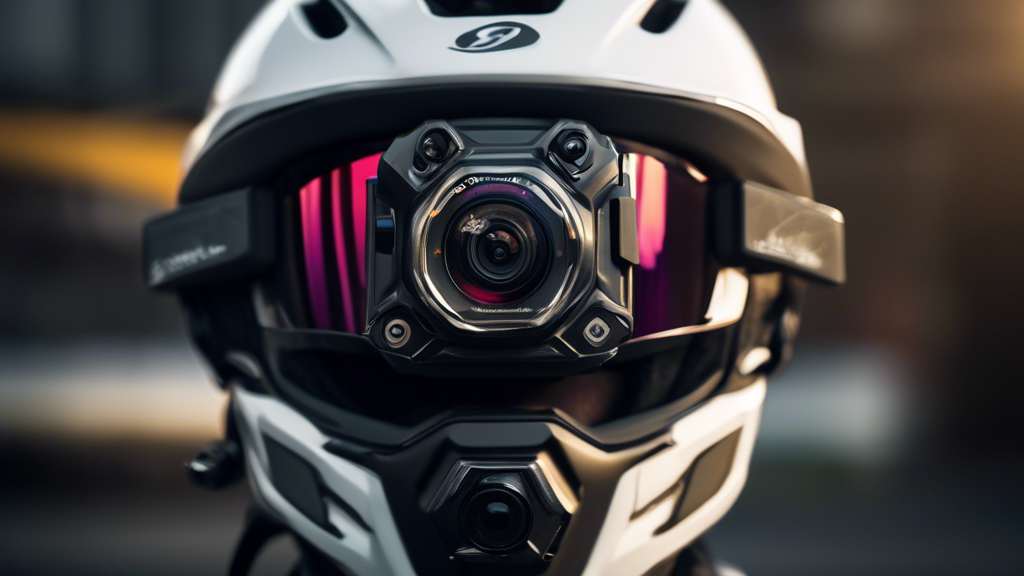
This matters for camera mounting because some mounting methods are more invasive than others:

  • Adhesive mounts (the most common type for action cameras) attach to the outer shell without penetrating it, and are generally considered the lowest-risk mounting method from a certification standpoint.
  • Drilling or cutting into the shell to attach a mount can compromise the structural integrity the certification was based on, even if the change looks minor. This is generally not recommended by helmet or camera manufacturers.
  • Mount position matters too — a rigid mount and camera body sitting directly over a primary impact zone (the crown or the area that typically contacts the ground first in a fall for a given sport) is a different risk profile than one mounted lower or further back.

General Guidance

The most consistent advice across camera and helmet manufacturers is: follow the mount manufacturer’s installation instructions exactly, don’t permanently modify a certified helmet to fit a mount, and check whether your specific helmet manufacturer has published any guidance on accessory mounting (some do, particularly for motorsport and cycling helmets). If in doubt, an adhesive mount designed for your specific helmet’s curvature is the safest default option.

This Isn’t a Legal Conclusion

Helmet certification rules and any regulations around modifying safety equipment vary by jurisdiction and by sport. This is general background information, not legal advice — check your local regulations and your helmet’s specific manufacturer guidance for anything beyond general best practice.

How Action Camera Technology Has Evolved: Resolution, Stabilization, and Battery Life

The Evolution of Helmet Cameras: High-Resolution Video, Battery Innovations, and Advanced Features

How Action Camera Hardware Has Evolved

Action cameras have gone through several generations of meaningful improvement since the category became mainstream. The specific numbers vary by brand and model year, but the general direction of progress has been consistent across the industry.

Resolution and Frame Rate

Early action cameras topped out at standard or high-definition resolution with limited frame rate options. Current cameras commonly shoot 4K at high frame rates as standard, with higher-end models offering even greater resolution for cropping and reframing flexibility in post-production. Higher frame rates at high resolution have also become more accessible, which matters for slow-motion footage of fast-moving action.

Stabilization

This is arguably where the biggest practical improvement has happened. Early cameras relied on physical gimbals or produced noticeably shaky footage from vibration and hand movement. Electronic image stabilization has advanced enough that many current cameras produce gimbal-smooth footage without any external stabilizing hardware, which is a significant difference for helmet-mounted use where the camera is exposed to constant small vibrations.

Battery Life and Charging

Battery capacity and efficiency have both improved, but so have power demands from higher resolutions and processing-heavy features, so real-world runtime hasn’t necessarily grown as fast as capacity numbers alone would suggest. What has clearly improved is charging speed and convenience — fast-charging docks and swappable battery systems have made it much easier to keep a camera running through a full day of use.

Ruggedization

Many current cameras are waterproof to a meaningful depth without needing a separate protective housing, a real change from earlier generations that typically required a bulky external case for any water exposure. This also tends to improve audio quality, since housing-free designs let the microphone pick up sound directly rather than through a plastic case.

What to Take Away

When comparing a current camera against an older model, resolution numbers alone understate the real-world difference — stabilization quality and battery/charging convenience are usually where the generational gap is most noticeable in actual riding conditions.

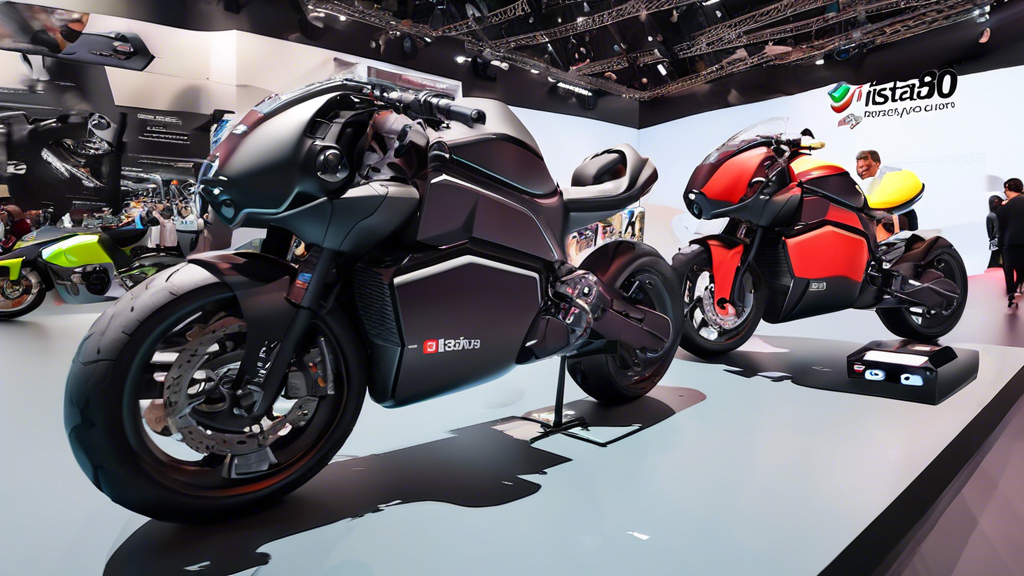
Insta360 Unveils Advanced Motorcycle Camera Solutions at EICMA 2024

Insta360 Unveils Advanced Motorcycle Camera Solutions at EICMA 2024

Beyond the Helmet: How Insta360’s EICMA 2024 Reveal Redefines Ride Recording

You lean into the perfect hairpin, the bike singing beneath you, only to later find your camera was fixed on your handlebars, missing the crucial interplay of lean and road. You witness a stunning mountain vista, but the audio is a relentless, useless roar of wind. These aren’t just missed shots; they’re lost chapters of your story. Modern motorcycling is an experience to be captured and relived, yet traditional cameras force a limiting choice of perspective.

The solution is a paradigm shift. At EICMA 2024, Insta360 unveiled advanced motorcycle camera solutions designed not just to record, but to comprehensively document. This ecosystem is the key to mastering the art of the ride story, transforming you from a passive recorder into the director of your two-wheeled epic.

Foundational Choices: The New Hardware Ecosystem

Your choice of capture system is the bedrock of your storytelling. Insta360’s 2024 lineup provides specialized tools for different narrative styles, moving beyond the one-size-fits-all approach.

Selection and Sizing – Choosing Your Narrative Lens

Your riding style dictates your primary camera.

The 360-Degree Storyteller: Cameras like the X4 are for the rider who refuses to miss a moment. Mount it once, and in post-production, you choose between a sweeping follow-cam view, a tight shot of the instrument cluster, or a reactive shot of the scenery you just passed. It captures the entire environment, granting total creative freedom later.

The Action-Centric POV: The Ace Pro, especially in its Motorcycle Kit, is for high-intensity, fixed-perspective recording. Its large sensor excels in low-light tunnels and captures crisp, stabilized footage when you want a traditional, immersive first-person view from your helmet.

The Modular Workhorse: The ONE RS system offers adaptability. Swap between a 360 lens and a 4K Boost Lens on the same core, perfect for the rider who wants both narrative options without buying two complete cameras.

Location and Setup – Strategic Mounting for Optimal Capture

Mounting is half the battle. Each location tells a different part of the story.

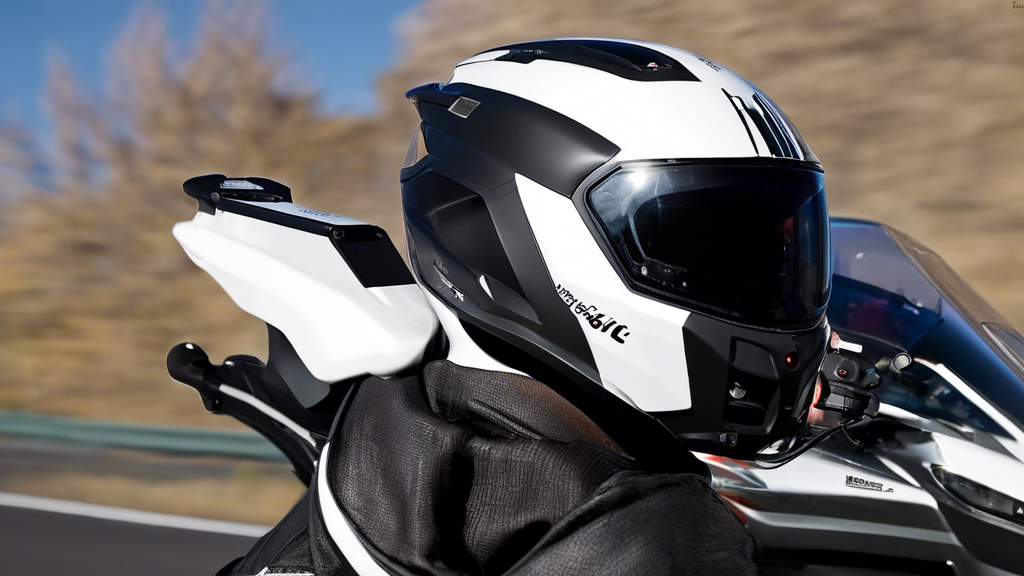
Helmet Chin: Offers an immersive, rider’s-eye view that matches head movement. It is ideal for technical riding footage but can be susceptible to wind noise.

Helmet Side: Provides a classic “rider profile” angle, excellent for showing lean angle and helmet checks. Ensure the mount is secure to avoid vibration.

Handlebars/Tank: Gives a dynamic, front-facing view of the road and instruments. Use a vibration-dampening adapter to prevent high-frequency shakes from ruining your footage.

Tail/Swingarm: Creates dramatic, trailing shots of the bike and road. This position is exposed to the most debris; use a lens guard religiously.

Core Components & Tech Breakdown

Solution Core Technology Key Characteristics for Riders
Ace Pro Motorcycle Kit 1/1.3″ Sensor, 8K Video Exceptional low-light performance for dawn rides or tunnels; Leica-designed lens ensures sharpness; Motorcycle Bundle includes quiet frame and adhesive mounts to minimize wind noise.
X4 as a Bike Cam 8K 360 Capture, 72MP Photos Shoot first, choose your angle later with revolutionary post-production freedom; Built-in GPS for adding data overlays like speed and route; 10-bit color for richer, more editable footage.
ONE RS Modular System Interchangeable Lens Mods Ultimate flexibility—switch between a 360 lens for adventures and a 4K lens for track days; Cost-effective way to access multiple shooting styles.

The Core System: Management and Control

A motorcycle camera is a dynamic system. Controlling these three variables transforms raw clips into cinematic sequences.

Perspective & Framing

The Target: To create dynamic, multi-angle edits that look like you had a chase car and a drone, all from a single 360 camera.

The Consequence: Without active reframing, 360 footage remains a flat, spherical curiosity. Static, single-perspective shots fail to engage an audience.

The Tools: This is where Insta360’s software shines. Use Auto Frame to let AI track you and the action automatically. For full control, use Keyframing in Insta360 Studio or the app to smoothly direct the viewer’s eye from a wide establishing shot to a tight detail, crafting a professional narrative flow.

Audio Fidelity

The Target: A balanced audio mix: clear voice comms, the visceral growl of your engine, and the ambient sounds of the environment, all free from destructive wind roar.

The Consequence: Unwatchable footage. Deafening wind noise is the number one killer of motorcycle video audio.

The Tools: Start with hardware: use the Motorcycle Kit’s “quiet frame” or a dedicated foam windslip. For 360 cams, position the camera closer to your body to use it as a windbreak. In post, leverage the new Wind Noise Reduction algorithms in Insta360’s desktop software for a final, clean polish.

Stabilization & Dynamic Range

The Target: Silky-smooth footage on bumpy backroads, with detail preserved in both shadowy forest roads and glaringly bright asphalt.

The Consequence: Jerky, nauseating video or footage where the sky is a white blob and the tunnel is a black hole.

The Tools: FlowState Stabilization (especially in 360 mode) is your invisible gimbal. For high-contrast scenes, enable Active HDR on compatible cameras to balance light and dark areas. Use 4K 120fps slow-motion (Ace Pro) to dramatically highlight critical moments like a perfect apex or a trail obstacle.

Advanced Practices: The Art of the Ride Edit

Capture is only data. Editing is where you build your story.

Preparation: Workflow Foundations

Adopt a ruthless file management system. Create a folder for each ride date. Use the Insta360 app to quickly generate and export highlight clips for social media, but for serious projects, transfer the full original files to a computer. Your first edit should always be a “selects” timeline—a string of your best, unedited moments from the day.

Ongoing Inputs: Editing Techniques

For 360 footage, start your edit in Insta360’s dedicated software to set your keyframes and perspectives, then export those angles as standard video files for fine-cutting in your preferred editor. Master the “invisible selfie stick” effect, where the stick holding the 360 camera is automatically erased, creating magical floating third-person shots. Sync multiple camera angles using a common audio track or a visual cue like a turn signal flash.

Selection and Strategy: Crafting the Narrative

Choose clips that show progression: a wide landscape, then a tight shot of you reacting to it. Select moments that demonstrate skill—a smooth downshift, a controlled brake—not just speed. Sequence for emotional impact: build anticipation with winding road shots, release it with an open straight, and conclude with a satisfying destination shot. Your soundtrack should follow this same arc.

Threat Management: Problem Prevention & Solution

Proactive habits prevent heartbreak.

Prevention: The Pre-Ride Checklist

This five-minute ritual saves hours of grief. 1) Lens Inspection: Clean with a microfiber cloth; a smudge ruins every shot. 2) SD Card: Format it in-camera to ensure compatibility and free space. 3) Power: Confirm all batteries are at 100%. 4) Mount Integrity: Tug on the camera; check adhesive mounts for lifting. 5) Test Record: Do a 30-second recording and review playback for issues.

Intervention: Troubleshooting Common Issues

Adopt a diagnostic mindset:

Issue: Footage is shaky.

Response: Tier 1: Ensure mount is tight and on a solid surface. Tier 2: Verify FlowState Stabilization is enabled in camera settings. Tier 3: Apply a vibration-dampening base.

Issue: File corruption or camera freeze.

Response: Tier 1: Power cycle the camera. Tier 2: Try a different, high-speed V30-rated SD card. Tier 3: Connect to Insta360 app for a firmware check/reinstall.

The Action Plan: A Rider’s Seasonal Camera Guide

Season/Phase Primary Tasks What to Focus On
Summer / Touring Charge multiple batteries. Clean lenses at every fuel stop. Use highest bitrate (e.g., 8K/5.7K) for key scenic rides. Pack lens guards for gravel roads. Long, sweeping scenic shots. Time-lapses of changing landscapes. Capturing the full story of multi-day journeys.
Fall / Canyon Riding Utilize Active HDR for mixed light under trees. Leverage 120fps slow-mo for dramatic cornering shots. Secure mounts for aggressive riding. Dynamic, action-oriented editing. Showing technical skill and bike control. The interplay of light, shadow, and motion.
Winter / Cold & Storage Fully charge, then remove batteries from cameras. Store equipment in a sealed, dry container with desiccant. Archive and organize year’s footage. Editing your best clips into a year-end highlight reel. Planning camera angles and stories for the next season.

The principle is now clear: total environmental capture leads to total creative freedom. Your journey evolves from selecting a camera to strategically mounting it, managing its digital variables, and finally crafting a compelling narrative in the edit bay. The tools unveiled by Insta360 at EICMA 2024 empower this entire process. They transform you from a passenger in your own story to its author. The reward is no longer just a ride logged, but an adventure perfected—an unparalleled archive where every road, every corner, and every vista is captured not just as it happened, but as you felt it. Your two-wheeled masterpiece awaits its director.
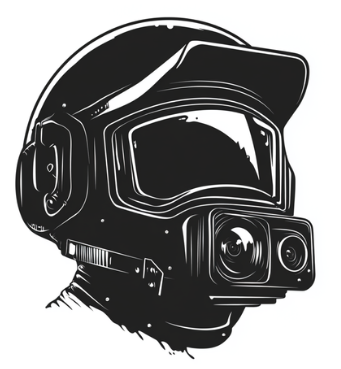
Helmet Camera Rules in Equestrian Sports: What Riders Should Know

Navigating the Debate: The Evolution of Helmet Camera Policies in Equestrian Sports

Camera Rules Vary by Discipline and Organization

Unlike motorsport or action-sports filming, equestrian competition doesn’t have one universal rule about helmet cameras. Different disciplines and different governing and show organizations set their own policies, and those policies can differ significantly — some events welcome cameras without restriction, others require prior approval, and some restrict or prohibit recording devices during competition rounds entirely.

Common Reasons Organizations Regulate Cameras

While specific rules vary, the underlying concerns tend to fall into a few general categories:

  • Rider and horse safety. Some organizations are cautious about any equipment attached to a helmet that wasn’t part of its original certified design, out of concern for how it might behave in a fall.
  • Fairness and privacy for other competitors. Recording during a shared warm-up area or a judged test can raise questions about capturing other riders or horses without their knowledge.
  • Distraction concerns. Devices that require any interaction during a round (starting/stopping recording, checking a screen) can conflict with rules focused on rider focus and horse welfare.

What This Means for Riders

Because rules differ by organization and even by specific show or venue, the only reliable approach is to check the current rulebook or ask event organizers directly before mounting a camera for a competition round — don’t assume that because a camera was fine at one show, or in training, it will be permitted at another. Schooling shows, clinics, and casual riding are generally far less restrictive than sanctioned competition, which is why most riders’ helmet-camera footage comes from training rather than competition rounds.

A Reasonable Default

If you’re unsure, treat competition rounds as camera-restricted by default and confirm permission in advance, while using your camera freely during lessons, schooling, and practice — the settings where the footage is usually most useful for actually improving your riding anyway.

Techalogic DC-1 Helmet Camera: Revolutionizing Road Safety with Dual-Lens Technology

Techalogic DC-1 Helmet Camera: Revolutionizing Road Safety with Dual-Lens Technology

The Vision of Unbreakable Evidence

Your heart pounds. A car drifts into your lane, a sudden stop from the vehicle ahead. In the adrenaline-fueled moments after a near miss, details blur. Was it their fault? Yours? The conversation that follows is often a tense, “he-said, she-said” exchange where memory is fragile and bias is real. For anyone on two wheels—or even in a car—this uncertainty is the true danger that lingers long after the tires have stopped squealing.

Modern road safety transcends defensive driving; it demands definitive documentation. It requires an impartial witness that sees what you see, remembers every detail, and speaks with crystal-clear video. This is the new standard for accountability. Mastering your presence on the road means mastering your evidence. The Techalogic DC-1 Helmet Camera, built on a pioneering dual-lens architecture, is the foundational tool for this mastery. It transforms your helmet from passive protection into an active command center for security, giving you control over the most critical narrative of all: your own.

Foundational Choices: The Hardware of Your Digital Witness

Your camera is the cornerstone of your safety system. Its capabilities determine the clarity, scope, and legal weight of your evidence. Choosing and setting it up correctly is not an accessory step; it is the first and most critical action in building your digital defense.

The Dual-Lens Paradigm: Your 360-Degree Narrative

A single-lens camera tells only half the story. It captures the threat in front of you but misses the tailgater behind or the passenger-side hazard. The DC-1’s dual-lens system changes the game entirely. It records high-definition video from both a front and a rear (or interior-facing) camera simultaneously. This creates a continuous, 360-degree situational log. In a collision, you have proof of the car that hit you from behind while also showing your position and signaling. It provides context that a single perspective can never offer, making your evidence irrefutable.

Mounting and Integration: The Tactical Setup

Position is everything. The goal is a clear, stable field of view with minimal aerodynamic drag and zero risk of detachment.

  • Front Camera: Mount centrally on the chin bar or side of a full-face helmet for the most natural riding perspective. On an open-face helmet, the top center is a secure alternative. Ensure no part of your helmet or visor intrudes into the frame.
  • Rear Camera: Mount on the opposite side or rear of the helmet to maximize the rearward view. Route the slim connecting cable securely along the helmet’s contours, using adhesive clips to prevent snagging.
  • Stability Check: Before every ride, grip the camera and apply gentle pressure. It should not wiggle. Vibration is the enemy of clear footage; a rock-solid mount is non-negotiable.

Core Specifications: Breaking Down the Components

Understanding the key specifications allows you to operate the system to its full potential. Here is what defines the DC-1’s capability:

Component Category Options / Key Specs Key Characteristics
Lenses & Sensor Dual Lenses, Wide Dynamic Range (WDR) Captures clear detail in both shadows and bright skies. Essential for reading license plates against headlights or a bright sky.
Resolution & Frame Rate 1080p or 4K options, 30/60fps Higher resolution (4K) captures finer details like distant plates. Higher frame rates (60fps) provide smoother slow-motion playback for analyzing rapid events.
Battery & Power Rechargeable battery, hardwiring option For all-day security, a hardwired kit to your vehicle’s electrical system is the professional’s choice, ensuring the camera never powers down during your ride.
Storage & Looping MicroSD Card (High Endurance), Loop Recording Loop recording automatically overwrites old, non-essential footage when the card is full, ensuring you always have recent video without manual deletion.
Critical Features G-Sensor, GPS, Wi-Fi The G-sensor detects impacts and automatically locks incident footage to prevent overwriting. GPS logs your speed and route. Wi-Fi enables quick preview and download to your smartphone.

The Core System: Management and Control of Your Footage

A helmet camera is not a set-and-forget device. It is a dynamic recording system that you must actively manage. Proper control ensures that when you need it, your critical evidence is preserved, organized, and crystal clear.

Capture Control: Mastering Light and Exposure

The ideal setting depends on your environment. Most modern cameras like the DC-1 handle this automatically, but knowing the limits is key.

  • Sunny Days: Ensure WDR is enabled. This prevents the sky from being blown out white while keeping the road and vehicles properly exposed.
  • Low-Light & Night: This is the ultimate test. A camera with a good low-light sensor will still capture usable footage, but license plate readability drops significantly. Consequence of Poor Control: Dark, grainy video where crucial details like faces and plates are lost.

Actionable Method: Test your camera at dusk. Review the footage. Can you read plates of parked cars? If not, consider a camera with stronger low-light performance or add auxiliary lighting to your vehicle.

Data Integrity & Storage: The Climate Control for Evidence

This is the most critical administrative function. Your system must automatically protect important files and manage storage.

  • Loop Recording + G-Sensor: This is the heart of the system. The camera continuously records in short clips (e.g., 3 or 5 minutes). During normal riding, old clips are erased for new ones. Upon a detected impact (G-sensor trigger), the current clip and the one before it are locked in a protected folder, safe from deletion.
  • Method: Use only High Endurance microSD cards, designed for constant write cycles. Establish a weekly routine to download any locked files and clear the card.

Power Management: The Uninterrupted Feed

A dead camera is a blind witness. Know your operational limits.

  • Benchmark: A standard battery may last 2-3 hours. For a commute, this is fine. For a full day’s ride, it is insufficient.
  • Advanced Solution: Hardwire the camera to your vehicle’s fuse box via an add-a-circuit kit. The camera turns on and off with the ignition, drawing power directly from the battery without risk of drain. This is the definitive solution for guaranteed, uninterrupted recording.

Advanced Practices: The Protocol of a Prepared Rider

With the hardware mastered, the practice evolves from passive recording to active, strategic documentation. This is the art of using your tool to its maximum potential.

Pre-Ride Preparation: The Essential Checklist

This 60-second ritual ensures readiness. Visually inspect and confirm:

1. Lenses are clean (use a microfiber cloth).

2. Memory card has free space.

3. Battery is charged or power cable is secure.

4. Mounts are solid; no wiggle.

5. Camera powers on and begins recording automatically.

The Riding Protocol: Active Documentation

Engage with the system as you ride.

  • Verbal Commentary: Use the microphone. Say the license plate of an aggressive driver aloud: “Blue sedan, California plate ABC-123, is tailgating.” Narrate street names and conditions. This audio track is powerful, timestamped evidence that clarifies the video.
  • Manual Incident Tag: Don’t wait for the G-sensor. See a near-miss or a hazard? Press the manual lock button. This proactively protects the current video clip, marking it for review later.

Post-Ride Routine: Securing the Harvest

Your duty of care extends after you park.

  1. Immediate Backup: Download any locked or tagged footage to your computer or cloud storage immediately. Evidence is only as good as its backup.
  2. Organize: Create folders by date and route (e.g., “2023-10-26_Commute_Highway101”).
  3. Edit for Clarity: Use simple software to trim long clips to the relevant 30-60 seconds before and after an incident. This is the clip you provide to authorities or insurance.

Threat Management: Your Proactive Response Plan

The presence of a camera is a deterrent, but its real power is in structured, calm response. Have a plan before you need one.

Prevention: The Psychology of Visibility

A visibly mounted camera changes behavior—yours and theirs. You ride more consciously, knowing you’re recording. Other motorists, noticing the lens, often drive more courteously. Furthermore, use your footage proactively: report recurring potholes or dangerous intersections to your city’s public works department with video evidence.

Intervention: The Tiered Response

  • Tier 1 (Minor Incident/Close Call): Secure the footage with a manual tag. Do not engage or gesture at the other driver. Continue riding safely. Report the aggressive driver later to local non-emergency lines if warranted, offering to provide video.
  • Tier 2 (Accident or Physical Confrontation): State calmly, “I have the entire incident on camera from two angles.” Do not argue details. Provide your name and insurance information. Tell the responding officer you have immediate digital evidence to provide.
  • Tier 3 (Legal & Insurance Proceedings): Present the unedited, original file. The embedded GPS data validates your speed and location. The timestamp provides an immutable timeline. This is your primary exhibit. Your word is now supported by an objective, technological witness.

The Rider’s Safety Calendar: A Cyclical Action Plan

Integrate these tasks into your riding rhythm to maintain a state of constant readiness.

Phase Primary Tasks What to Focus On
Daily Power check. Quick lens wipe. Verbal audio test. Operational readiness the moment you start your engine.
Weekly Download all footage. Format memory card in-camera. Inspect mount security. Data management and physical integrity. Preventing card errors.
Monthly Test G-sensor function. Check for firmware updates. Review a sample of footage for quality. System functionality and performance optimization.
Seasonally Deep-clean all ports and connectors. Re-evaluate camera settings for changing light conditions (longer nights). Consider hardwiring if not already done. Long-term reliability and adapting to environmental shifts.

Riding with Unbreakable Confidence

The journey from mounting a simple camera to mastering a complete safety protocol is a transformation in control. It begins with the foundational choice of a tool like the Techalogic DC-1 Helmet Camera—a system designed to capture the full context of your ride. It advances through the disciplined management of data and power, and it culminates in the practiced protocol of a rider who documents proactively and responds with calm assurance.

This mastery does more than protect you in court; it changes your experience on the road. The anxiety of the “he-said, she-said” fades, replaced by the quiet confidence of having an objective witness. You ride not with paranoia, but with empowered awareness. The road is a shared space, subject to the errors and impulses of others. But your evidence—your clear, dual-lens, time-stamped narrative—is yours alone. It is the ultimate tool for accountability, the revolution in personal road safety that turns your helmet into a guardian, and every ride into a documented journey you control.

Helmet Cameras for Equestrian Riders: Mounting and Gear Considerations

Balancing Safety and Technology: The Use of Helmet Cameras in Equestrian Sports

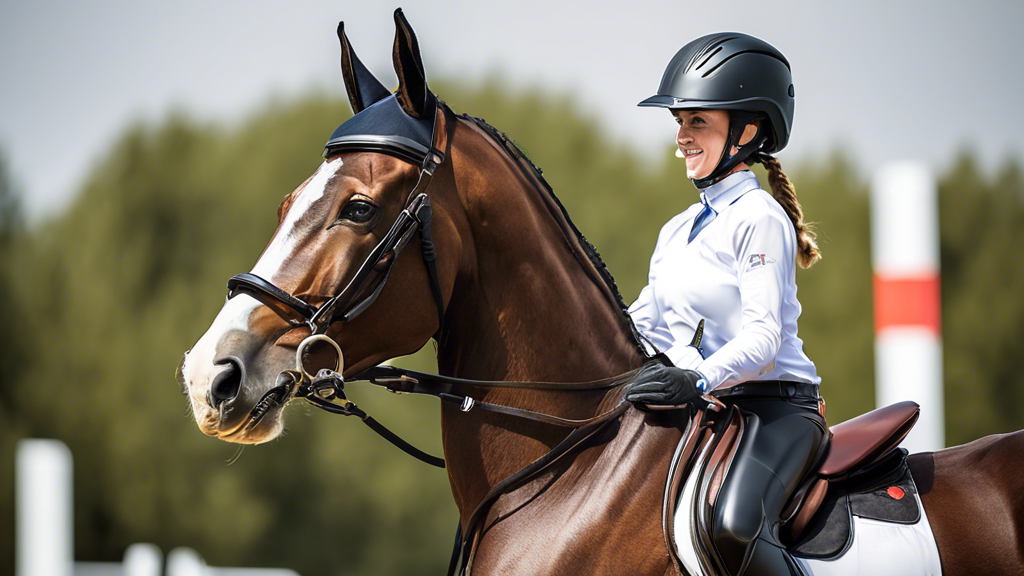
Why Equestrian Riders Use Helmet Cameras

Helmet cameras are increasingly common in equestrian sports for the same core reasons they’re popular elsewhere: reviewing your own performance after a lesson or a course, documenting a competition round, and sharing riding with instructors who weren’t present. For a sport where timing, position, and the horse’s response happen in fractions of a second, first-person footage can show details that are hard to remember or describe afterward.

Mounting Considerations Specific to Riding Helmets

Equestrian riding helmets are certified safety equipment, and how a camera is attached matters more than it might for a casual bike ride. A few general principles apply regardless of camera brand:

  • Follow the mount manufacturer’s guidance, and don’t modify the helmet itself. Drilling, cutting, or otherwise permanently altering a certified helmet can affect the protection it’s designed to provide. Most camera mounts are designed to attach without any modification to the helmet shell.
  • Keep weight and position in mind. A camera mounted high or far forward changes the helmet’s balance more than one mounted low and close to the shell. Lighter, more compact cameras are generally a better fit for riding than bulkier options built for other sports.
  • Check that the mount doesn’t interfere with the chin strap or any safety harness system. Fit and secure retention always take priority over camera positioning.

Choosing a Camera for Riding

For lessons and general schooling, a compact, lightweight camera with a reasonably wide field of view is usually enough to capture the horse’s ears, your hands, and the arena ahead without extra bulk. For jump courses and cross-country, riders often prefer a slightly wider angle to keep more of the fence and approach in frame, along with good stabilization to smooth out the camera shake from the horse’s motion.

A Practical Starting Point

If you’re new to riding with a helmet camera, start with a lightweight, securely-mounted camera during a low-stakes schooling session before using it in competition or on cross-country, both to confirm the mount holds securely at speed and to check that it doesn’t affect your awareness or comfort in the saddle.

Where Camera Technology Is Headed: Trends Shaping Action Cameras

Transformative Trends and Innovations in Camera Technology and Their Societal Impact

Where Camera Technology Is Headed

Action and helmet cameras have improved steadily over the past several product generations, and most of that improvement comes from a handful of underlying trends rather than any single breakthrough. Understanding these trends is useful context when comparing current camera options, since they explain why newer models tend to outperform older ones in specific, predictable ways.

Computational Processing Over Raw Hardware

A lot of the improvement in recent cameras comes from processing rather than sensor size alone. Features like automatic scene detection, in-camera color correction, and multi-frame noise reduction let a small camera sensor produce footage that looks closer to what a larger sensor would capture. This is part of why stabilization quality, low-light performance, and dynamic range have improved faster than raw sensor specifications would suggest.

360-Degree Capture Becoming Mainstream

360-degree cameras were a niche category for years, mostly used by dedicated content creators willing to deal with bulky hardware and complex editing workflows. That’s changed as 360 cameras have gotten smaller, editing apps have gotten better at automatically reframing footage into a standard flat video, and prices have come down. For helmet and action camera use specifically, 360 capture solves a real problem: you don’t have to decide on a shot angle before you start riding, since the “camera direction” can be chosen after the fact in editing.

Data Overlays and Sensor Integration

Built-in GPS, accelerometers, and barometric sensors are increasingly standard, allowing footage to be overlaid with speed, elevation, g-force, and route data automatically in companion apps. This started as a niche feature for track-day and motorsport riders but has become a mainstream selling point across most camera tiers.

Smaller Form Factors, Less Compromise

Early action cameras generally required a trade-off between size and capability — smaller cameras had noticeably worse battery life, stabilization, and low-light performance than larger ones. That gap has narrowed considerably, and compact/bullet-style cameras now handle helmet mounting with much less aerodynamic and weight penalty than earlier generations.

What This Means for Buyers

None of these trends make older cameras obsolete for casual use, but they explain why a camera released a generation or two ago typically falls behind on stabilization quality, low-light footage, and companion-app features even if its core resolution specs look similar on paper. When comparing cameras, it’s worth checking current firmware and stabilization mode names specifically, since manufacturers iterate on processing software between hardware releases as well as within them.

Durable, water-resistant GoPro action camera sees a price drop

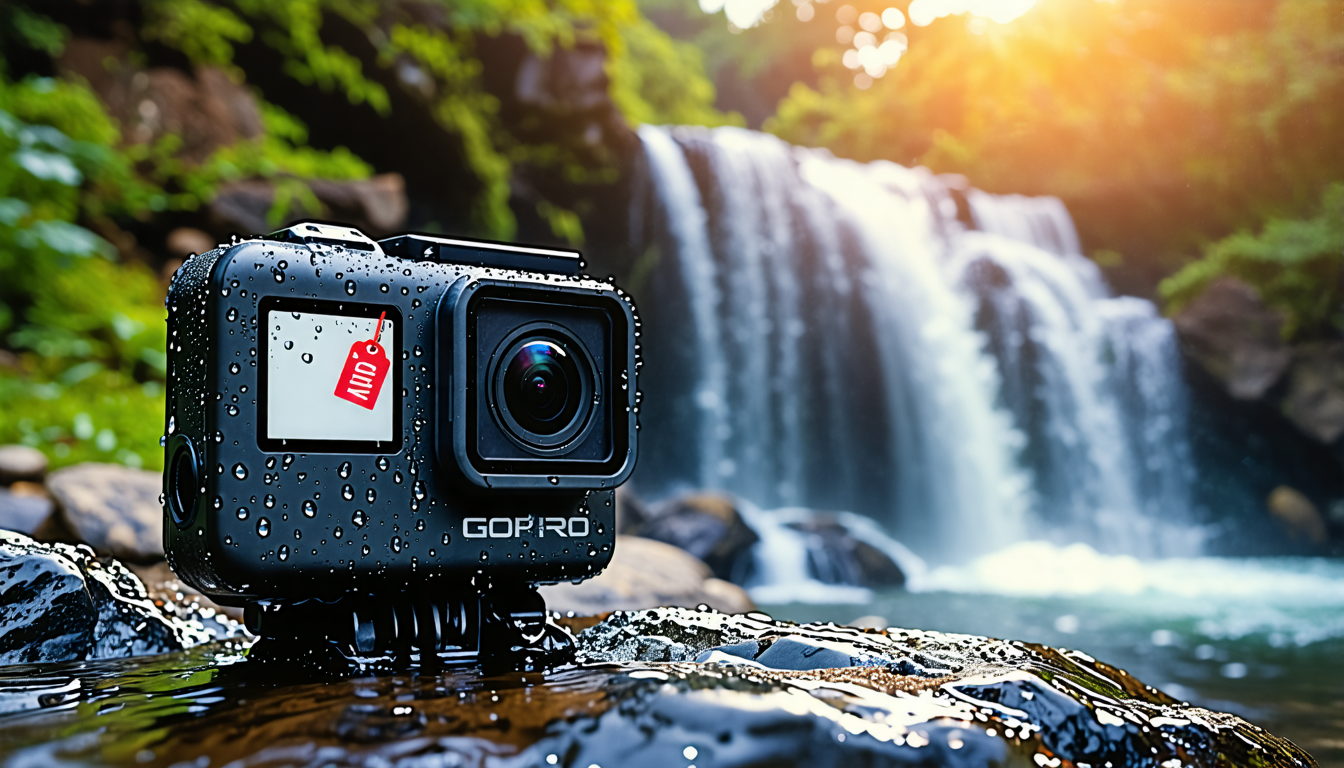
Create an image of a sleek, modern GoPro action camera sitting on a rocky ledge next to a waterfall. The camera appears durable and robust, with water droplets glistening off its surface, emphasizing

Capture Without Compromise: Your Adventure Awaits

You’re dropping into the singletrack, feeling the spray of a mountain waterfall, or catching the perfect wave. In these moments, the last thing you should worry about is your camera. The fear of missing the shot—or worse, destroying your gear—can hold you back from fully immersing in the experience. That barrier to fearless, high-quality documentation is crumbling.

For the modern adventurer, an action camera is more than a gadget; it’s a trusted companion that preserves perspective. Its fundamental promise is unwavering reliability amidst chaos. Mastering your adventures begins with choosing a tool engineered to endure them. The recent price drop on leading durable, water-resistant GoPro action cameras makes this level of professional-grade, reliable capture more accessible than ever. This isn’t just a purchase; it’s the foundational key to unlocking your most epic footage with confidence.

Choosing Your Adventure Partner: The Hardware of Capture

Your camera is your partner in the elements. The right choice forms an unshakeable foundation for everything you’ll create, from raw POV clips to cinematic edits.

Part A: Align Your Camera With Your Mission

Not every adventure requires the same tool. Match the camera’s durability profile to your primary activity. A durable, water-resistant GoPro action camera is the versatile workhorse, ideal for the user who transitions from mountain biking to snorkeling without switching gear. For specialized needs, a competitor might offer a more compact form or a different sensor, but often at the cost of the GoPro’s proven ecosystem and stabilization.

Part B: Decoding Durability and Waterproofing

The terms “rugged” and “water-resistant” are often used loosely. True adventure readiness is defined by specific engineering.

Build & Impact Protection

A true adventure camera features a reinforced polycarbonate chassis designed to absorb shock. It’s not just about surviving a drop; it’s about resisting the crush in a packed backpack or the vibration on a handlebar mount. The design ethos prioritizes a low-profile, aerodynamic shape that minimizes snag points.

The Waterproofing Standard

This is where the standard is set. “Splash-proof” is for rain. True waterproofing means submersibility without an external case. A rating of 10 meters (33 feet) is the benchmark for a durable, water-resistant GoPro action camera, allowing you to swim, surf, and snorkel freely. This built-in resistance is a game-changer, removing the fumble of an extra housing when spontaneity strikes.

Part C: The Adventurer’s Comparison Table

Model Video Resolution & Frame Rates Standard Waterproof Rating Key Rugged Feature Best For
GoPro Hero (Latest Model) 5.3K/60fps, 4K/120fps 10m / 33ft HyperSmooth stabilization, replaceable lens cover The all-around adventurer who demands top-tier image quality and stabilization in any condition.
DJI Osmo Action 4 4K/120fps 18m / 59ft Excellent low-light performance, front color screen Vloggers and adventurers who film in varied lighting and need a high-quality front display.
Insta360 GO 3 2.7K/30fps 5m / 16ft (with case) Ultra-compact magnetic mounting, unique perspectives Discreet, creative POV shots and travelers prioritizing minimal gear.

Mastering the Chaos: Your Core Control System

A rugged camera is a tool for controlled chaos. To master it, you must command its internal systems, transforming raw action into watchable footage.

Control Variable 1: Stabilization (HyperSmooth/EIS)

This is the magic. Electronic Image Stabilization (EIS) uses software and gyro data to counteract shake. For a durable, water-resistant GoPro action camera, HyperSmooth is the standard. Use Auto for general activities like hiking or cycling. Engage Boost for high-vibration scenarios like motocross or downhill mountain biking. The result is buttery-smooth, cinematic flow from the bumpiest motion.

Control Variable 2: Resolution & Frame Rate

Your choice here dictates the feel and flexibility of your footage. 4K at 60fps is your daily driver: incredibly detailed and smooth for most adventures. When you want to dramatize a moment, switch to 1080p at 240fps for stunning super slow-motion that reveals every splash and speck of dirt. Remember, higher frame rates consume more battery and storage.

Control Variable 3: Field of View (FOV)

This is your perspective. Wide captures the full, immersive scene with a distinctive curved edge—perfect for establishing shots. Linear removes the fisheye distortion, giving a natural, rectilinear look ideal for POV footage where straight lines matter. Narrow provides a zoomed-in, more traditional video look. I default to Linear for handlebar and helmet mounts to keep the horizon straight and the view immersive.

Beyond the Basics: Optimization for Epic Footage

With the right hardware and settings dialed in, the art of capture begins. These advanced practices separate good footage from great stories.

Preparation: Strategic Mounting

Securing your camera is as critical as the camera itself. A failed mount means a lost shot or lost gear. For a durable, water-resistant GoPro action camera, use the official adhesive mounts for helmets—clean the surface with alcohol first. On handlebars, use a clamp mount with a vibration damper. For immersive POV, the chest mount is unparalleled, but tighten the straps to minimize bounce. Always use a safety tether (a simple leash) in high-risk scenarios.

Ongoing Inputs: Power and Storage Discipline

Adventure doesn’t wait for you to recharge. Carry at least two extra batteries and a dual charger. For long days, a compact power bank connected via USB-C can keep you rolling. For storage, never skimp. Use only high-endurance, high-speed microSD cards (V30 rating or higher) from reputable brands. A corrupted card is a heartbreak you can avoid. Format the card in the camera before every major outing to ensure file system integrity.

Selection & Strategy: Automated Genius

Your camera can work for you while you play. TimeWarp (moving time-lapse) is perfect for condensing a long hike into a mesmerizing minute. Night Lapse can capture star trails over your campsite. Use Scheduled Capture to have the camera automatically start recording at sunrise for that perfect dawn patrol surf session. These modes automate cinematic shots, letting you focus on the experience.

Proactive Protection: Keeping Your Gear Adventure-Ready

A rugged tool requires smart care. Adopt a proactive stance to prevent failures before they happen.

Prevention: The Post-Adventure Ritual

This five-minute routine extends your camera’s life exponentially. After exposure to saltwater, sand, or mud, always rinse the camera with fresh water while all ports are securely closed. Gently dry it, then inspect and clean the lens with a microfiber cloth. Carefully check the sealing surfaces of the battery and side doors for debris—a single grain of sand can compromise the waterproof seal.

Intervention: A Tiered Troubleshooting Guide

When issues arise, escalate logically. For fog inside the lens, remove the camera from the cold environment, open the doors, and let it acclimate to dry air—this is often condensation, not a leak. For connectivity drops with your phone, first restart both devices and forget/re-pair the Bluetooth connection. For file corruption or camera freeze, perform a manual firmware update via the GoPro Quik app or desktop, ensuring a clean install. This solves most software glitches.

Your Annual Adventure Roadmap

Season Primary Adventure Tasks Camera Focus & Preparation
Spring Trail running, mountain biking, early kayaking Update camera firmware. Check all adhesive mounts for wear. Test waterproofing in a sink. Charge all batteries cycled from winter storage.
Summer Surfing, beach trips, hiking, climbing Apply a new tempered glass lens protector. Confirm 10m waterproof rating is sufficient for planned depth. Pack a portable power bank for long days. Rinse with fresh water after every saltwater use.
Fall Leaf-peeping hikes, cooler water sports, travel Prepare for lower light: test Night Lapse and low-light video settings. Organize and back up summer footage to free memory cards. Inspect all port seals for flexibility.
Winter Skiing, snowboarding, cold-weather travel Use silicone skin for better grip with gloves. Carry spare batteries close to your body—cold drains them rapidly. Be vigilant about condensation when moving between cold and warm environments.

From Hesitation to Full Immersion

True confidence in your gear fundamentally transforms your experience. It shifts your mindset from “I hope my camera survives this” to “I can’t wait to see how this looks.” This journey begins with selecting a tool engineered for the task—a durable, water-resistant GoPro action camera, now at a price point that invites more adventurers to the fold. It culminates in the mastered control of stabilization, perspective, and automated capture.

The final reward is profound and personal: the unparalleled joy of reliving your adventures through stunning, stable footage that feels as epic as the moment itself. It’s the satisfaction of knowing your tool was not just a spectator, but a resilient partner, built to survive the very story it helped you tell. Your perspective is worth preserving. Now, go capture it.

Best Bike Cameras for Cyclists: Documenting Close Passes and Near Misses

Create an image of a cyclist mounted with a high-tech bike camera navigating through a busy city street. The scene includes detailed elements like vehicles, pedestrians, and various urban settings to

Why Cyclists Use Bike Cameras

Bike cameras have become a common piece of kit for commuters and road cyclists, mainly for one reason: documentation. Footage from a close pass, a collision, or a dangerous driving incident can support an insurance claim or a police report in a way that a verbal account can’t. Many cyclists also use footage simply to review their own riding — line choice, braking points, group-ride positioning — the same way action-sports riders use footage for skill development.

What to Look For in a Bike Camera

  • Loop recording. This is the single most important feature for incident documentation. Loop recording continuously overwrites old footage once the card is full, so the camera never has to be manually managed and is always capturing the last several hours of riding. Most dedicated bike cameras and dashcam-style cycling cameras support this; general-purpose action cameras often don’t by default.
  • Battery life matched to your ride length. A daily commute camera needs to comfortably outlast the commute with margin to spare. Longer touring or group rides may need a camera with swappable batteries or a USB power bank connection for continuous charging while recording.
  • Wide field of view. A wider FOV captures more of the road and approaching traffic, which matters more for incident documentation than it does for cinematic footage.
  • Low-light performance. Early morning and evening commutes mean a lot of cycling happens in low light. Sensor quality in dim conditions varies a lot between cameras, more than most spec sheets make obvious.
  • Weatherproofing. Most riding happens in conditions a phone camera can’t handle. Look for a genuine IP rating rather than marketing language like “weather resistant.”

Mounting Options

Handlebar mounts are the most common choice — stable, easy to install and remove, and a natural forward-facing angle that captures approaching traffic well. Helmet mounts give a higher vantage point and follow your head movement, which can be useful for reviewing where you were looking during an incident, but they’re more exposed to knocks and generally have shorter battery life due to smaller camera bodies. A growing number of cyclists run a second, rear-facing camera (seat post or saddle-mounted) specifically to document vehicles approaching from behind, which is where many close-pass incidents originate.

Using Footage After an Incident

If you’re involved in an incident, the practical steps are similar regardless of camera brand: stop recording as soon as it’s safe to do so (to avoid the clip being overwritten by loop recording), copy the relevant footage off the card immediately, and note the approximate time and location while it’s fresh. Many cyclists submit footage to local police as part of a report; policies and acceptance of cyclist-submitted video vary significantly by jurisdiction and department, so it’s worth checking your local police force’s current process rather than assuming a specific procedure applies everywhere.

A Simple Setup That Covers Most Riders

For most commuters, a single forward-facing handlebar camera with loop recording and a battery that comfortably covers the commute is enough to start. Riders who want fuller documentation, or who ride in heavier traffic, often add a second rear-facing unit once they’ve settled on a system that works for their route.

Review of the DJI Osmo Action 5 Pro

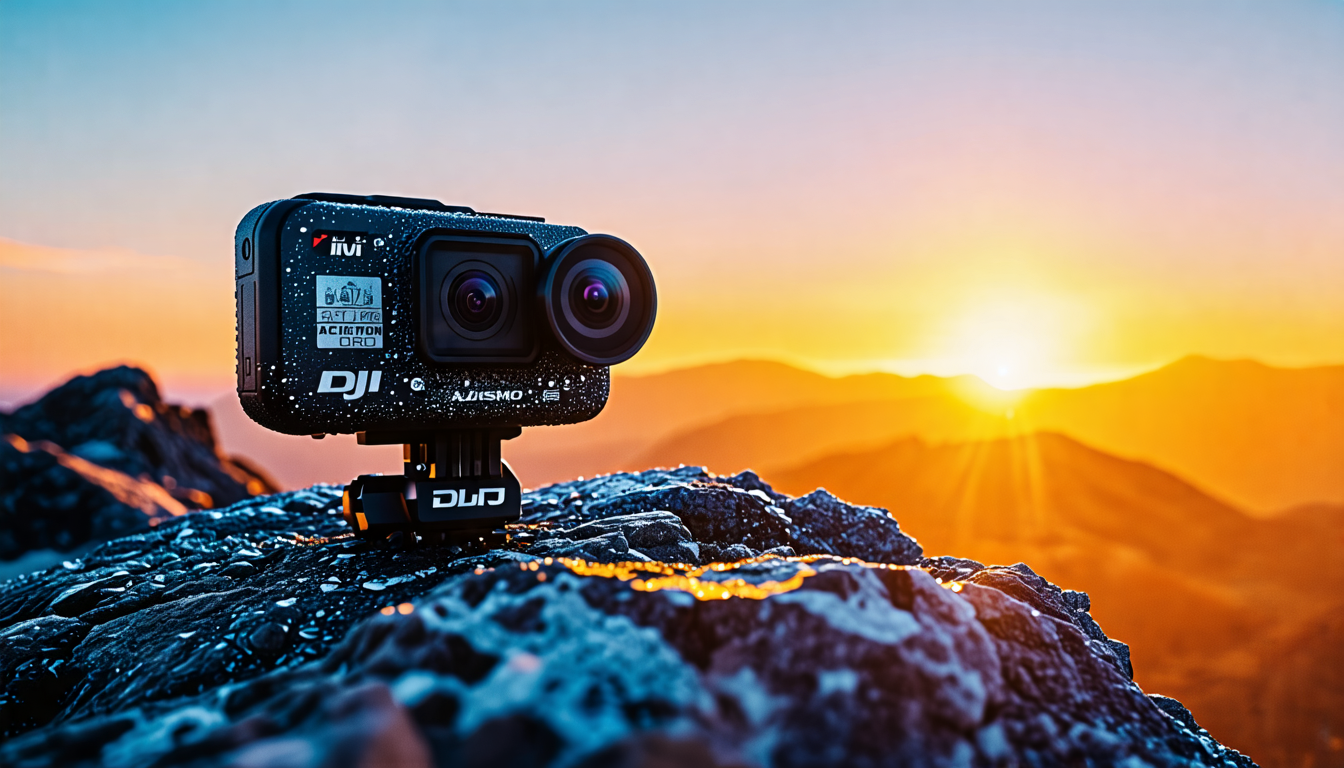
Create an image of a high-tech action camera, the DJI Osmo Action 5 Pro, resting on a rocky mountain summit at sunrise. The camera is partially covered in dew, glistening under the golden morning ligh

The DJI Osmo Action 5 Pro Review: Redefining the Action Camera Standard

The Vision of Uncompromised Capture

You crest the mountain trail, the view is breathtaking, and the descent is pure exhilaration. Weeks later, you review the footage. The memory is vivid, but the video is a jittery, wind-blasted mess. The story is lost in technical failure. This frustration ends now. The promise of modern action cameras is not just to record your adventure, but to elevate it with the clarity and drama of a cinematic story. This comprehensive review of the DJI Osmo Action 5 Pro demonstrates that mastering this tool is the key to that transformation. It is the foundation for turning raw adrenaline into polished, professional-grade narratives.

Foundational Choices: Decoding the Hardware

Your creative success begins with the physical tool. The Action 5 Pro is a sophisticated imaging system, and understanding its core components is your first step toward mastery.

Part A: Design & Durability

The camera’s redesigned chassis feels substantial yet manageable. Its weight and balance are optimized for the enhanced RockSteady 4.0 stabilization, which works mechanically and digitally to neutralize shakes. Both the front and rear touchscreens are remarkably bright, remaining usable in direct sunlight, and they respond reliably even with wet fingers. The inclusion of a 10-bit D-Log M color profile is a game-changer; it captures a wider dynamic range, preserving detail in shadows and highlights, giving you a flat color image perfect for powerful grading in post-production.

Part B: Core Imaging Performance

At its heart is a large 1/1.3-inch sensor paired with a fast f/2.8 aperture. This combination excels in diverse lighting. You can shoot ultra-smooth 4K video at 120 frames per second for breathtaking slow motion or capture crisp 48-megapixel still photos. In low-light conditions, performance is respectable; noise is controlled, and details remain clear, though naturally, it can’t match larger-sensor cameras. The flexibility here is exceptional.

Part C: Component & Accessory Ecosystem

The true power of this camera is unlocked through its modular ecosystem. Your choice of accessories defines its functionality.

Component Category Options Key Characteristics
Magnetic Quick-Release Standard Adapter, GPS Preview Remote Enables one-second swaps between mounts. The lock is incredibly secure. The GPS Remote allows wireless framing control and data tagging.
Audio Solutions Internal Mics, DJI Mic 2 Integration Built-in mics feature advanced wind noise reduction. Seamless pairing with the DJI Mic 2 transmitter enables pro-level wireless audio with perfect sync.
Power Management Endurance Battery, Battery Case The larger battery significantly extends record time. The charging case manages and stores multiple batteries efficiently for all-day shoots.

The Core System: Management and Control

Great footage is not captured by accident. It is the result of actively managing key variables. The Action 5 Pro gives you precise control.

Control Variable 1: Stabilization & Framing

The ideal state is perfectly level, buttery-smooth footage regardless of movement. The consequence of poor control is jerky, unwatchable video. Your control tools are multifaceted. Use standard RockSteady for general action. Engage HorizonSteady for activities with extreme tilting, like mountain biking, to keep the horizon locked. The quick-switch button to a 9:16 vertical frame is invaluable for social media creators.

Control Variable 2: Exposure & Color

Your target is an image that retains detail in bright skies and dark forests, captured in a flat color profile for maximum grading flexibility. Failure here means blown-out highlights or murky, noisy shadows. Take control by using the touchscreen to set an auto-exposure lock on your subject. Program the QuickSwitch buttons for instant access to EV compensation or to toggle D-Log M on/off. This proactive management ensures you get the best data for post-production.

Control Variable 3: Audio & Connectivity

Aim for crisp, clear dialogue and immersive ambient sound, with seamless wireless control from your phone. The consequence of neglect is muffled audio plagued by wind and complicated file transfers. Activate the wind noise reduction algorithm in windy conditions. For interviews or vlogging, pair a DJI Mic 2 transmitter for broadcast-quality wireless audio. Use the DJI Mimo app’s live view feature, which streams a high-quality, low-latency feed to your phone for remote framing.

Advanced Practices: Optimization and Workflow

Mastery means moving beyond default settings to craft a seamless, efficient workflow that produces your signature look.

Preparation: Settings Profiles

Before you head out, create and save custom shooting profiles. I have one for mountain biking (4K/60fps, HorizonSteady, D-Log M On), one for vlogging (4K/30fps, standard stabilization, DJI Mic 2 audio), and one for snorkeling (4K/120fps, waterproof housing check). This allows you to switch contexts in two taps, ensuring you’re always optimally configured.

Ongoing Inputs: Power & Storage Strategy

While battery life is good, demanding settings like 4K/120fps will drain it faster. Your strategy is non-negotiable: carry at least two extra Endurance batteries and a charging case. Use only high-speed, V30-rated microSD cards (so-called “Enduro” cards) to handle the massive data rates without dropping frames.

Selection & Strategy: Shooting for the Edit

Think like an editor while you shoot. Use the QuickSwitch button to instantly change your field of view from wide to narrow during a single shot, creating dynamic perspective shifts. Shoot establishing shots, action sequences, and detail close-ups as intentional B-roll. The camera’s built-in timecode sync (when using multiple DJI devices) is a professional feature that makes multi-camera editing a breeze.

Threat Management: Problem Prevention & Solution

A professional approach is proactive. Most common issues are preventable with simple habits.

Prevention: The Field Kit

Your kit must include microfiber lens cloths for daily cleaning, a silicone protective sleeve for rocky environments, and a routine. Before any water activity, meticulously check the housing seal for debris, press the latch firmly, and conduct a shallow water test. This ritual prevents catastrophic failure.

Intervention: Troubleshooting Guide

When problems arise, follow a tiered response.

Problem: Overheating Warning.
Response 1: Immediately move the camera out of direct sunlight.
Response 2: Lower the recording resolution or frame rate.
Response 3: In extreme cases, attach an accessory cooler or point a breeze at it.

Problem: Wireless Connection Drops.
Response 1: Power cycle both the camera and the DJI Mimo app on your phone.
Response 2: Re-pair the devices via the settings menu.
Response 3: Check for and install the latest firmware updates for both devices.

The Action Plan: A User’s Seasonal Roadmap

Season/Phase Primary Tasks What to Focus On
Initial Setup (Week 1) Update to latest firmware. Program QuickSwitch buttons. Create 3 custom shooting profiles. Personalizing the control scheme for your primary activity. Mastering the magnetic mount system.
Active Season (e.g., Summer Adventures) Clean lens before each shoot. Perform pre-dive seal check. Offload and back up footage nightly. Capturing stable, well-exposed action with clean audio. Experimenting with different stabilization modes.
Off-Season / Editing Phase Color grade D-Log M footage in your editor. Organize and archive your media library. Inspect and service camera seals. Crafting the final visual story. Maintaining gear longevity. Planning projects for the next season.

The Transformation Awaits

The core principle of the DJI Osmo Action 5 Pro is control. It transforms from a simple rugged box into a cinematic instrument you command. Your journey begins with understanding its robust hardware, progresses through actively managing stabilization and exposure, and culminates in a streamlined workflow that delivers editable master files. The ultimate reward is the profound satisfaction of watching your own adventures rendered with stunning, steady, professionally polished clarity. This review confirms the Action 5 Pro as the new benchmark, a tool that doesn’t just document your journey, but actively enriches it, frame by spectacular frame.

Get Your Download Immediately

Get Instant access to our Digital Helmet Camera ebook

You have Successfully Subscribed!