How to Mount an Action Camera on Your Helmet: A Step-by-Step Installation Guide

Installation of Cason Cs6 Action Camera on Helmet😍 | Step-by-Step #youtube #viral #dailyvlog #cason

A General Installation Guide for Helmet-Mounted Action Cameras

Most action cameras — regardless of brand — use one of two mounting systems: a GoPro-style two-prong buckle adapter, or a magnetic quick-release base. The installation steps below apply to either.

Step 1: Choose the Position

Chin mounts give the most natural point-of-view angle and the least wind resistance. Side mounts are easier to reach but skew the angle. Top mounts give a higher vantage point but catch more wind and add more leverage on the adhesive bond, which matters at highway speed. Pick a position based on the footage style you actually want, not just convenience.

Step 2: Prep the Surface

Adhesive mounts fail almost exclusively because of surface prep, not the adhesive itself. Clean the helmet surface with isopropyl alcohol and let it fully dry before applying anything — oils from packaging, sunscreen, or handling will weaken the bond significantly.

Step 3: Respect the Cure Time

Most adhesive mounts need 24 hours to reach full bond strength. Riding before that window is one of the most common causes of a mount failing mid-ride. If a ride can’t wait, use a mount with a mechanical strap or buckle system instead of relying on adhesive alone.

Step 4: Attach the Camera and Set the Angle

With the camera clipped into the buckle adapter, check the angle by looking through the camera’s live preview (via its app, if it has one) rather than eyeballing it — a mount that looks level by eye is very often tilted on screen. Aim slightly down from level; footage that’s tilted up toward the sky loses the road/trail in frame.

Step 5: Add a Safety Tether

A thin tether cord between the mount base and a secondary anchor point on the helmet means a failed adhesive bond doesn’t turn into a lost or flying camera. This is inexpensive and worth doing regardless of camera brand or price.

Step 6: Route Cables and Test Before Riding

If using an external microphone or auxiliary battery, route the cable so it can’t catch on gear, a jacket zipper, or the helmet strap. Once everything is mounted, do a short test ride at low speed before committing to a longer trip — this is the easiest point to catch a mount that isn’t as secure as it looked in the driveway.
Mounting a Phone to Your Helmet for Motovlogging: What Actually Works

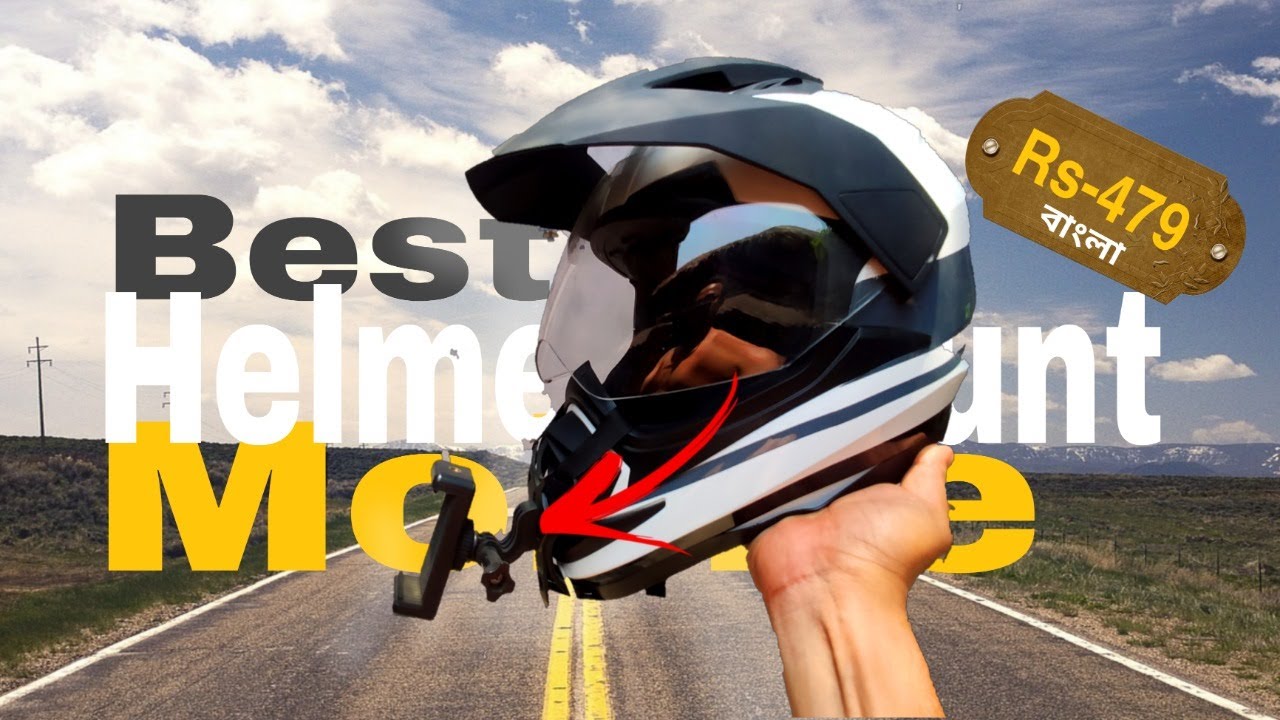
Best Helmet Mount For Mobile #helmetmount #motovlog #besthelmetmountmotovlogging

Why a Phone Is Different From an Action Camera

Motovloggers sometimes mount a phone instead of a dedicated action camera — usually because they already own it, want a bigger sensor for low light, or want to livestream directly. But a phone was never designed to be strapped to a helmet, and that creates a few real problems an action camera doesn’t have: it’s heavier and less balanced, it has no rugged housing, the screen is exposed, and sustained recording plus GPS use drains the battery and generates heat fast, especially in direct sun.

Mount Types That Actually Work

A few approaches show up repeatedly among riders who mount phones successfully:

  • Case-integrated mount points. A phone case with a built-in mount adapter (often a standard GoPro-style two-prong fitting) is more secure than a universal spring-loaded phone clamp, which adds bulk and vibration risk.
  • Chin mount or side mount with a low center of gravity. A phone’s extra weight makes top-of-helmet mounting less stable at speed than it is for a lightweight action camera. Lower, closer-to-the-head positions handle vibration better.
  • Magnetic quick-release bases. Useful for swapping the phone on and off between riding and normal use without redoing the whole mount each time.

Practical Considerations

A few things matter more with a phone than with a purpose-built action camera:

  • Heat. Phones throttle or shut down recording when they overheat. Avoid mounting in direct, unbroken sunlight for long sessions, and consider a lighter-colored case.
  • Battery. Recording video plus running GPS/navigation simultaneously drains a phone fast. A USB-C power bank routed to the phone, or a motorcycle USB charging port, is close to essential for anything beyond a short ride.
  • Vibration and screws. Check mount hardware before every ride — vibration loosens fittings faster on a heavier payload than on a lightweight action camera.
  • A tether. Given the cost of a phone, a safety tether between the mount and the helmet is worth the few extra dollars in case the primary mount fails.

When a Dedicated Action Camera Makes More Sense

If a ride involves water exposure, extended multi-hour sessions, or genuinely rough terrain, a purpose-built waterproof, shock-rated action camera is generally the better tool — it’s lighter, better sealed, and built to be mounted and forgotten about. A phone mount is a reasonable choice for shorter rides, livestreaming, or when convenience matters more than ruggedness.

Generic and No-Name Budget Action Cameras: What to Expect

4K Sports Ultra HD DV With wifi | Unboxing | Action camera battery door removal | action camera 4k

What “Generic” Action Cameras Are

Alongside major brands like GoPro, DJI, and Insta360, there’s a large market of unbranded and lesser-known action cameras, often sold through general online marketplaces with generic model names describing their specs rather than a real product line (for example, names combining resolution, “sports,” and a feature list). These can be a genuinely reasonable option for casual, low-stakes use — but they come with real trade-offs worth understanding before buying one.

What to Expect

  • Lower price, real trade-offs. These cameras are usually significantly cheaper than major-brand equivalents, but that price gap generally reflects real differences in stabilization quality, low-light performance, and build quality — not just brand markup.
  • Inconsistent quality control. Because these products often come from smaller manufacturers with less standardized production, unit-to-unit quality can vary more than with established brands. Reading recent buyer reviews (not just the product listing’s own claims) is more important than usual.
  • Marketing specs vs. real-world performance. Listed specs like “4K” resolution or a stated waterproof rating aren’t always independently verified, and real-world footage quality at that resolution can differ significantly from a major-brand camera with the same on-paper number.
  • Limited software support. Companion apps, firmware updates, and customer support are typically far more limited than with major brands, and may stop entirely if the specific product is discontinued or the manufacturer changes.
  • Accessory compatibility. Many generic cameras use a GoPro-style mount interface, which is a genuine advantage — it means they can usually work with the same wide range of third-party mounts as major-brand cameras.

When a Generic Camera Makes Sense

These cameras can be a reasonable choice for occasional, low-stakes use — testing whether you’ll actually use an action camera regularly before committing to a bigger purchase, or a backup camera for situations where losing or damaging it wouldn’t be a major loss. They’re a harder recommendation for anything where footage quality or reliability really matters, like documenting an incident, motovlogging regularly, or filming something you can’t reshoot.

Buying Tips

Check the seller’s return policy before buying, given the higher variability in unit quality. Look for recent, specific reviews rather than just a high average star rating. And treat any “waterproof” or “shockproof” claim as unverified marketing language unless it comes with a specific, testable rating (like an IP68 designation) rather than just descriptive words.

How to Set Up a Motovlogging Camera System: Camera, Mount, Mic and Workflow

Helmet Camera Setup Moto Vlog full information | Difference between gopro and action camera

What Motovlogging Needs From a Camera Setup

Motovlogging — recording yourself talking while riding — has different requirements than typical action-camera footage. You need the camera to capture your voice clearly over wind and engine noise, hold a stable face-to-camera framing, and run for the length of a real ride, not just a short clip.

Camera Choice

A wide field of view is important so the frame captures both your face and enough of the road/surroundings behind you for context. Battery life matters more here than in typical action-cam use, since motovlogging often means continuous recording for an entire ride rather than short clips — a camera with a swappable battery or one that can record while charging from a bike-mounted USB source has a real practical advantage.

Mounting

A chin mount is the standard choice for motovlogging because it keeps the camera close to mouth level for clear audio pickup and a natural talking-to-camera angle, and it’s less exposed to wind buffeting than a top-of-helmet mount. The trade-off is that a chin mount adds weight to the front of the helmet, so a lighter, more compact camera body is usually preferable to a larger one.

Audio: The Biggest Challenge

Wind noise is the single biggest obstacle to usable motovlogging audio. A few approaches address it: foam windscreens over the camera’s built-in mic reduce noise at moderate speeds but have limits at highway speed; an external lavalier or boom mic mounted closer to your mouth, run into a camera with a mic input, generally produces clearer results than any built-in mic; and some riders use in-helmet Bluetooth communication systems that route audio to the camera separately from the camera’s own microphone. Whatever the source, checking a short test clip at riding speed before committing to a full ride is worth the two minutes it takes.

Editing Workflow

A typical motovlogging workflow involves: reviewing footage and marking usable sections (most rides have far more footage than ends up in the final video), editing at proxy/lower resolution if your computer struggles with native 4K footage, basic color correction to fix the flat look common to action-camera footage, audio leveling to balance voice against ambient road/wind noise, and adding captions — increasingly expected on social platforms where videos are often watched without sound.

Putting It Together

The combination that works for most motovloggers starting out: a compact wide-FOV camera on a chin mount, an external mic if budget allows (even an inexpensive one is usually a bigger audio improvement than any built-in mic), and a simple, repeatable editing workflow rather than an elaborate one — consistency matters more than production complexity for building a following.

Get Your Download Immediately

Get Instant access to our Digital Helmet Camera ebook

You have Successfully Subscribed!