How to Mount a GoPro on a Motorcycle Helmet: Step-by-Step Guide

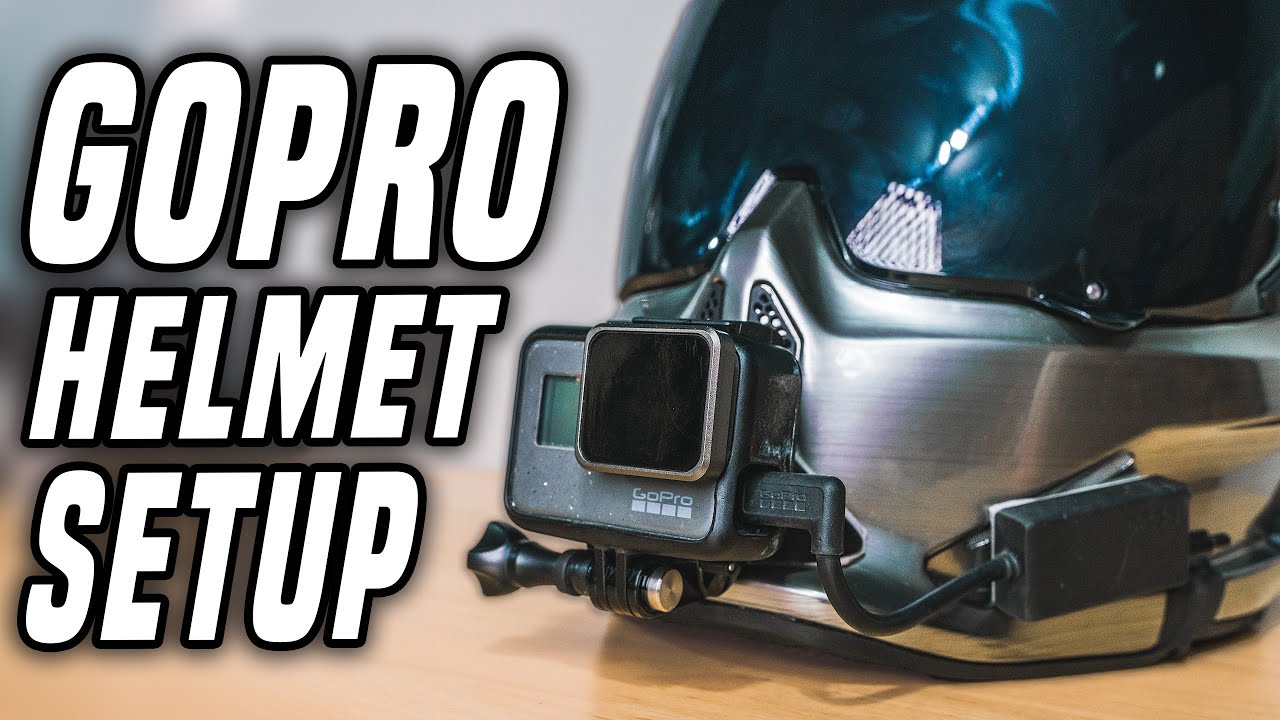
The BEST GoPro Helmet Mount Setup (for EVERY Helmet) | *Plus GoPro settings!*

Mounting a GoPro to a motorcycle helmet is straightforward — but there are several decisions that significantly affect the quality of your footage, the security of the mount, and whether your camera survives a crash. This step-by-step guide covers the three most common mounting methods with specific hardware recommendations for each helmet type.

The Three Main Ways to Mount a GoPro on a Motorcycle Helmet

Method 1: Chin Mount (Best for Full-Face Helmets)

The chin mount is the recommended position for motorcycle filming. The camera sits on the chin bar of your full-face helmet, pointing forward, at roughly eye level.

What you need:

  • GoPro Helmet Chin Mount (~$49.99) OR a compatible third-party chin mount (ULANZI U-400 ~$18, Telesin ~$15)
  • GoPro Hero 13 (or any current GoPro)
  • Optional: Anti-vibration mount pad if you’re on a high-vibration bike

Step-by-step installation:

  1. Identify the correct chin bar adapter for your helmet — the GoPro Helmet Chin Mount ships with multiple adapter plates for different chin bar widths
  2. Slide the adapter around the chin bar and fasten the two securing screws finger-tight first to confirm it sits level
  3. Tighten the screws firmly with the included hex key — the mount should not move when you pull it forward or sideways
  4. Click the GoPro onto the mount’s quick-release clip
  5. Adjust the camera angle downward approximately 10–15° from straight ahead — this compensates for the natural forward lean of your head when riding
  6. Test-record a 30-second clip and review the angle before your first ride

How to check the angle is right: The horizon should appear in the upper third of the frame when you’re in your normal riding position. Too high and you’ll see only road. Too low and you’ll see sky.

Method 2: Top Mount (For Any Helmet Type)

The top mount attaches to the top or back of the helmet and is the standard method for open-face, modular, and half-helmets where a chin mount isn’t possible.

Option A — Vented Helmet Strap Mount (no adhesive, reversible):

  • GoPro Vented Helmet Strap Mount (~$19.99) — adjustable strap fits around any helmet vent system
  • Position the camera as far forward on the helmet as the strap allows
  • Run the strap through two adjacent vents, tighten, and clip the GoPro on
  • Limitation: not as secure as adhesive mounts; can slip on smooth shells

Option B — Adhesive Curved Mount (permanent, most secure):

  • GoPro Curved Adhesive Mount (~$8 for 3-pack)
  • Clean the helmet surface with the included alcohol wipe — adhesive fails on dirty or waxed surfaces
  • Peel the 3M backing and press the mount firmly for 60 seconds in the centre of the top of the helmet
  • Allow 24 hours cure time before riding — the 3M VHB adhesive needs this time to reach full strength
  • Attach the GoPro mount buckle and twist-lock it into position

Important: Adhesive mounts are semi-permanent. Removal is possible but may leave residue or damage helmet paint. Consider this before committing to a smooth-shell helmet.

Method 3: Side Mount

Side mounting uses the same adhesive or strap system as the top mount but positioned at the temple or side of the helmet. This gives an offset angle rather than the standard forward POV.

When to use side mount: For variety shots and creative B-roll when you have a second camera or are doing slow-speed riding. Not recommended for sustained motorway riding due to aerodynamic drag and lateral vibration.

Which Mount Position Is Right For You?

Helmet Type Recommended Mount Product
Full-face (road) Chin mount GoPro Helmet Chin Mount or ULANZI U-400
Full-face (motocross) Chin mount GoPro Helmet Chin Mount with breakaway
Modular/flip-front Top mount (chin works if chin bar is solid) GoPro Vented Strap or adhesive
Open-face / 3/4 Top mount GoPro Vented Strap
Half helmet Top mount (compact camera only) Adhesive curved mount

Securing the Mount for Highway Speeds

At motorway speeds, aerodynamic forces put stress on both the camera and mount. These steps prevent camera loss:

  1. Use the tether — GoPro’s adhesive mounts include a tether attachment point. Thread the included safety tether through the camera’s tether hole and attach to the mount or helmet strap. If the camera detaches, it won’t hit traffic.
  2. Check the quick-release buckle before every ride — pull the camera forward and backward. It should be solid with no movement.
  3. Loctite Blue on the chin mount screws prevents vibration loosening over time without permanently bonding (unlike Red Loctite).
  4. Replace worn thumb screws — the knurled plastic screws on GoPro mounts strip over time. Metal replacement screws (~$5 on Amazon) are far more durable for motorcycle use.

Adjusting Camera Angle for Correct Framing

The GoPro mount buckles allow adjustment in 30° increments. For most riders:

  • Chin mount: position 2 or 3 clicks down from horizontal gives correct horizon placement
  • Top mount: position 1 or 2 clicks down — less correction needed from the elevated position

The exact angle depends on your riding position. Riders with a more aggressive forward lean need less downward tilt than riders in an upright touring position. Do a quick test ride at the start, review the footage, and adjust one click at a time until the horizon sits correctly.

Using the Mount Advisor for Your Specific Setup

Helmet shapes and chin bar profiles vary significantly between brands. Our Mount Advisor tool identifies the specific mount hardware compatible with your helmet model and camera, and recommends the optimal angle adjustment for your riding position.

Frequently Asked Questions

Will a GoPro chin mount fit my Shoei/Arai/Bell helmet?

Most chin mounts include multiple adapter plates for different chin bar widths. GoPro’s own Helmet Chin Mount is compatible with the majority of major helmet brands. For Arai helmets specifically, the narrower chin bar sometimes needs the narrowest adapter plate — check the Mount Advisor for your specific model.

Can I remove an adhesive mount without damaging my helmet?

Yes, with care. Use a hair dryer to warm the adhesive pad for 30 seconds, then use dental floss slid underneath the mount to cut through the adhesive layer. Remove remaining adhesive residue with Goo Gone or isopropyl alcohol. There may be slight paint dulling under the pad if the helmet has a gloss finish.

How do I prevent the GoPro from vibrating loose mid-ride?

Three steps: (1) Check the quick-release buckle is fully engaged (listen for the click). (2) Apply Loctite Blue to the chin mount screws and allow to cure for 24 hours. (3) Use an anti-vibration mount pad underneath if you’re on a high-vibration engine. Replace the twist-lock buckle if you notice any play in the connection.

Official resources: GoPro official mount accessories | GoPro Hero 13 setup guide.
What Is a Digital Helmet Camera? Complete Guide for Motorcycle Riders

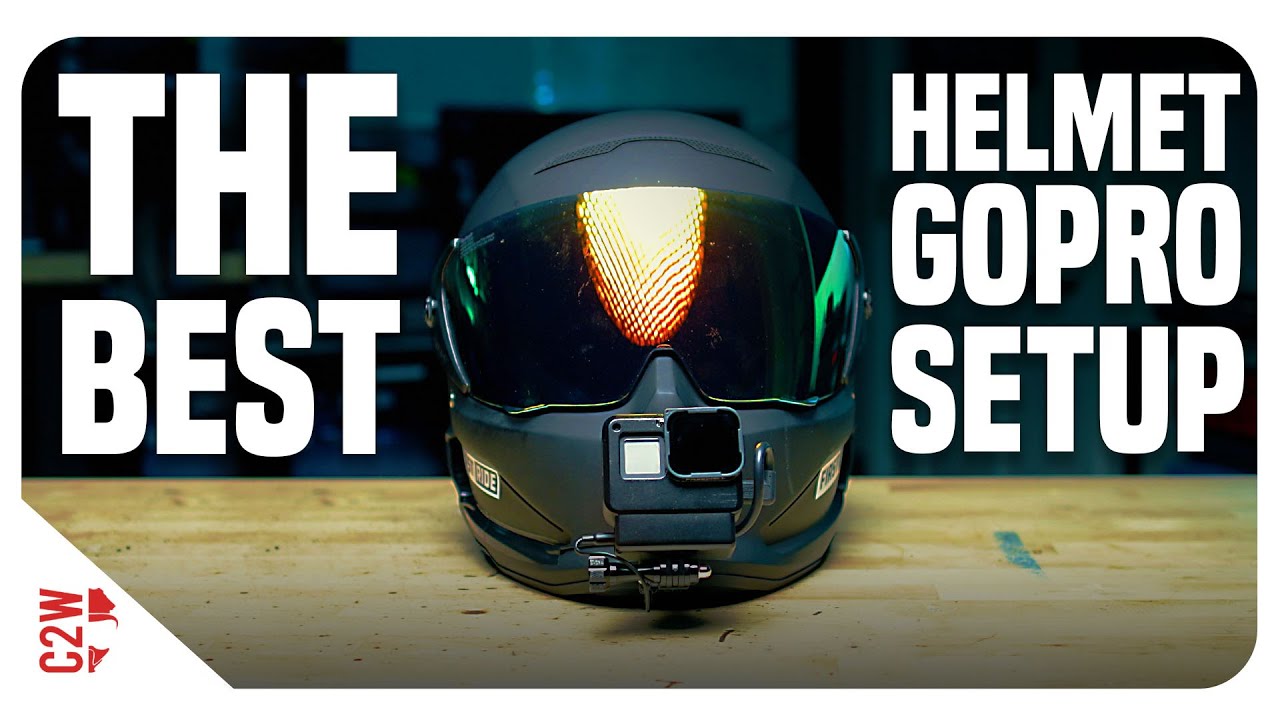
THIS is THE BEST Helmet GoPro Setup!! | Motorcycle Helmet Camera

A helmet camera turns every ride into footage you can watch, share, and learn from. Whether you’re a daily commuter who wants protection in case of an incident, an adventure rider documenting remote roads, or a motovlogger building an audience on YouTube, a helmet camera changes how you experience and remember riding. This guide explains exactly what helmet cameras are, how they work, and how to choose the right one.

What Is a Digital Helmet Camera?

A digital helmet camera is a compact action camera or purpose-built device mounted to a motorcycle, cycling, or sports helmet to record point-of-view video footage. The camera captures your perspective — what you see through the visor — creating first-person footage that’s become one of the most popular formats in motorcycle and action sports content.

Modern helmet cameras are waterproof, shock-resistant, and capable of recording in 4K resolution with electronic image stabilization that compensates for vibration, bumps, and camera movement. They’re small enough to mount without significantly affecting aerodynamics and light enough that you don’t feel them during a ride.

The Main Types of Helmet Cameras

General-Purpose Action Cameras

The most common type. Cameras like the GoPro Hero 13 Black, DJI Osmo Action 5 Pro, and Insta360 X5 are designed for any action sport but are widely used for helmet mounting. They offer the best image quality, the widest accessory ecosystems, and the most mount options.

Best for: Riders who want the best image quality and use the camera across multiple activities.

Purpose-Built Motorcycle Cameras

Cameras designed specifically for motorcycle use. Examples include the Techalogic DC-1 (dual-lens front/rear recording) and INNOVV H5 (integrated into the helmet). These prioritise continuous recording, loop recording, and incident detection over cinematic quality.

Best for: Commuters and riders who want always-on safety recording without managing files.

360-Degree Cameras

Cameras with lenses on both sides that capture a complete 360° sphere. The Insta360 X5 is the leading example. You choose your viewing angle in post-production, which allows you to reframe any shot after the fact. A 360° camera on a helmet can simultaneously capture front, side, and rear perspectives from a single recording.

Best for: Content creators who want maximum flexibility and the ability to create dynamic, reframeable footage.

How to Choose a Helmet Camera

Step 1: Define Your Primary Use Case

Use Case Recommended Camera Type Key Feature
Daily commuting / safety recording Purpose-built (Techalogic DC-1) Loop recording, dual lens, simple operation
YouTube motovlogging Action camera (GoPro Hero 13) 4K quality, HyperSmooth, mic compatibility
Adventure touring Action camera (DJI Osmo Action 5 Pro) Battery life, waterproofing, dual screen
Track days / racing Action camera (GoPro Hero 13) 120fps, GPS overlay, proven durability
Instagram Reels / TikTok content 360° (Insta360 X5) Reframeable footage, invisible selfie stick

Step 2: Know Your Helmet Type

Your helmet determines what mounting options are available:

  • Full-face: All mount options available — chin mount (best), top mount, side mount
  • Open-face: Top mount and side mount only; chin mounts require a half-visor extension bracket
  • Modular/flip-front: Top mount works well; chin mount requires compatible chin bar adapter
  • Half helmet: Top mount only; limited to cameras with compact form factors

Step 3: Set a Realistic Budget

The honest breakdown by budget tier:

  • Under $100: Generic no-name cameras — avoid for motorcycle use. Stabilization fails at speed and quality is inadequate.
  • $150–200: GoPro Hero (entry-level), older Insta360 GO 2, Techalogic DC-1. Acceptable for commuting and basic documentation.
  • $200–300: DJI Osmo Action 3/4, GoPro Hero 12. The value sweet spot — genuine 4K stabilization at a reasonable price.
  • $300–400: GoPro Hero 13 Black, Insta360 GO 3S. The best all-round cameras for most riders.
  • $400–500: Insta360 X5, DJI Osmo Action 5 Pro. Premium options for serious content creators.

Key Specifications Explained

Image Stabilization

The most important spec for motorcycle use. Modern EIS systems (GoPro HyperSmooth, DJI RockSteady) analyse motion thousands of times per second and digitally compensate. Look for cameras with named stabilization systems — generic “EIS” without a version number usually means basic or ineffective stabilization.

Waterproofing

Look for IP67 or IP68 rating, or the manufacturer’s stated depth rating without a housing. The GoPro Hero 13 and DJI Osmo Action 5 Pro are both waterproof to 10–11 metres without any additional case.

Field of View

Measured in degrees. Wider = more of the scene captured, but more fisheye distortion at the edges. For motorcycle use, 120°–135° (Wide/Linear setting) gives an immersive view without excessive distortion. SuperWide (155°+) is better for action sports where context matters more than accuracy.

Popular Helmet Camera Brands

  • GoPro — the original action camera company; widest accessory ecosystem; Hero 13 Black is the current flagship
  • DJI — dominant drone manufacturer; Osmo Action 5 Pro has the best battery life in class
  • Insta360 — pioneers of 360° cameras; X5 and GO 3S are their flagship action cameras
  • Techalogic — UK-based motorcycle specialist; DC-1 is the leading purpose-built motorcycle helmet camera
  • INNOVV — motorcycle-specific cameras; H5 integrates inside helmet; K6 is a motorcycle dashcam system
  • Sena — primarily Bluetooth headsets; 50C integrates camera and comms in one unit

Getting Started: Next Steps

If you’re new to helmet cameras, the fastest route to the right camera is our AI Camera Recommender — it takes 60 seconds, asks about your helmet type, riding style, and budget, and gives you a specific recommendation with current pricing.

Already know which camera you want? Check our Mount Advisor tool to find the best mount for your specific helmet and camera combination.

Frequently Asked Questions

Are helmet cameras legal?

In most countries and US states, yes — there are no laws specifically banning helmet cameras. Audio recording laws vary by state. Some jurisdictions have specific rules about protruding objects on helmets. See our dedicated legal guide for details.

Will a helmet camera affect my helmet’s safety rating?

Adhesive mounts that bond to the helmet shell can technically void some helmet certifications under strict interpretation. Chin mounts that clamp to the chin bar without modifying the shell generally do not. If certification integrity is critical (racing regulations, insurance), use a mount that doesn’t modify the helmet.

How much storage do I need?

At 4K/60fps, most action cameras record approximately 4–5 GB per hour. A 128GB card gives you 25–30 hours of recording — adequate for any ride. Use a V30-rated microSD card (SanDisk Extreme or Samsung PRO Endurance) to avoid recording errors at high bitrates.

Official resources: GoPro action cameras | DJI action cameras | Insta360 action cameras.

How to Mount an Action Camera on Your Helmet: A Step-by-Step Installation Guide

Installation of Cason Cs6 Action Camera on Helmet😍 | Step-by-Step #youtube #viral #dailyvlog #cason

A General Installation Guide for Helmet-Mounted Action Cameras

Most action cameras — regardless of brand — use one of two mounting systems: a GoPro-style two-prong buckle adapter, or a magnetic quick-release base. The installation steps below apply to either.

Step 1: Choose the Position

Chin mounts give the most natural point-of-view angle and the least wind resistance. Side mounts are easier to reach but skew the angle. Top mounts give a higher vantage point but catch more wind and add more leverage on the adhesive bond, which matters at highway speed. Pick a position based on the footage style you actually want, not just convenience.

Step 2: Prep the Surface

Adhesive mounts fail almost exclusively because of surface prep, not the adhesive itself. Clean the helmet surface with isopropyl alcohol and let it fully dry before applying anything — oils from packaging, sunscreen, or handling will weaken the bond significantly.

Step 3: Respect the Cure Time

Most adhesive mounts need 24 hours to reach full bond strength. Riding before that window is one of the most common causes of a mount failing mid-ride. If a ride can’t wait, use a mount with a mechanical strap or buckle system instead of relying on adhesive alone.

Step 4: Attach the Camera and Set the Angle

With the camera clipped into the buckle adapter, check the angle by looking through the camera’s live preview (via its app, if it has one) rather than eyeballing it — a mount that looks level by eye is very often tilted on screen. Aim slightly down from level; footage that’s tilted up toward the sky loses the road/trail in frame.

Step 5: Add a Safety Tether

A thin tether cord between the mount base and a secondary anchor point on the helmet means a failed adhesive bond doesn’t turn into a lost or flying camera. This is inexpensive and worth doing regardless of camera brand or price.

Step 6: Route Cables and Test Before Riding

If using an external microphone or auxiliary battery, route the cable so it can’t catch on gear, a jacket zipper, or the helmet strap. Once everything is mounted, do a short test ride at low speed before committing to a longer trip — this is the easiest point to catch a mount that isn’t as secure as it looked in the driveway.

Get Your Download Immediately

Get Instant access to our Digital Helmet Camera ebook

You have Successfully Subscribed!