GoPro vs iPhone for Motorcycle Filming: Which Camera Actually Wins?

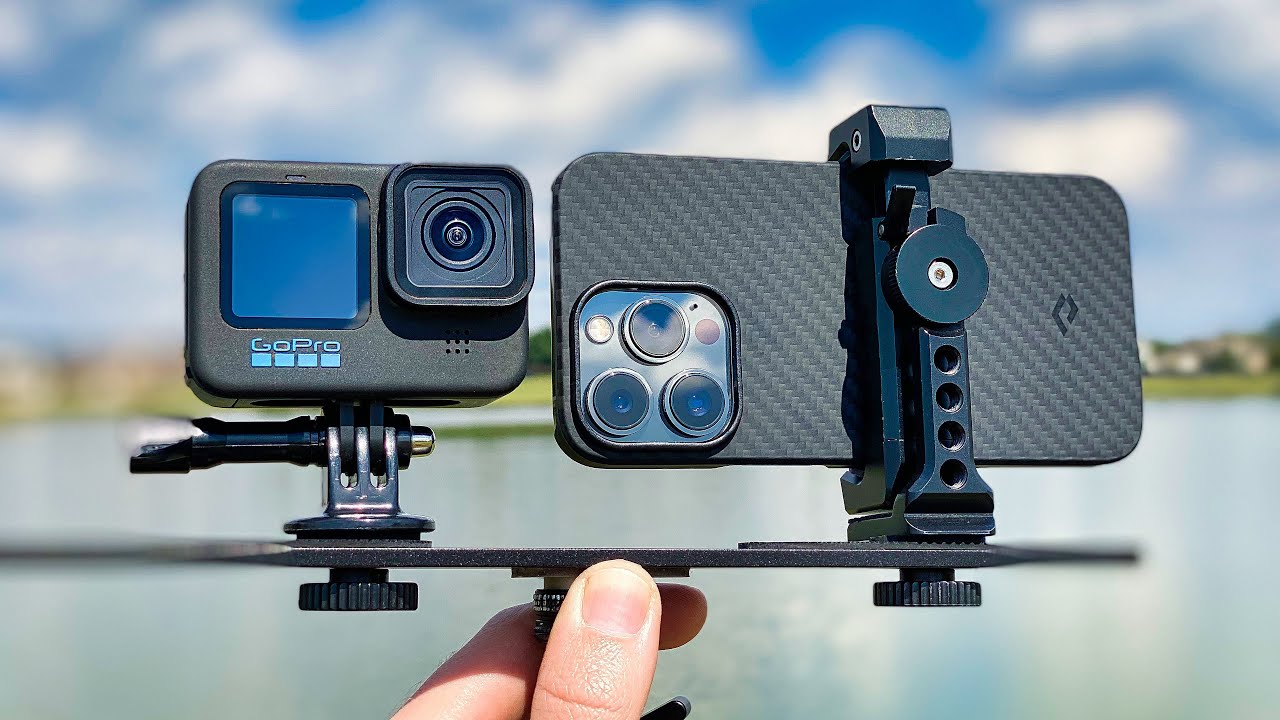
GoPro HERO 10 vs iPhone 13 Pro!

The honest answer depends entirely on what you are trying to do. For helmet mounting during a ride, the GoPro wins clearly. For everything else, the gap is much smaller than GoPro’s marketing suggests. Here’s how the two compare in real motorcycle conditions.

The Case for Using Your iPhone

Modern flagship phones shoot genuinely impressive video. The iPhone 15 Pro shoots 4K120 with Apple’s Log video format. In good lighting conditions, computational photography in a modern phone frequently beats a GoPro on pure image quality metrics. For filming your bike at a photo stop or a short talking-head piece to camera, your phone is an excellent tool you already have with you.

The Case Against Your iPhone on a Motorcycle

Vibration damage

Apple issued a support document in 2022 specifically warning against mounting iPhones to motorcycle handlebars due to engine vibration causing optical image stabilization and autofocus damage. The same risk applies to helmet mounting. GoPro cameras are built for this environment — iPhones are not.

Size and weight

A modern iPhone is approximately 160mm x 78mm x 8mm and weighs around 240g — heavier than a GoPro Hero 13 Black at 154g. On a chin or top mount, that extra weight and larger surface area create aerodynamic drag and affect helmet balance at speed.

Heat and battery

iPhones throttle performance when hot. A phone recording video in direct sunlight during a summer ride while also running navigation will frequently hit thermal limits and stop recording. GoPros are designed to record continuously in outdoor conditions.

Dedicated recording vs multitasking

Using your phone as a helmet camera means it is unavailable for navigation, music, and communication for the entire ride. A separate GoPro leaves your phone free for everything else.

Side-by-Side Comparison

Test GoPro Hero 13 Black iPhone 15 Pro
Stabilization at 70mph helmet mount Excellent — HyperSmooth 6.0 Good but not designed for this
Wind noise at motorway speeds Poor (both cameras suffer equally) Poor
Image quality in bright sunlight Very good Excellent
Image quality at dusk Good Better (larger sensor, Night mode)
Battery continuous recording ~75 min (replaceable) ~90 min (heats up, non-replaceable)
Waterproofing in rain 33 ft / 10m — no housing needed IP68 — fine in light rain
Helmet mountability Excellent — designed for it Poor — too large, no purpose-built mount
Vibration resistance Built for it Risk of hardware damage (Apple advisory)

The Verdict

For helmet-mounted riding footage: GoPro wins on practicality, safety, and purpose-fit design. For filming your bike parked or during breaks: your iPhone is perfectly fine and already in your pocket. The two tools complement each other rather than compete.

For the best GoPro to pair with your iPhone workflow, see our GoPro for motorcycle riders guide, or our full best helmet cameras guide to compare GoPro against DJI and Insta360.

Frequently Asked Questions

Can I mount my iPhone to my motorcycle helmet?

Technically yes, but it is not recommended. The size and weight create aerodynamic drag, the vibration creates hardware risk, and using your phone for recording means no navigation for the ride.

Is GoPro video quality better than iPhone?

In most controlled conditions, no — modern iPhones have excellent cameras. In motorcycle-specific conditions (vibration, airflow, continuous recording), GoPro is the more reliable and purpose-appropriate tool.

What does Apple say about motorcycle vibration and iPhones?

Apple published a support document warning that high-amplitude vibrations from high-power motorcycle engines can damage the iPhone camera system. They recommend against mounting iPhones directly to motorcycle handlebars or high-vibration surfaces.

Reviewed by the Digital Helmet Cameras Editorial Team. Comparison based on published GoPro and iPhone camera specifications. Prices and availability change; check current listings.

Official resources: GoPro Hero 13 Black specifications | iPhone 16 Pro camera specifications.
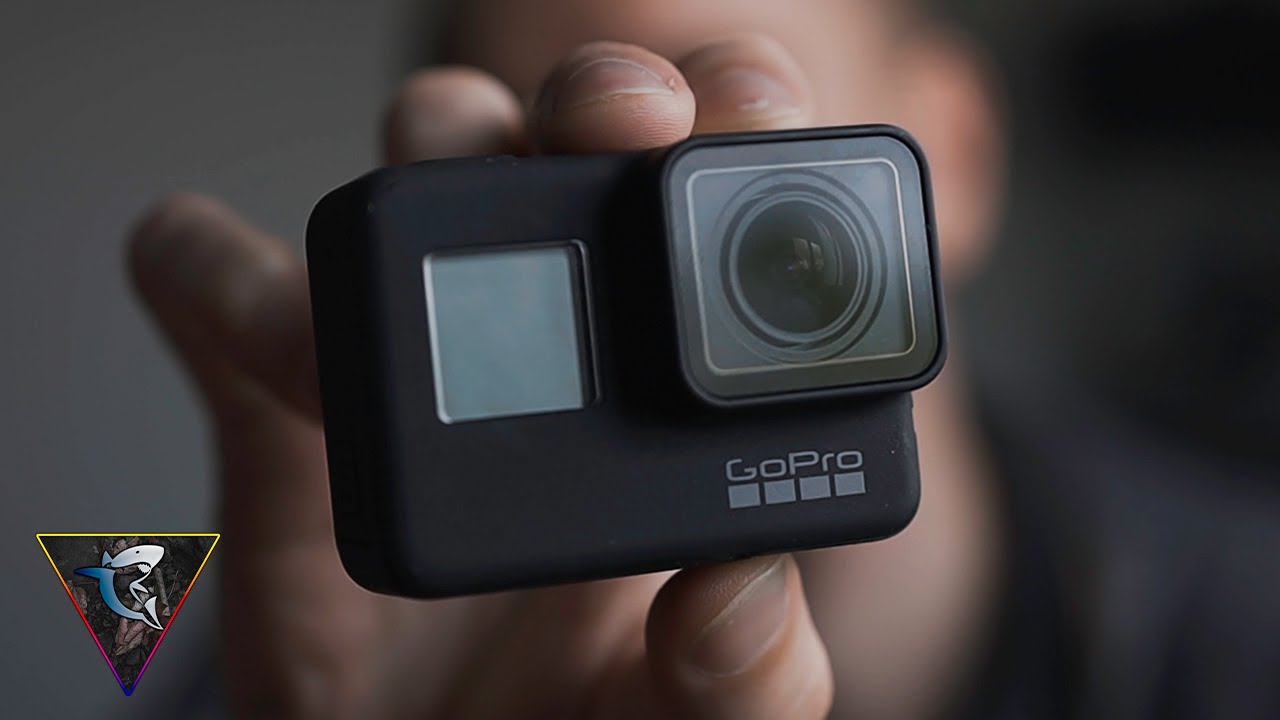
What Is a GoPro Camera Good For? 7 Best Uses for Motorcycle Riders

8 Reasons Why You Should Buy A GoPro

GoPro cameras are designed for action sports, but their specific combination of features makes them useful for a surprisingly wide range of activities. For motorcycle riders specifically, the GoPro’s capabilities go well beyond simply recording a ride. This guide covers the practical uses that deliver the most value for riders at every level.

What Is a GoPro Camera Good For?

1. Motorcycle Ride Documentation

The most common use for GoPro cameras among motorcyclists. Recording your ride serves three purposes:

  • Memory: Watching back footage from a great ride, sharing memorable sections with fellow riders
  • Insurance protection: If another driver causes an incident, camera footage is the clearest evidence of fault. UK police forces accept GoPro footage as evidence; US insurance companies use it to assess liability.
  • Safety documentation: Building a record of close calls, dangerous driving by other road users, and road hazard documentation

GoPro’s HyperSmooth stabilization makes recording practical at all speeds — the footage is smooth enough to be reviewed usefully, not just a shaky blur.

2. YouTube Motovlogging

Motovlogging — talking to camera while riding, sharing routes, reviewing gear, and building a riding community on YouTube — is one of the fastest-growing motorcycle content formats. GoPro Hero 13 paired with an external microphone (Rode Wireless GO II, DJI Mic Mini) is the standard equipment for serious motovloggers.

The GoPro’s 4K resolution and HyperSmooth produce professional-looking footage that keeps viewers watching. Channels like FortNine, Moto Adventures, and numerous UK touring channels use GoPro as their primary camera.

3. Riding Technique Analysis

Track day riders and serious road riders use GoPro footage to improve their technique. Recording a lap or a route, then reviewing it in slow motion (120fps = 4x slower than real time), reveals:

  • Braking points and whether they’re early or late relative to the apex
  • Body position through corners and how it changes with confidence
  • Vision and where you’re looking through corners
  • Throttle and brake application smoothness (visible in suspension movement)

The GoPro Hero 13’s GPS overlay in the Quik app adds speed data to footage — useful for comparing corner entry and exit speeds between sessions.

4. Route Exploration Recording

Documenting new routes for later reference, or sharing them with other riders in a club or forum. A GoPro recording of a great B-road section is useful social content, a practical route reference, and a memory. At 4K resolution, road sign text is readable — which makes footage useful as a navigational aid when revisiting a route.

5. Multi-Sport Use

Unlike purpose-built motorcycle cameras, GoPros work across activities:

  • Skiing / snowboarding — top-mount on ski helmet; standard for resort and backcountry filming
  • Mountain biking — chin mount for trail riding; DH mountain bikers use GoPro as the standard
  • Water sports — surfing, kayaking, wake boarding; GoPro’s waterproof housing is rated to 10m
  • Cycling — top mount for road cycling; captures routes and commuting incidents
  • Travel — handheld and on monopod for general travel video; compact enough to carry everywhere

This multi-use versatility justifies the price for riders who also ski, cycle, or travel — one camera covers all activities rather than buying separate specialist cameras.

6. Vehicle Dashcam

A GoPro mounted on a vehicle’s windscreen (suction cup mount) functions as a dashcam. It’s more capable than most dedicated dashcams — better resolution, better stabilization, better low-light performance. Limitation: no loop recording in standard mode. GoPro’s Dashcam mode (added in Hero 12) addresses this with continuous loop recording.

7. Wildlife and Nature Photography

The wide-angle lens and small form factor make GoPros useful for wildlife photography where a large camera would disturb animals. The waterproof design handles outdoor conditions. Not a replacement for a telephoto lens, but useful for close-range nature footage.

What GoPro Is NOT Good For

Understanding limitations helps set realistic expectations:

  • Zoom photography: GoPro uses fixed wide-angle lenses. No optical zoom. Not suitable for distant subjects.
  • Low-light photography: The 1/1.9-inch sensor is capable but limited compared to larger-sensor cameras. Portrait and interior photography at night is not where GoPros excel.
  • Professional film production: For YouTube content and social media, GoPro footage is excellent. For broadcast television or cinema, the compression, dynamic range, and latitude limitations of action cameras become visible.
  • Long-form interviews: The wide-angle lens creates unflattering facial distortion at close range. Not suitable for talking-head style video without a narrow FOV lens attachment.

GoPro Models for Motorcycle Riders: Quick Reference

GoPro Model Best For Price
Hero 13 Black Maximum quality, motovlogging, track days ~$399
Hero 12 Black Same quality as Hero 13 at lower price ~$299
Hero 11 Black Great value, same sensor as Hero 12/13 ~$249
Hero (entry) Budget option, basic recording ~$179

Use our free Camera Recommender to get a specific GoPro model recommendation matched to your riding style and budget — takes 60 seconds.

Frequently Asked Questions

Can a GoPro replace a phone camera?

For action and activity recording: yes, GoPros typically outperform phones due to superior stabilization and waterproofing. For portraits, low-light photography, and versatile everyday photography: no, modern smartphone cameras with computational photography are more capable for general use.

Is GoPro the best action camera?

For most riders, yes — GoPro’s HyperSmooth stabilization, mount ecosystem, and proven durability make it the best-tested option. DJI Osmo Action 5 Pro has better battery life and a larger sensor; Insta360 X5 offers unique 360° capabilities. The “best” depends on your specific priorities. Our Camera Recommender tool matches you to the right camera for your situation.

How long does a GoPro last?

GoPro cameras are regularly used for 5–7 years by active riders before being upgraded or replaced. The Hero 7 Black (2018) is still used by many riders today. Battery health degrades over time — expect to replace the battery after 200–300 charge cycles. The camera itself is typically durable enough to outlast several batteries.

Official resources: Full GoPro camera range | GoPro mount accessories for motorcycles.

How to Mount a GoPro on a Motorcycle Helmet: Step-by-Step Guide

The BEST GoPro Helmet Mount Setup (for EVERY Helmet) | *Plus GoPro settings!*

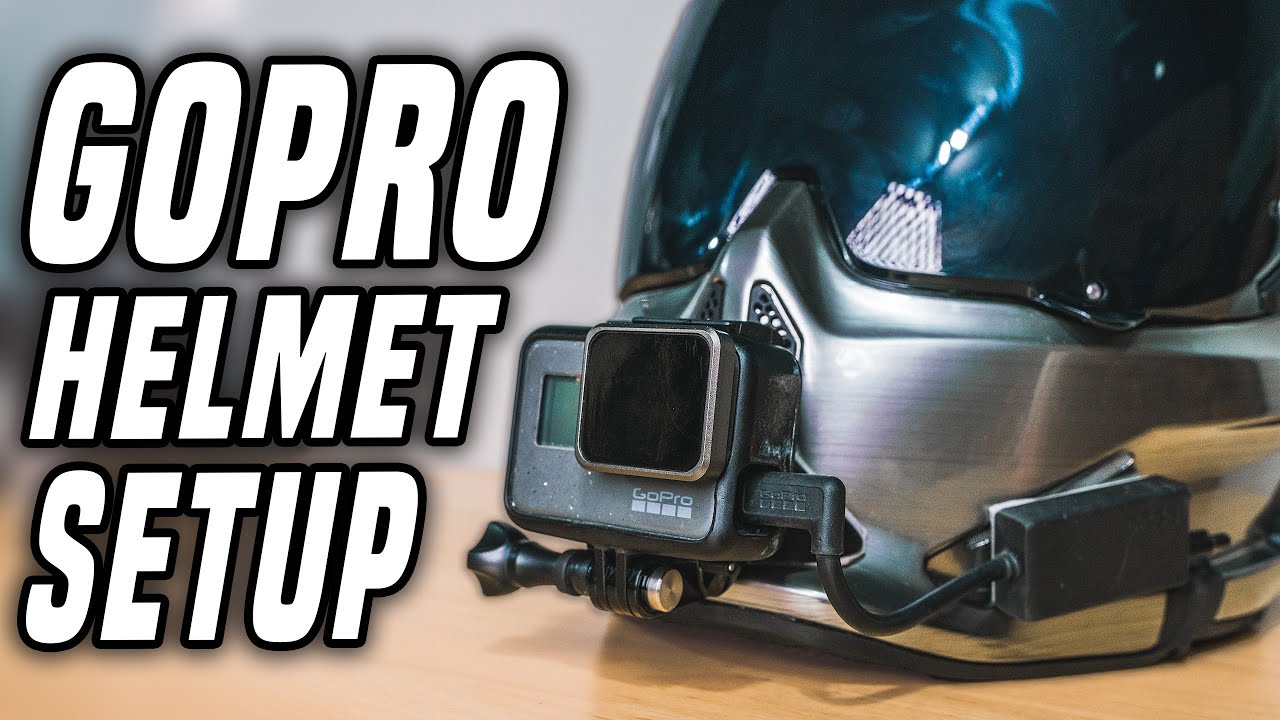
Mounting a GoPro to a motorcycle helmet is straightforward — but there are several decisions that significantly affect the quality of your footage, the security of the mount, and whether your camera survives a crash. This step-by-step guide covers the three most common mounting methods with specific hardware recommendations for each helmet type.

The Three Main Ways to Mount a GoPro on a Motorcycle Helmet

Method 1: Chin Mount (Best for Full-Face Helmets)

The chin mount is the recommended position for motorcycle filming. The camera sits on the chin bar of your full-face helmet, pointing forward, at roughly eye level.

What you need:

  • GoPro Helmet Chin Mount (~$49.99) OR a compatible third-party chin mount (ULANZI U-400 ~$18, Telesin ~$15)
  • GoPro Hero 13 (or any current GoPro)
  • Optional: Anti-vibration mount pad if you’re on a high-vibration bike

Step-by-step installation:

  1. Identify the correct chin bar adapter for your helmet — the GoPro Helmet Chin Mount ships with multiple adapter plates for different chin bar widths
  2. Slide the adapter around the chin bar and fasten the two securing screws finger-tight first to confirm it sits level
  3. Tighten the screws firmly with the included hex key — the mount should not move when you pull it forward or sideways
  4. Click the GoPro onto the mount’s quick-release clip
  5. Adjust the camera angle downward approximately 10–15° from straight ahead — this compensates for the natural forward lean of your head when riding
  6. Test-record a 30-second clip and review the angle before your first ride

How to check the angle is right: The horizon should appear in the upper third of the frame when you’re in your normal riding position. Too high and you’ll see only road. Too low and you’ll see sky.

Method 2: Top Mount (For Any Helmet Type)

The top mount attaches to the top or back of the helmet and is the standard method for open-face, modular, and half-helmets where a chin mount isn’t possible.

Option A — Vented Helmet Strap Mount (no adhesive, reversible):

  • GoPro Vented Helmet Strap Mount (~$19.99) — adjustable strap fits around any helmet vent system
  • Position the camera as far forward on the helmet as the strap allows
  • Run the strap through two adjacent vents, tighten, and clip the GoPro on
  • Limitation: not as secure as adhesive mounts; can slip on smooth shells

Option B — Adhesive Curved Mount (permanent, most secure):

  • GoPro Curved Adhesive Mount (~$8 for 3-pack)
  • Clean the helmet surface with the included alcohol wipe — adhesive fails on dirty or waxed surfaces
  • Peel the 3M backing and press the mount firmly for 60 seconds in the centre of the top of the helmet
  • Allow 24 hours cure time before riding — the 3M VHB adhesive needs this time to reach full strength
  • Attach the GoPro mount buckle and twist-lock it into position

Important: Adhesive mounts are semi-permanent. Removal is possible but may leave residue or damage helmet paint. Consider this before committing to a smooth-shell helmet.

Method 3: Side Mount

Side mounting uses the same adhesive or strap system as the top mount but positioned at the temple or side of the helmet. This gives an offset angle rather than the standard forward POV.

When to use side mount: For variety shots and creative B-roll when you have a second camera or are doing slow-speed riding. Not recommended for sustained motorway riding due to aerodynamic drag and lateral vibration.

Which Mount Position Is Right For You?

Helmet Type Recommended Mount Product
Full-face (road) Chin mount GoPro Helmet Chin Mount or ULANZI U-400
Full-face (motocross) Chin mount GoPro Helmet Chin Mount with breakaway
Modular/flip-front Top mount (chin works if chin bar is solid) GoPro Vented Strap or adhesive
Open-face / 3/4 Top mount GoPro Vented Strap
Half helmet Top mount (compact camera only) Adhesive curved mount

Securing the Mount for Highway Speeds

At motorway speeds, aerodynamic forces put stress on both the camera and mount. These steps prevent camera loss:

  1. Use the tether — GoPro’s adhesive mounts include a tether attachment point. Thread the included safety tether through the camera’s tether hole and attach to the mount or helmet strap. If the camera detaches, it won’t hit traffic.
  2. Check the quick-release buckle before every ride — pull the camera forward and backward. It should be solid with no movement.
  3. Loctite Blue on the chin mount screws prevents vibration loosening over time without permanently bonding (unlike Red Loctite).
  4. Replace worn thumb screws — the knurled plastic screws on GoPro mounts strip over time. Metal replacement screws (~$5 on Amazon) are far more durable for motorcycle use.

Adjusting Camera Angle for Correct Framing

The GoPro mount buckles allow adjustment in 30° increments. For most riders:

  • Chin mount: position 2 or 3 clicks down from horizontal gives correct horizon placement
  • Top mount: position 1 or 2 clicks down — less correction needed from the elevated position

The exact angle depends on your riding position. Riders with a more aggressive forward lean need less downward tilt than riders in an upright touring position. Do a quick test ride at the start, review the footage, and adjust one click at a time until the horizon sits correctly.

Using the Mount Advisor for Your Specific Setup

Helmet shapes and chin bar profiles vary significantly between brands. Our Mount Advisor tool identifies the specific mount hardware compatible with your helmet model and camera, and recommends the optimal angle adjustment for your riding position.

Frequently Asked Questions

Will a GoPro chin mount fit my Shoei/Arai/Bell helmet?

Most chin mounts include multiple adapter plates for different chin bar widths. GoPro’s own Helmet Chin Mount is compatible with the majority of major helmet brands. For Arai helmets specifically, the narrower chin bar sometimes needs the narrowest adapter plate — check the Mount Advisor for your specific model.

Can I remove an adhesive mount without damaging my helmet?

Yes, with care. Use a hair dryer to warm the adhesive pad for 30 seconds, then use dental floss slid underneath the mount to cut through the adhesive layer. Remove remaining adhesive residue with Goo Gone or isopropyl alcohol. There may be slight paint dulling under the pad if the helmet has a gloss finish.

How do I prevent the GoPro from vibrating loose mid-ride?

Three steps: (1) Check the quick-release buckle is fully engaged (listen for the click). (2) Apply Loctite Blue to the chin mount screws and allow to cure for 24 hours. (3) Use an anti-vibration mount pad underneath if you’re on a high-vibration engine. Replace the twist-lock buckle if you notice any play in the connection.

Official resources: GoPro official mount accessories | GoPro Hero 13 setup guide.

Helmet Camera Mount Guide: Chin vs Top vs Side — Which Is Best for Motorcycles?

HOW TO: POV Camera Head Mount - Hands Free Smartphone

The mount is more important than most riders realise. A high-end camera in a poor mount position produces worse footage than a budget camera mounted correctly. This guide covers every mounting option for helmet cameras — the positioning trade-offs, the hardware that works, and which combinations produce the best results for each riding type.

The Four Main Mount Positions

1. Chin Mount

Position: On the chin bar of a full-face helmet, pointing forward.
Best for: Motorcycle road riding, track days, motocross, mountain biking
Perspective: Close to the rider’s eye line — the most natural, immersive POV

Advantages:

  • The chin bar acts as a natural vibration damper — smoother footage than top mounts in many conditions
  • Camera is sheltered from wind by the chin bar, reducing wind noise and aerodynamic drag
  • Lower risk in a crash — the chin bar protects the camera rather than the camera protruding beyond the helmet
  • Best perspective for showing what the rider sees through the visor

Disadvantages:

  • Full-face helmets only (without adapter brackets)
  • Camera can pick up visor reflections if aimed slightly upward

2. Top Mount

Position: On the top of the helmet, as far forward as the slope allows.
Best for: Cycling, skiing, snowboarding, open-face motorcycle helmets
Perspective: Elevated, overhead-ish view — shows more of the environment around the rider

Advantages:

  • Works with any helmet style
  • Elevated perspective shows more scenery, better for landscape/environment showcase
  • Standard for cycling and snow sports

Disadvantages:

  • More aerodynamic drag at highway speeds — can cause discomfort and fatigue on long rides
  • More exposure to vibration without chin bar buffer
  • In a crash, the camera is exposed and can catch on the ground

3. Side Mount

Position: On the side of the helmet, usually at the temple or ear area.
Best for: B-roll, creative angles, slow-speed activities
Perspective: Offset angle — interesting for variety but unnatural as a primary POV

Advantages:

  • Unique angle for variety in edited content
  • Can capture rider’s face in frame alongside the road

Disadvantages:

  • Significant aerodynamic leverage at speed creates vibration and neck fatigue
  • Not suitable as a primary mount for sustained riding above 60 km/h

4. Inside Helmet (Integrated)

Position: Built into the helmet or mounted behind the visor internally.
Best for: Maximum aerodynamics, professional race documentation
Examples: INNOVV H5, Sena 50C with integrated camera

Advantages:

  • Zero aerodynamic impact
  • No external hardware visible
  • Camera is fully protected

Disadvantages:

  • Limited to purpose-built systems; not compatible with standard action cameras
  • Lower image quality than external cameras in most cases

Mount Hardware: What to Buy

For GoPro Cameras

Mount Position Price Best For
GoPro Helmet Chin Mount Chin ~$50 Full-face motorcycle helmets
GoPro Vented Helmet Strap Top ~$20 Vented helmets, open-face
GoPro Curved Adhesive Mount Top/side ~$8 Smooth-shell helmets
RAM Mounts + GoPro adapter Any ~$35 Maximum security, track use
Peak Design Sports Chin Mount Chin ~$60 Premium, quick-release ecosystem

For DJI Cameras

Mount Position Price Best For
DJI Helmet Chin Mount Chin ~$29 DJI magnetic system, full-face helmets
ULANZI U-400 Chin ~$18 Budget option, secure for riding
Telesin Chin Mount (DJI) Chin ~$15 Best value, adequate for road use

Helmet Compatibility: Which Mounts Work With Which Helmets

Shoei GT-Air 2, NXR2, X-14: Most chin mounts compatible. GoPro Helmet Chin Mount fits well.

Arai RX-7V, Corsair-X: Arai’s shell geometry can make some chin mounts tighter. Test fit before committing. ULANZI U-400 typically fits well.

Bell Race Star Flex DLX: GoPro Helmet Chin Mount designed with Bell helmets in mind — excellent fit.

AGV Pista GP RR, K6: Most chin mounts compatible. The more rounded chin bar shape gives good clearance.

Shark Spartan GT: Chin mount compatible; the narrow chin bar profile means some mounts need light spacers.

Open-face / three-quarter: Top mounts only. GoPro Vented Helmet Strap is the standard solution.

Anti-Vibration Solutions

For motorcycles with significant engine vibration (large V-twins, high-revving singles, older inline-fours with worn engine mounts):

  • GoPro Anti-Vibe Mount (~$20) — rubber-isolated mount designed for exactly this problem. Insert between camera and chin mount base.
  • Vibration-absorbing foam pad (~$5–8) — cut to size and place under any adhesive mount to add a vibration buffer layer.
  • Switch to chin mount from top mount — the chin bar naturally absorbs more vibration than the top of the helmet.

Using Our Mount Advisor Tool

Every helmet and camera combination is slightly different. Our free Mount Advisor tool takes your helmet brand, model, camera, and riding type and recommends the specific mount hardware that produces the best results for your exact setup.

Frequently Asked Questions

Will a chin mount fit my full-face helmet?

Most chin mounts include multiple adapter plates to fit different chin bar profiles. The GoPro Helmet Chin Mount and ULANZI U-400 both fit 90%+ of full-face helmets. Check our Mount Advisor for your specific helmet model.

Can I use a GoPro mount with a DJI camera?

Yes — DJI cameras include a GoPro-compatible adapter in the box. This opens the entire GoPro mount ecosystem to DJI camera users.

Is it safe to use adhesive mounts on a helmet?

Adhesive mounts can technically void some helmet certifications under strict ECE/DOT interpretations. For daily riding this is usually not a concern. For racing where helmet certification matters to regulations, use a mount that doesn’t adhere to the helmet shell (chin mounts that clamp to the chin bar).

Official resources: GoPro official mount accessories | DJI Osmo Action mount accessories.

Best Slow-Motion Settings for Motorcycle Helmet Cameras (120fps & 240fps Guide)

GoPro: Top 10 Slow Motion Action

Slow motion footage from a helmet camera is one of the most effective tools for creating compelling motorcycle content — and for analysing your own riding technique. But getting it right requires specific settings that most riders don’t configure correctly. This guide covers the exact slow-motion settings for GoPro Hero 13, DJI Osmo Action 5 Pro, and Insta360 cameras, plus when to use each mode for the best results.

How Slow Motion Works: The Basics

Slow motion video is simply footage recorded at a higher frame rate than it’s played back. Standard video plays at 24 or 30fps. If you record at 120fps and play back at 30fps, the footage plays at 1/4 speed — four times slower than real time.

Record at Play back at Slow-motion factor Looks like
60fps 30fps 2x slower Subtle — smooth movement
120fps 30fps 4x slower Clear slow-motion effect
240fps 30fps 8x slower Very dramatic slow motion
240fps 24fps 10x slower Cinema slow motion

Best Slow-Motion Settings by Camera

GoPro Hero 13 Black

The Hero 13 is the most capable action camera for slow motion in its price range:

  • 4K / 120fps — Best quality slow motion. 4x slow at full HD playback. Use this for: corner sequences, jump footage, arrival/departure shots at speed.
  • 2.7K / 240fps — 8x slow motion with excellent quality. Use this for: water splashes, tyre roost, crash analysis, jump apexes in motocross.
  • 1080p / 240fps — 8x slow motion. Lower resolution but useful for long takes where storage matters.

Critical shutter speed setting: At 120fps, set shutter to 1/240s. At 240fps, set shutter to 1/480s. This follows the “180° shutter rule” — shutter speed double the frame rate — and creates natural motion blur that makes slow motion look cinematic rather than stiff.

Stabilization at high frame rates: HyperSmooth Boost is not available at 4K/120fps on the Hero 13 — use Standard mode. The difference is minimal at the speeds involved in slow-motion sequences.

DJI Osmo Action 5 Pro

  • 4K / 120fps — RockSteady 3.0 applies at this mode. Very smooth 4x slow motion suitable for cinematic sequences.
  • 2.7K / 120fps — More stable than 4K at the same frame rate due to slightly more crop tolerance.
  • 1080p / 240fps — 8x slow motion. Adequate for action sequences where full resolution isn’t needed.

Note: The Action 5 Pro does not offer 240fps at 4K. For maximum slow motion quality, use 2.7K or 1080p at 240fps, or 4K at 120fps for the best balance.

Insta360 X5

The X5 handles slow motion differently because of its 360° format:

  • 5.7K 360° / 30fps normal speed — then apply FlowState stabilization and reframe in the app.
  • 4K Single Lens / 100fps — Approximately 3x slow motion. Limited compared to GoPro/DJI for slow motion but the reframing advantage compensates.

For slow-motion motorcycle content with the X5, plan to reframe in the Insta360 Studio app: choose your angle, apply FlowState, then export. The result looks like a tracking shot that follows the action — which is more professional-looking than a fixed-angle slow-motion clip.

Top 8 Motorcycle Slow-Motion Shots Worth Capturing

1. Corner Entry and Exit

At 120fps, the moment of turn-in and lean becomes visually dramatic. Position your chin mount camera and review the footage to see your own body position and technique. For content, corner sequences at 4x slow are universally engaging.

2. Tyre Roost and Gravel Spray

The debris thrown by tyres is invisible in real time — at 240fps it becomes a shower of individual rocks and dust. Best captured from a third-party camera position, not helmet mount.

3. Jump Apex

The split-second when a motorcycle is fully airborne at the top of a jump is peak motocross content. 240fps captures the full arc and landing with enough detail to see suspension compression.

4. Water Splash / River Crossing

Adventure riding through water features is iconic. At 120–240fps, water spray creates dramatic visual patterns. The Osmo Action 5 Pro and GoPro Hero 13 are both fully waterproof — no additional housing needed.

5. Gear Change Sequence

A close-up mount on the gear lever at 240fps captures the mechanical precision of a racing gear change. Difficult to set up but a uniquely detailed shot that enthusiast audiences appreciate.

6. Arrival at a Layby or Summit

Slowing down from cruising speed to a stop at a scenic location — at 120fps this becomes a graceful arrival shot. Pair with wide FOV to include landscape context.

7. Gravel Road Spray

On unpaved roads, the rooster tail of gravel and dust thrown up at speed becomes cinematic at 120fps. Best captured by a second rider following at a safe distance.

8. Low-Sun Riding

Early morning or late evening light creates dramatic lens flare and shadow patterns at regular speed. In slow motion at 120fps, light shifts become visible movement — the landscape changes as you move through it.

Editing Slow-Motion Footage

Key editing principles for slow-motion motorcycle clips:

  • Don’t over-use it — slow motion is most effective as punctuation. Two or three slow-motion moments in a 3–5 minute video is ideal. Full-length slow-motion rides become fatiguing to watch.
  • Match music to playback speed — slow-motion sequences need slower, more dramatic music. Beat-sync slow-motion to a music breakdown is a proven formula.
  • Cut before the interesting moment, not at it — start your slow-motion clip slightly before the peak action. The lead-in makes the action hit harder.
  • DaVinci Resolve’s Speed Ramp — ramp from normal speed into slow motion and back out. This transition style is used in professional automotive and motorcycle content.

For personalized settings recommendations for your specific camera and riding conditions, use our Footage Settings Optimizer tool.

Frequently Asked Questions

Why does my slow-motion footage look choppy?

Most likely cause: the footage was recorded at 120fps but not interpreted correctly in your editing software. Import the clip and change the playback speed to 25% (for 120fps played at 30fps) or confirm your NLE has auto-detected the high frame rate. If using GoPro Quik, the slow motion is applied automatically.

Does slow motion use more battery and storage?

Yes — higher frame rates increase both data rate and processor load. At 4K/120fps on the GoPro Hero 13, battery life drops to approximately 50 minutes vs. 90 minutes at 4K/60fps. Storage: 4K/120fps uses approximately 8–9 GB per hour. Use a 128GB card minimum for extended slow-motion sessions.

What’s the difference between 120fps and 120p on camera menus?

They mean the same thing. Some cameras use “fps” (frames per second) and others use “p” (progressive scan) to describe frame rate. 120fps = 120p = the same 120 frames per second recording mode.

Official resources: GoPro camera specifications | DJI Osmo Action 4 | Insta360 Ace Pro 2.

How to Film Motocross: Camera Settings, Techniques & Best Angles

GoPro: Justin Barcia - 450 Moto 1 - 2022 Lucas Oil Pro Motocross Championship Unadilla MX

Filming motocross races — whether your own performance or someone else’s — produces completely different challenges than road riding footage. The combination of high speed, jumps, roost, tight corners, and unpredictable race conditions requires a specific approach to get footage worth watching. This guide covers techniques, camera placement, and settings that produce professional-quality motocross race footage.

Filming Your Own Riding: Helmet Cam Setup

Camera Placement for MX Racing

Chin mount: the standard for motocross
All major GoPro-sponsored motocross and MXGP athletes use chin mounts. The reasons are practical: the chin bar absorbs vibration from the rough terrain, the camera is sheltered from direct roost, and the perspective closely matches the rider’s eye line — which means viewers see what the rider sees through jumps, berms, and whoops.

Use a breakaway mount design for racing (not permanent adhesive) — if the helmet hits the ground, you want the camera to detach cleanly rather than applying rotational force to the helmet.

Best Settings for Race Footage

Situation Resolution Frame Rate Stabilization
Full race documentation 4K 60fps HyperSmooth Boost
Jump slow-motion 2.7K or 4K 120fps Standard
Long gate drop to checkered flag 2.7K 60fps Boost (saves battery)
Practice lap analysis 1080p 120fps Any

Key setting: Horizon Lock ON — corners in motocross involve significant body lean. With Horizon Lock off, the camera tilts with your body, making footage look chaotic. With Horizon Lock on, the horizon stays level and corners look controlled and intentional.

Battery Management for Race Day

A standard motocross heat runs 30–35 minutes. A full race day with practice, qualifying, and 2 motos can run 4–5 hours of actual riding. Plan for:

  • 2–3 batteries for GoPro Hero 13 (90 min each)
  • 1–2 batteries for DJI Osmo Action 5 Pro (160 min each)
  • Charge between sessions in the paddock via USB-C power bank

Use the Battery & Trip Planner to calculate exactly how much power you need for your race day schedule.

Filming Someone Else Racing: Ground Camera Techniques

Filming riders from trackside produces a very different type of motocross content — and for compelling action footage, ground cameras and multiple angles produce better spectator content than a single helmet cam.

Position 1: The Berm Exit

Position yourself just outside the exit of a fast berm corner, low to the ground. As riders exit the berm at full throttle, they pass within feet of the camera. At 60fps, this produces blurring of the background while the rider stays sharp — a cinematic effect without any post-production work.

Position 2: Jump Face and Landing

Set up on the side of a significant jump — not directly in line with the trajectory (obvious safety reason), but at 45°. Shoot at 120fps minimum to capture the full arc of the jump in slow motion. This is the most watchable type of motocross footage and the highest-traffic shot type on YouTube motocross channels.

Position 3: Start Gate

The holeshot is pure energy — 20+ bikes launching simultaneously. Set up wide at a 45° angle to the start gate, 30fps for the real-time chaos look or 120fps for slow-motion gate drop analysis.

Best Cameras for Trackside Motocross Filming

For filming from the side of the track (not helmet mounting), a different set of priorities applies:

  • Zoom capability: Action cameras have fixed wide lenses — you need to be close to the action. For distance shots, a camera with optical zoom (Sony ZV-E10 with kit lens, or a 70–200mm telephoto) captures riders on the far side of the track.
  • High frame rate: 120fps minimum to freeze the details of riders in the air.
  • Burst photo mode: GoPro Hero 13 shoots 27MP bursts at 30fps — capturing split-second moments between video clips.

Audio for MX Race Footage

The sound of motocross is half the content — tyre roost, engine scream, landing impacts. External microphone options:

  • Rode VideoMicro II — compact directional mic that attaches to a camera hotshoe. Directional pattern focuses on the action in front of you.
  • Zoom H1n — separate handheld recorder. Record raw engine and crowd audio separately, sync in editing for clean multi-track audio.
  • Smartphone mic — modern iPhones and Samsung flagships record excellent ambient audio. A separate phone on a mini tripod pointing at the track is surprisingly effective.

Editing Your Motocross Footage

Two tools dominate motocross content editing:

  • GoPro Quik (free) — automated editing with beat-sync. Creates a watchable highlight reel in minutes. Limited control but excellent for quick social content.
  • DaVinci Resolve (free) — full professional editing suite. Used by professional moto videographers. Has a learning curve but the Fusion compositor enables colour grading and effects that Quik can’t match.

Not sure which camera fits your motocross filming needs? Our Camera Recommender tool has a specific motocross profile that factors in vibration handling, frame rate, and budget.

Frequently Asked Questions

Do professional MX riders get paid to use GoPro?

Major MXGP and AMA Pro riders are typically sponsored by GoPro or DJI — they use specific cameras as part of their sponsorship agreements. The cameras they use are production models, not custom units, which is why the footage you see from factory riders is achievable with consumer cameras.

What’s the safest way to mount a camera on a motocross helmet?

Use a dedicated motocross chin mount with a breakaway release mechanism. Avoid permanent adhesive mounts that can’t release during a crash. Check that your helmet’s certification (ECE 22.06 or DOT) isn’t voided by external modifications — most chin mounts avoid this by attaching to the chin bar without adhesive rather than bonding to the helmet shell.

Official resources: GoPro Hero 13 Black | DJI Osmo Action 4.

How to Mount an Action Camera on Your Helmet: A Step-by-Step Installation Guide

Installation of Cason Cs6 Action Camera on Helmet😍 | Step-by-Step #youtube #viral #dailyvlog #cason

A General Installation Guide for Helmet-Mounted Action Cameras

Most action cameras — regardless of brand — use one of two mounting systems: a GoPro-style two-prong buckle adapter, or a magnetic quick-release base. The installation steps below apply to either.

Step 1: Choose the Position

Chin mounts give the most natural point-of-view angle and the least wind resistance. Side mounts are easier to reach but skew the angle. Top mounts give a higher vantage point but catch more wind and add more leverage on the adhesive bond, which matters at highway speed. Pick a position based on the footage style you actually want, not just convenience.

Step 2: Prep the Surface

Adhesive mounts fail almost exclusively because of surface prep, not the adhesive itself. Clean the helmet surface with isopropyl alcohol and let it fully dry before applying anything — oils from packaging, sunscreen, or handling will weaken the bond significantly.

Step 3: Respect the Cure Time

Most adhesive mounts need 24 hours to reach full bond strength. Riding before that window is one of the most common causes of a mount failing mid-ride. If a ride can’t wait, use a mount with a mechanical strap or buckle system instead of relying on adhesive alone.

Step 4: Attach the Camera and Set the Angle

With the camera clipped into the buckle adapter, check the angle by looking through the camera’s live preview (via its app, if it has one) rather than eyeballing it — a mount that looks level by eye is very often tilted on screen. Aim slightly down from level; footage that’s tilted up toward the sky loses the road/trail in frame.

Step 5: Add a Safety Tether

A thin tether cord between the mount base and a secondary anchor point on the helmet means a failed adhesive bond doesn’t turn into a lost or flying camera. This is inexpensive and worth doing regardless of camera brand or price.

Step 6: Route Cables and Test Before Riding

If using an external microphone or auxiliary battery, route the cable so it can’t catch on gear, a jacket zipper, or the helmet strap. Once everything is mounted, do a short test ride at low speed before committing to a longer trip — this is the easiest point to catch a mount that isn’t as secure as it looked in the driveway.

Get Your Download Immediately

Get Instant access to our Digital Helmet Camera ebook

You have Successfully Subscribed!