Mounting a GoPro to a motorcycle helmet is straightforward — but there are several decisions that significantly affect the quality of your footage, the security of the mount, and whether your camera survives a crash. This step-by-step guide covers the three most common mounting methods with specific hardware recommendations for each helmet type.
The Three Main Ways to Mount a GoPro on a Motorcycle Helmet
Method 1: Chin Mount (Best for Full-Face Helmets)
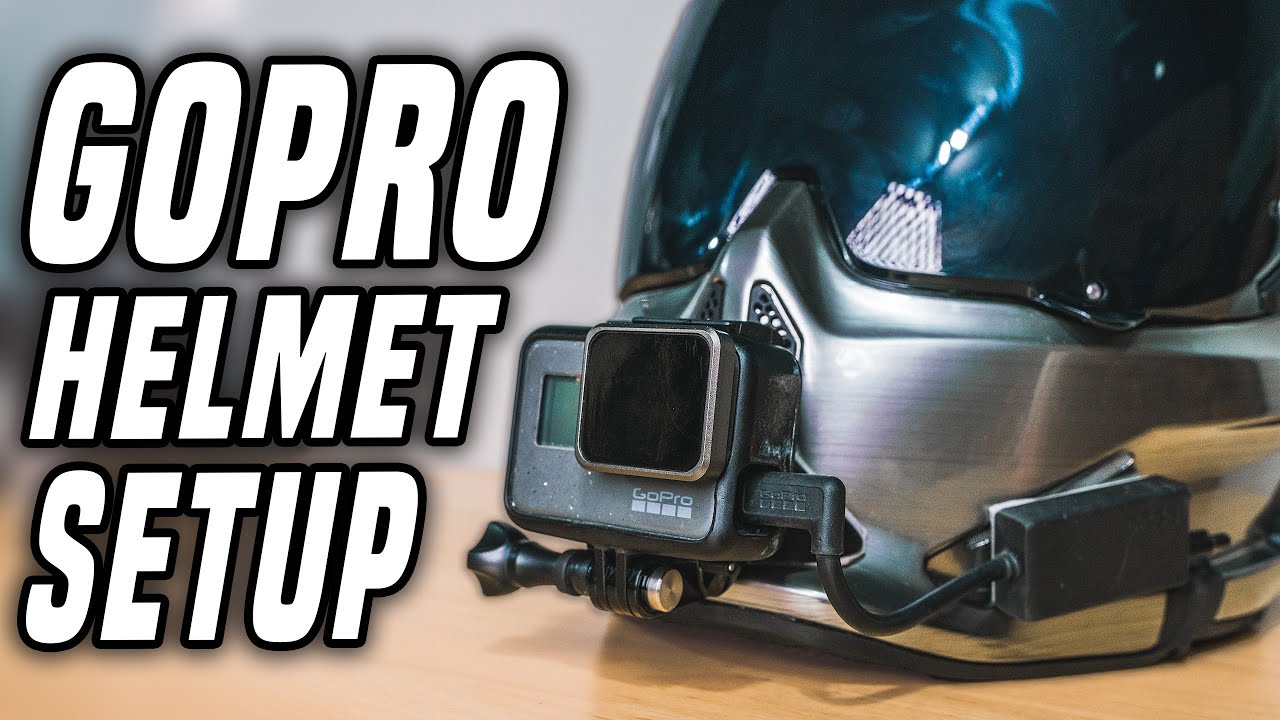
The chin mount is the recommended position for motorcycle filming. The camera sits on the chin bar of your full-face helmet, pointing forward, at roughly eye level.
What you need:
- GoPro Helmet Chin Mount (~$49.99) OR a compatible third-party chin mount (ULANZI U-400 ~$18, Telesin ~$15)
- GoPro Hero 13 (or any current GoPro)
- Optional: Anti-vibration mount pad if you’re on a high-vibration bike
Step-by-step installation:
- Identify the correct chin bar adapter for your helmet — the GoPro Helmet Chin Mount ships with multiple adapter plates for different chin bar widths
- Slide the adapter around the chin bar and fasten the two securing screws finger-tight first to confirm it sits level
- Tighten the screws firmly with the included hex key — the mount should not move when you pull it forward or sideways
- Click the GoPro onto the mount’s quick-release clip
- Adjust the camera angle downward approximately 10–15° from straight ahead — this compensates for the natural forward lean of your head when riding
- Test-record a 30-second clip and review the angle before your first ride
How to check the angle is right: The horizon should appear in the upper third of the frame when you’re in your normal riding position. Too high and you’ll see only road. Too low and you’ll see sky.
Method 2: Top Mount (For Any Helmet Type)
The top mount attaches to the top or back of the helmet and is the standard method for open-face, modular, and half-helmets where a chin mount isn’t possible.
Option A — Vented Helmet Strap Mount (no adhesive, reversible):
- GoPro Vented Helmet Strap Mount (~$19.99) — adjustable strap fits around any helmet vent system
- Position the camera as far forward on the helmet as the strap allows
- Run the strap through two adjacent vents, tighten, and clip the GoPro on
- Limitation: not as secure as adhesive mounts; can slip on smooth shells
Option B — Adhesive Curved Mount (permanent, most secure):
- GoPro Curved Adhesive Mount (~$8 for 3-pack)
- Clean the helmet surface with the included alcohol wipe — adhesive fails on dirty or waxed surfaces
- Peel the 3M backing and press the mount firmly for 60 seconds in the centre of the top of the helmet
- Allow 24 hours cure time before riding — the 3M VHB adhesive needs this time to reach full strength
- Attach the GoPro mount buckle and twist-lock it into position
Important: Adhesive mounts are semi-permanent. Removal is possible but may leave residue or damage helmet paint. Consider this before committing to a smooth-shell helmet.
Method 3: Side Mount
Side mounting uses the same adhesive or strap system as the top mount but positioned at the temple or side of the helmet. This gives an offset angle rather than the standard forward POV.
When to use side mount: For variety shots and creative B-roll when you have a second camera or are doing slow-speed riding. Not recommended for sustained motorway riding due to aerodynamic drag and lateral vibration.
Which Mount Position Is Right For You?
| Helmet Type | Recommended Mount | Product |
|---|---|---|
| Full-face (road) | Chin mount | GoPro Helmet Chin Mount or ULANZI U-400 |
| Full-face (motocross) | Chin mount | GoPro Helmet Chin Mount with breakaway |
| Modular/flip-front | Top mount (chin works if chin bar is solid) | GoPro Vented Strap or adhesive |
| Open-face / 3/4 | Top mount | GoPro Vented Strap |
| Half helmet | Top mount (compact camera only) | Adhesive curved mount |
Securing the Mount for Highway Speeds
At motorway speeds, aerodynamic forces put stress on both the camera and mount. These steps prevent camera loss:
- Use the tether — GoPro’s adhesive mounts include a tether attachment point. Thread the included safety tether through the camera’s tether hole and attach to the mount or helmet strap. If the camera detaches, it won’t hit traffic.
- Check the quick-release buckle before every ride — pull the camera forward and backward. It should be solid with no movement.
- Loctite Blue on the chin mount screws prevents vibration loosening over time without permanently bonding (unlike Red Loctite).
- Replace worn thumb screws — the knurled plastic screws on GoPro mounts strip over time. Metal replacement screws (~$5 on Amazon) are far more durable for motorcycle use.
Adjusting Camera Angle for Correct Framing
The GoPro mount buckles allow adjustment in 30° increments. For most riders:
- Chin mount: position 2 or 3 clicks down from horizontal gives correct horizon placement
- Top mount: position 1 or 2 clicks down — less correction needed from the elevated position
The exact angle depends on your riding position. Riders with a more aggressive forward lean need less downward tilt than riders in an upright touring position. Do a quick test ride at the start, review the footage, and adjust one click at a time until the horizon sits correctly.
Using the Mount Advisor for Your Specific Setup
Helmet shapes and chin bar profiles vary significantly between brands. Our Mount Advisor tool identifies the specific mount hardware compatible with your helmet model and camera, and recommends the optimal angle adjustment for your riding position.
Frequently Asked Questions
Will a GoPro chin mount fit my Shoei/Arai/Bell helmet?
Most chin mounts include multiple adapter plates for different chin bar widths. GoPro’s own Helmet Chin Mount is compatible with the majority of major helmet brands. For Arai helmets specifically, the narrower chin bar sometimes needs the narrowest adapter plate — check the Mount Advisor for your specific model.
Can I remove an adhesive mount without damaging my helmet?
Yes, with care. Use a hair dryer to warm the adhesive pad for 30 seconds, then use dental floss slid underneath the mount to cut through the adhesive layer. Remove remaining adhesive residue with Goo Gone or isopropyl alcohol. There may be slight paint dulling under the pad if the helmet has a gloss finish.
How do I prevent the GoPro from vibrating loose mid-ride?
Three steps: (1) Check the quick-release buckle is fully engaged (listen for the click). (2) Apply Loctite Blue to the chin mount screws and allow to cure for 24 hours. (3) Use an anti-vibration mount pad underneath if you’re on a high-vibration engine. Replace the twist-lock buckle if you notice any play in the connection.
Official resources: GoPro official mount accessories | GoPro Hero 13 setup guide.