This Firefighter’s Helmet Camera Saved Lives – Here’s How

digital helmet cameras 2

Documentation as a Practical Use Case

Beyond content creation, one of the most practical reasons people mount a camera to a helmet is documentation. First responders, delivery riders, and everyday commuters have all adopted helmet and body-worn cameras for broadly similar reasons: an objective record of what happened, from a first-person point of view, when it matters.

Why First Responders Use Them

Fire departments, EMS crews, and law enforcement agencies across the country have increasingly adopted helmet- and body-worn cameras for training review, incident documentation, and accountability. Reviewing real footage after an incident — what was visible, what decisions were made, how a situation unfolded — is a training tool that a written report alone can’t fully replicate.

Why It Matters for Everyday Riders

The same basic logic applies to motorcyclists and cyclists, at a much smaller scale. A helmet camera doesn’t prevent a collision or a close call, but it does provide a first-person record if a dispute arises afterward — with another driver, with an insurance claim, or simply to understand what actually happened in a fast-moving situation that’s hard to reconstruct from memory alone.

What to Look For

For documentation-focused use, a few specs matter more than for pure content creation: a wide field of view (to capture context, not just what’s directly ahead), loop recording so the camera is always capturing the most recent footage without manual intervention, and a mount secure enough that it stays in place if the ride doesn’t go as planned.

Best GoPro Cameras for Epic Adventures

A GoPro camera capturing a breathtaking mountaintop vista with a hiker overlooking a valley during golden hour.

GoPro Use Cases Beyond the Motorcycle

Most of this site’s coverage is motorcycle-focused, but GoPro-style action cameras are built for a much wider range of outdoor activity. A few use cases worth knowing about if the adventure isn’t on two motorized wheels.

Hiking and Trail Running

A chest or backpack-strap mount works better than a helmet mount for most hiking, since it captures the trail and surroundings without the constant head-turning that makes helmet POV footage dizzying to watch back. Wide field-of-view settings help capture scenery-heavy trail sections.

Mountain Biking

This is one of the closest use cases to motorcycle riding in terms of camera demands — high vibration, variable light moving in and out of tree cover, and genuine crash risk. A secure helmet chin or top mount with strong electronic stabilization (GoPro’s HyperSmooth or DJI’s RockSteady/HorizonBalancing) matters more here than resolution.

Skiing and Snowboarding

Chest mounts are common here too, since a helmet mount can catch wind and snow spray more directly. Cold weather significantly reduces battery life on most action cameras, so carrying a spare battery kept warm in an inner pocket is standard practice for a full day on the mountain.

Water Sports

Waterproof-rated housings (built-in on many current models, or an add-on dive case for deeper submersion) are the main requirement. Floating hand grips are worth the small extra cost — a dropped camera in open water without one is usually gone for good.

Travel and Everyday Vlogging

A magnetic quick-release mount and a small handheld grip cover most casual, non-extreme use — walking around, documenting a trip, or quick day-to-day clips — without needing a helmet or chest rig at all.

Features That Matter Across All of These

Regardless of activity, three specs do most of the work: a wide field of view for context-heavy footage, strong electronic stabilization for anything involving vibration or bumps, and a waterproof rating appropriate to the conditions (splash-resistant is not the same as submersion-rated).

DJI Osmo Action 4: A Guide to Versatility and Core Settings

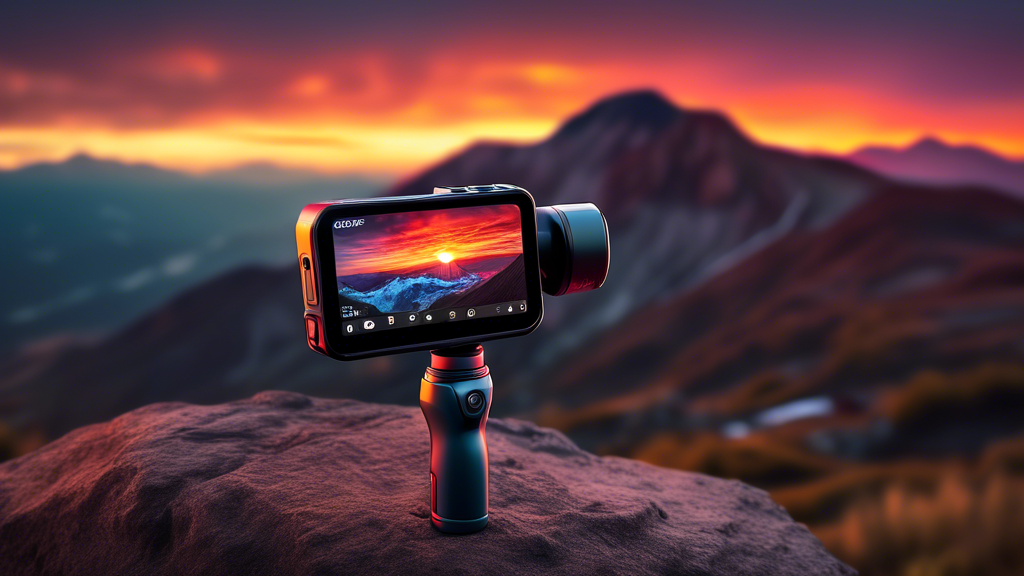
A rugged DJI Osmo Action 4 camera capturing a breathtaking sunset over a mountain landscape, showcasing its versatility.

Built for Conditions You Actually Shoot In

The DJI Osmo Action 4 is built around one core idea: a camera that survives the conditions riders and outdoor users actually shoot in — splashes, dust, drops, and temperature swings — without needing to be babied. Here’s how to get the most out of its hardware and settings.

Building Your Foundation: The Hardware Decision

Your camera choice is the foundational decision that enables or limits your creative potential. It determines what you can shoot and how easily you can shoot it.

Defining Your Needs: Action Camera vs. The Rest

When does an action camera beat a phone or DSLR? When durability, size, and mounting options are non-negotiable. The Osmo Action 4’s core proposition is its balance: a large 1/1.3-inch sensor for quality packed into a rugged, waterproof body. It’s the camera you can take anywhere without a second thought.

Mounting is Everything: Tactical Placement

Your camera’s perspective defines your story. Use a helmet mount for a first-person view in cycling or skiing. A chest mount offers a stable, immersive angle for hiking. Handlebar mounts capture the action on vehicles, while a simple handheld grip works for casual vlogging. The foundational rule is security: always use the correct DJI adhesive mounts or magnetic locks for a shake-free hold.

Breaking Down the Kit: Core Components

Your experience is shaped by the accessories you choose. Here’s a breakdown of key components:

Component Category Options Key Characteristics
Power Standard Battery vs. Extended Battery Standard offers 70+ mins; essential for most shoots. Extended battery provides 150+ mins; critical for long-form recording like events or travel days.
Mounting Magnetic Quick-Release vs. Adhesive Base Magnetic mount allows instant camera swaps; perfect for multi-angle vlogging. Adhesive base is a permanent, ultra-secure bond for high-vibration activities like mountain biking.
Protection Dive Case vs. Standard Frame Standard frame protects against bumps and is water-resistant to 18m. The Dive Case is mandatory for depths beyond 18m; it adds bulk but enables underwater color correction with a red filter.

Commanding the Image: Your Core Control System

Think of the Action 4 not as a point-and-shoot, but as a dynamic system. Managing its settings directly dictates the quality of your footage.

Dynamic Range & Color: Taming Light and Shadow

The ideal target is capturing detail in both bright skies and dark shadows. Getting it wrong means blown-out highlights or murky, lost details. Your control method is the color profile. Use the standard profile for quick, vibrant edits straight out of camera. Engage the 10-bit D-Log M profile when you plan to color grade; it captures vastly more information, giving you professional flexibility in post-production.

Stabilization: The Invisible Art

The target is gimbal-smooth footage from a camera on a bumpy trail. The consequence of failure is unwatchable, jittery video. Your control lies in choosing the right mode. RockSteady is for general stabilization. HorizonSteady keeps the horizon level during panning motions. HorizonBalancing is the ultimate mode, keeping the frame level even if the camera rotates 360 degrees.

Low-Light Performance: Conquering the Dark

Your target is clean, detailed footage at dawn, dusk, or indoors. Failure results in a grainy, noisy mess. Control this by leveraging the large sensor’s natural light gathering. Use a lower frame rate like 24 or 30fps to allow more light per frame. Understand the trade-off: higher resolution in the dark often means more noise. Sometimes, 1080p in low light looks better than noisy 4K.

Mastering the Workflow: From Capture to Edit

This is where you move from basic operation to seamless artistry. It’s about optimizing your process before and after you hit record.

Preparation: The Power of Custom Profiles

Don’t reconfigure settings for every activity. Save custom profiles instead — for example, a “Mountain Bike” profile (4K/60fps, HorizonBalancing, D-Log M), a “Snorkeling” profile (4K/30fps, RockSteady, Standard Color), and a “Daily Vlog” profile (2.7K/30fps for battery life, HorizonSteady). This lets you switch contexts in two taps.

Ongoing Inputs: Power and Media Strategy

Efficiency is key. Use the quick-release battery system and carry spares in a waterproof case. For all-day shoots, a small power bank with USB-C charging keeps you going. For media, only use high-endurance, V30-rated microSD cards. They are built for the constant write speeds of 4K video and prevent corrupt files.

Shooting for the Edit: Strategic Capture

Think like an editor while filming. Get shot variety: wide establishing shots, tight action details, and personal POVs. Always record a few extra seconds before and after your action (pre- and post-roll) for clean edit points. Capture dedicated, stable B-roll—shots of your environment, gear, or reactions—to weave into your story later.

Preventing Disaster: A Proactive Stance

Gear failure should never spoil an adventure. Adopt a proactive mindset to eliminate common threats.

Prevention: The Non-Negotiable Pre-Shoot Checklist

Before every outing: 1) Clean the lens with a microfiber cloth. 2) Check all mount connections are tight. 3) Format your memory card *in the camera*. 4) Ensure batteries are charged and the camera body is sealed if going underwater. This two-minute ritual saves hours of heartache.

Intervention: A Tiered Troubleshooting Guide

When issues arise, respond methodically. For overheating (rare, but possible in hot, static shoots), first, move to shade and remove any non-essential casing. For connectivity drops with the DJI Mimo app, restart both the app and the camera’s Wi-Fi. For fogging inside the dive case, place a silica gel packet inside the case before sealing it to absorb moisture.

Your Situational Shooting Roadmap

This practical guide tailors the Action 4’s system to your specific adventure.

Scenario Primary Settings Key Accessories
Water Sports 4K/60fps, RockSteady, Standard Color. Use 4K/30fps for lower light. Dive Case, Floating Hand Grip, Lens Guard.
Cycling & Motorsports 4K/120fps for slow-mo, HorizonBalancing, D-Log M. Adhesive Helmet Mount, Chin Mount, or Chest Mount. Extended Battery.
Daily Vlog & Travel 2.7K/30fps (for efficiency), HorizonSteady, Standard Color. Magnetic Quick-Release Mount, Mini Tripod, DJI Mic 2 for audio.
Low-Light & Night 4K/24fps, RockSteady, Low-Light Video Mode enabled. Stable handheld grip or fixed mount (tripod). Avoid digital stabilization in pure darkness.

The Bottom Line

Most of getting good footage from the Osmo Action 4 comes down to matching settings to the activity ahead of time rather than fumbling with them mid-ride: a saved profile per activity, a pre-shoot checklist, and the right mount for the job. That preparation is what makes the camera feel reliable rather than fiddly.

Bolton’s Erzbergrodeo 2024 Experience: A BTS and Helmet Cam Perspective

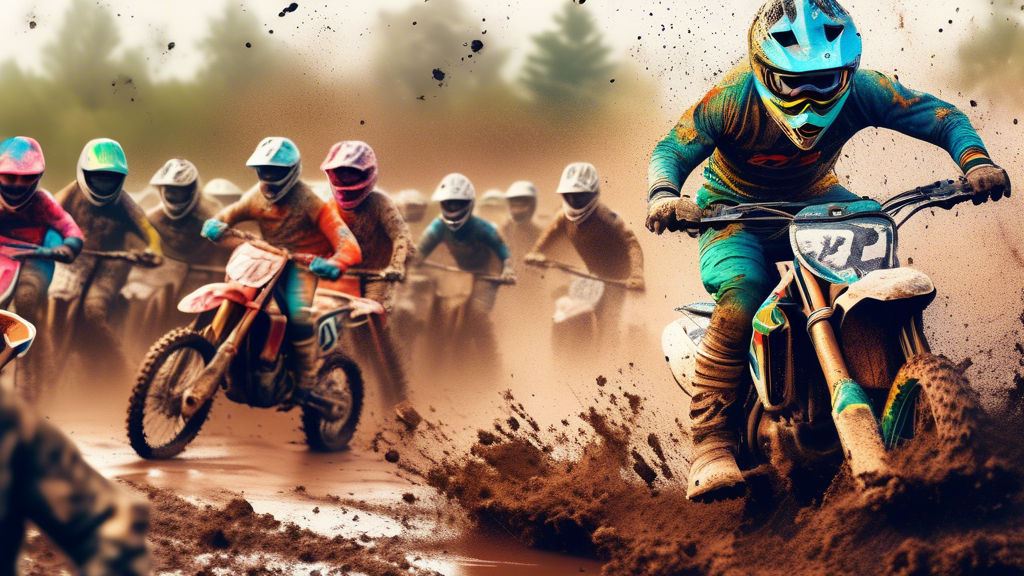
A motocross rider wearing a helmet cam races through a muddy obstacle course with a cheering crowd in the background and a drone shot of the event overlaid in the top corner.

Bolton’s Erzbergrodeo 2024: Through the Helmet Cam Lens

You watch the highlights: a blur of color against a brutal, rocky mountainside. The scale is lost. The sound is a distant roar. The true struggle—the white-knuckle grip, the split-second saves, the sheer physical toll—remains a mystery. This is the frustration of viewing a legend like the Erzbergrodeo from the outside. But what if you could strap into the cockpit? Modern helmet camera technology offers that visceral pass. Bolton’s Erzbergrodeo 2024 experience, captured through a meticulous behind-the-scenes and helmet cam perspective, is the ultimate key to unlocking the brutal artistry of the “Iron Giant.”

I. The Foundation: Choosing Your Hardware

Your gear choices determine everything. The right setup captures a cinematic, immersive story. The wrong one yields a shaky, unwatchable mess. This is your foundational system.

Part A: Selection and Sizing – Your Camera’s Eye

Form factor is your first decision. Ultra-compact cameras offer minimalism and light weight. Modular action cameras provide superior versatility for mounting and accessory use. For capturing Erzberg, a wide field-of-view lens is non-negotiable. You need to see the handlebars, the front wheel, and the terrifying climb ahead—all in one frame.

Part B: Location and Setup – Mounting for the Mayhem

Placement is critical for perspective and stability. A chin mount offers a natural, first-person view that follows your head movements. A side mount can capture more of the bike and rider posture. A top mount is simple but can feel detached. Whichever you choose, securing it is paramount. Use the official mounts, add security tethers, and lock down every connection to withstand endless vibration and potential impacts.

Part C: Core Components & Settings

These technical choices define your footage’s quality and usability. Here’s the breakdown for an extreme environment:

Component Category Options Key Characteristics
Resolution & Frame Rate 4K/60fps vs. 2.7K/120fps 4K/60fps: Delivers stunning detail for the main narrative; ideal for BTS storytelling. 2.7K/120fps: Creates supremely smooth slow-motion; perfect for analyzing technical climbs and crashes in post-production.
Stabilization Standard vs. HyperSmooth/RockSteady Standard: Useless here. It will produce a jarring, vibrating mess. HyperSmooth: Absolutely essential. This electronic image stabilization (EIS) negates brutal shakes to create a watchable, immersive frame.
Audio Built-in Mic vs. External Mic Built-in: Will be completely overwhelmed by engine noise and wind. External (with windscreen): Crucial for BTS. Captures clear rider communication, heavy breathing, and ambient sound, adding a critical layer of realism.

II. The Core System: Managing the Capture

Filming Erzberg is an active logistical battle. Managing power, data, and perspective is as critical as managing your throttle control on the course.

Power Management: The Lifeblood of Your Shoot

The ideal is multiple pre-charged batteries and a high-capacity power bank. The consequence of failure is missing the key, unrepeatable moment. My method is strict: I label batteries numerically and cycle through them in order, recharging the used set at every opportunity.

Data Management: Protecting the Priceless Footage

The ideal involves high-endurance, high-speed memory cards and a portable solid-state drive for backups. The consequence of a card failure is the permanent loss of a story. I follow a card-swapping schedule during natural breaks—like after a prologue run—and perform a nightly backup ritual without exception.

Perspective Management: Building the Story

The helmet cam is your primary perspective, but it shouldn’t be your only one. Combine it with secondary angles: a chest mount for a more stable, over-the-handlebars view, or a handlebar mount for a unique mechanical perspective. I follow the “5-minute rule”: I shoot short, intentional clips with a purpose, rather than letting the camera run for hours. This saves editing time and forces compositional thought.

III. Advanced Practices: The Art of the Edit

This is where Bolton’s Erzbergrodeo 2024 experience transforms from raw data into a compelling narrative. The edit is where you craft the feeling.

BTS Narrative Building

Use your stable, immersive helmet cam clips as the spine of the video. Weave in the candid audio you captured, shots of pre-race preparation, and short rider interviews. This builds emotional depth and context, making the eventual POV race footage far more impactful.

Pacing for Emotional Impact

Use the slow-motion capability from your high frame-rate clips to emphasize the impossibility of an obstacle. Contrast is key. Juxtapose a smooth, stabilized clip of a successful climb with a chaotic, shaky recovery from a crash. This visual contrast directly conveys the struggle and triumph of the event.

Sound Design: The Unseen Character

Layer your audio tracks. Use the clean engine sound from an external mic, mix in ambient crowd noise from a BTS clip, and carefully place music to build tension before a hard section or provide release after a victory. Sound is half the immersion.

IV. Threat Management: Protecting the Story

Adopt a proactive stance. The elements at Erzberg—dust, mud, and impacts—are actively trying to destroy your footage.

Prevention: The First and Best Defense

Physical protection is non-negotiable. Use a durable case for the camera body. Always use a lens protector—consider it a sacrificial item. Ensure all cable ports and battery doors are sealed against the omnipresent dust and mud.

Intervention: The Field Repair Mindset

Know how to identify issues instantly. Is the lens fogging? Is the camera overheating? Carry a small kit: a microfiber cloth, a sealed air blower, and isopropyl wipes. Have a tiered response. Clean the lens at a stop. If a primary camera fails, you must have a backup ready to deploy immediately.

V. The Erzberg Filmmaker’s Calendar

A phased roadmap is essential for managing the chaos and ensuring you capture the complete story.

Phase Primary Tasks What to Focus On
Pre-Event (Weeks Before) Test all gear in harsh, dusty conditions. Finalize and secure all mounting points. Create a clear, logical file organization system on your drives. System reliability. Achieving rock-solid camera mounts. Mastering your own logistics.
Event: Prologue & BTS Capture rider prep, course walks, qualifying runs. Conduct short, focused interviews. Film the scale of the machinery and terrain. Building the human story. Establishing the scale and fear of the terrain. Gathering emotional sound bites.
Event: Race Day Execute your power/data swap schedule religiously. Film the start line chaos, key sections (Carl’s Diner, Dynamite), and the finish line emotion. Gear survival. Capturing iconic moments and raw, unfiltered emotion. Getting the immersive, struggle-filled POV.
Post-Event (First 48 Hours) Complete a full, verified data backup. Log and tag your best clips. Begin the rough edit while the memory and feeling are freshest. Preserving priceless footage. Crafting the first draft of the narrative. Letting the immediate emotion guide the story.

Mastering this process does more than create a video; it fundamentally transforms your understanding of the sport. The journey from selecting the right hardware to crafting a narrative in the edit is the journey from spectator to visceral participant. The ultimate reward is the ability to share the true weight, sound, and feeling of the Erzbergrodeo—the gasps for air, the screaming engine, the crunch of rock. Bolton’s Erzbergrodeo 2024 experience, captured through this lens, becomes more than a highlight reel. It becomes a timeless, immersive document of motorsport extremity, a personal portal to the mountain that enriches every viewing.
How to Mount an Action Camera on Your Helmet: A Step-by-Step Installation Guide

Installation of Cason Cs6 Action Camera on Helmet😍 | Step-by-Step #youtube #viral #dailyvlog #cason

A General Installation Guide for Helmet-Mounted Action Cameras

Most action cameras — regardless of brand — use one of two mounting systems: a GoPro-style two-prong buckle adapter, or a magnetic quick-release base. The installation steps below apply to either.

Step 1: Choose the Position

Chin mounts give the most natural point-of-view angle and the least wind resistance. Side mounts are easier to reach but skew the angle. Top mounts give a higher vantage point but catch more wind and add more leverage on the adhesive bond, which matters at highway speed. Pick a position based on the footage style you actually want, not just convenience.

Step 2: Prep the Surface

Adhesive mounts fail almost exclusively because of surface prep, not the adhesive itself. Clean the helmet surface with isopropyl alcohol and let it fully dry before applying anything — oils from packaging, sunscreen, or handling will weaken the bond significantly.

Step 3: Respect the Cure Time

Most adhesive mounts need 24 hours to reach full bond strength. Riding before that window is one of the most common causes of a mount failing mid-ride. If a ride can’t wait, use a mount with a mechanical strap or buckle system instead of relying on adhesive alone.

Step 4: Attach the Camera and Set the Angle

With the camera clipped into the buckle adapter, check the angle by looking through the camera’s live preview (via its app, if it has one) rather than eyeballing it — a mount that looks level by eye is very often tilted on screen. Aim slightly down from level; footage that’s tilted up toward the sky loses the road/trail in frame.

Step 5: Add a Safety Tether

A thin tether cord between the mount base and a secondary anchor point on the helmet means a failed adhesive bond doesn’t turn into a lost or flying camera. This is inexpensive and worth doing regardless of camera brand or price.

Step 6: Route Cables and Test Before Riding

If using an external microphone or auxiliary battery, route the cable so it can’t catch on gear, a jacket zipper, or the helmet strap. Once everything is mounted, do a short test ride at low speed before committing to a longer trip — this is the easiest point to catch a mount that isn’t as secure as it looked in the driveway.

Mounting a Phone to Your Helmet for Motovlogging: What Actually Works

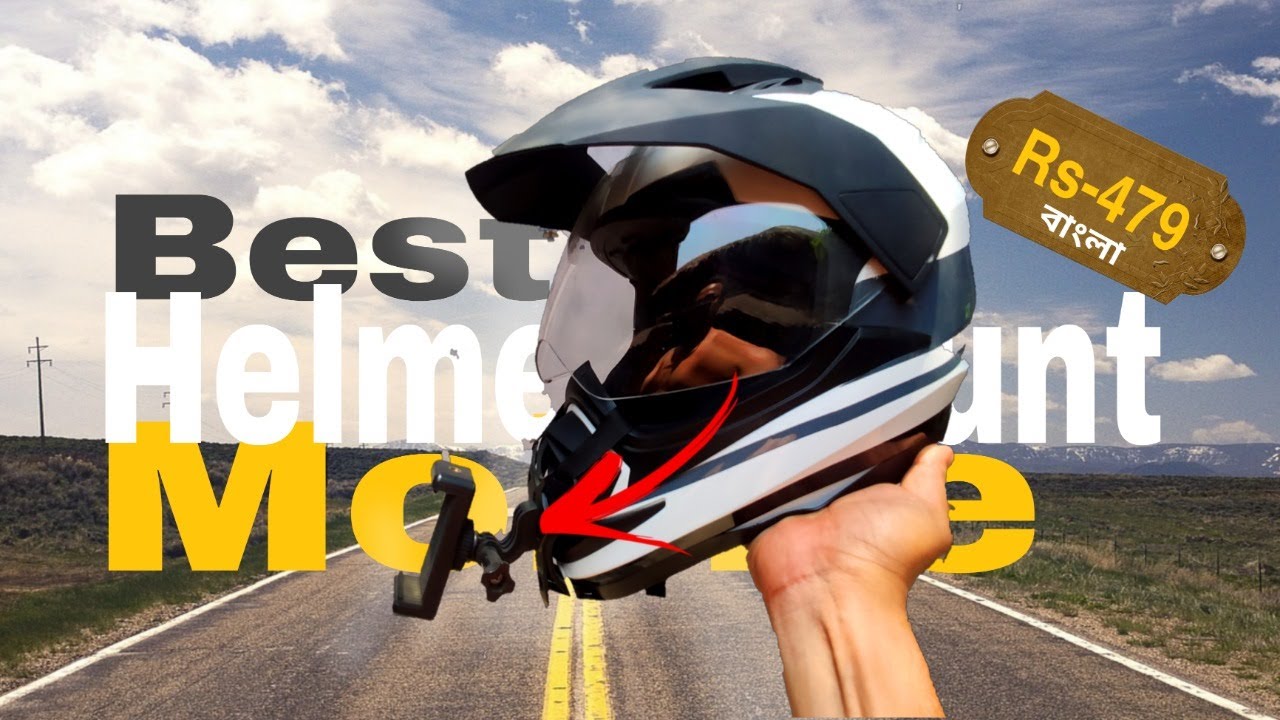
Best Helmet Mount For Mobile #helmetmount #motovlog #besthelmetmountmotovlogging

Why a Phone Is Different From an Action Camera

Motovloggers sometimes mount a phone instead of a dedicated action camera — usually because they already own it, want a bigger sensor for low light, or want to livestream directly. But a phone was never designed to be strapped to a helmet, and that creates a few real problems an action camera doesn’t have: it’s heavier and less balanced, it has no rugged housing, the screen is exposed, and sustained recording plus GPS use drains the battery and generates heat fast, especially in direct sun.

Mount Types That Actually Work

A few approaches show up repeatedly among riders who mount phones successfully:

  • Case-integrated mount points. A phone case with a built-in mount adapter (often a standard GoPro-style two-prong fitting) is more secure than a universal spring-loaded phone clamp, which adds bulk and vibration risk.
  • Chin mount or side mount with a low center of gravity. A phone’s extra weight makes top-of-helmet mounting less stable at speed than it is for a lightweight action camera. Lower, closer-to-the-head positions handle vibration better.
  • Magnetic quick-release bases. Useful for swapping the phone on and off between riding and normal use without redoing the whole mount each time.

Practical Considerations

A few things matter more with a phone than with a purpose-built action camera:

  • Heat. Phones throttle or shut down recording when they overheat. Avoid mounting in direct, unbroken sunlight for long sessions, and consider a lighter-colored case.
  • Battery. Recording video plus running GPS/navigation simultaneously drains a phone fast. A USB-C power bank routed to the phone, or a motorcycle USB charging port, is close to essential for anything beyond a short ride.
  • Vibration and screws. Check mount hardware before every ride — vibration loosens fittings faster on a heavier payload than on a lightweight action camera.
  • A tether. Given the cost of a phone, a safety tether between the mount and the helmet is worth the few extra dollars in case the primary mount fails.

When a Dedicated Action Camera Makes More Sense

If a ride involves water exposure, extended multi-hour sessions, or genuinely rough terrain, a purpose-built waterproof, shock-rated action camera is generally the better tool — it’s lighter, better sealed, and built to be mounted and forgotten about. A phone mount is a reasonable choice for shorter rides, livestreaming, or when convenience matters more than ruggedness.

Generic and No-Name Budget Action Cameras: What to Expect

4K Sports Ultra HD DV With wifi | Unboxing | Action camera battery door removal | action camera 4k

What “Generic” Action Cameras Are

Alongside major brands like GoPro, DJI, and Insta360, there’s a large market of unbranded and lesser-known action cameras, often sold through general online marketplaces with generic model names describing their specs rather than a real product line (for example, names combining resolution, “sports,” and a feature list). These can be a genuinely reasonable option for casual, low-stakes use — but they come with real trade-offs worth understanding before buying one.

What to Expect

  • Lower price, real trade-offs. These cameras are usually significantly cheaper than major-brand equivalents, but that price gap generally reflects real differences in stabilization quality, low-light performance, and build quality — not just brand markup.
  • Inconsistent quality control. Because these products often come from smaller manufacturers with less standardized production, unit-to-unit quality can vary more than with established brands. Reading recent buyer reviews (not just the product listing’s own claims) is more important than usual.
  • Marketing specs vs. real-world performance. Listed specs like “4K” resolution or a stated waterproof rating aren’t always independently verified, and real-world footage quality at that resolution can differ significantly from a major-brand camera with the same on-paper number.
  • Limited software support. Companion apps, firmware updates, and customer support are typically far more limited than with major brands, and may stop entirely if the specific product is discontinued or the manufacturer changes.
  • Accessory compatibility. Many generic cameras use a GoPro-style mount interface, which is a genuine advantage — it means they can usually work with the same wide range of third-party mounts as major-brand cameras.

When a Generic Camera Makes Sense

These cameras can be a reasonable choice for occasional, low-stakes use — testing whether you’ll actually use an action camera regularly before committing to a bigger purchase, or a backup camera for situations where losing or damaging it wouldn’t be a major loss. They’re a harder recommendation for anything where footage quality or reliability really matters, like documenting an incident, motovlogging regularly, or filming something you can’t reshoot.

Buying Tips

Check the seller’s return policy before buying, given the higher variability in unit quality. Look for recent, specific reviews rather than just a high average star rating. And treat any “waterproof” or “shockproof” claim as unverified marketing language unless it comes with a specific, testable rating (like an IP68 designation) rather than just descriptive words.

How to Set Up a Motovlogging Camera System: Camera, Mount, Mic and Workflow

Helmet Camera Setup Moto Vlog full information | Difference between gopro and action camera

What Motovlogging Needs From a Camera Setup

Motovlogging — recording yourself talking while riding — has different requirements than typical action-camera footage. You need the camera to capture your voice clearly over wind and engine noise, hold a stable face-to-camera framing, and run for the length of a real ride, not just a short clip.

Camera Choice

A wide field of view is important so the frame captures both your face and enough of the road/surroundings behind you for context. Battery life matters more here than in typical action-cam use, since motovlogging often means continuous recording for an entire ride rather than short clips — a camera with a swappable battery or one that can record while charging from a bike-mounted USB source has a real practical advantage.

Mounting

A chin mount is the standard choice for motovlogging because it keeps the camera close to mouth level for clear audio pickup and a natural talking-to-camera angle, and it’s less exposed to wind buffeting than a top-of-helmet mount. The trade-off is that a chin mount adds weight to the front of the helmet, so a lighter, more compact camera body is usually preferable to a larger one.

Audio: The Biggest Challenge

Wind noise is the single biggest obstacle to usable motovlogging audio. A few approaches address it: foam windscreens over the camera’s built-in mic reduce noise at moderate speeds but have limits at highway speed; an external lavalier or boom mic mounted closer to your mouth, run into a camera with a mic input, generally produces clearer results than any built-in mic; and some riders use in-helmet Bluetooth communication systems that route audio to the camera separately from the camera’s own microphone. Whatever the source, checking a short test clip at riding speed before committing to a full ride is worth the two minutes it takes.

Editing Workflow

A typical motovlogging workflow involves: reviewing footage and marking usable sections (most rides have far more footage than ends up in the final video), editing at proxy/lower resolution if your computer struggles with native 4K footage, basic color correction to fix the flat look common to action-camera footage, audio leveling to balance voice against ambient road/wind noise, and adding captions — increasingly expected on social platforms where videos are often watched without sound.

Putting It Together

The combination that works for most motovloggers starting out: a compact wide-FOV camera on a chin mount, an external mic if budget allows (even an inexpensive one is usually a bigger audio improvement than any built-in mic), and a simple, repeatable editing workflow rather than an elaborate one — consistency matters more than production complexity for building a following.

Get Your Download Immediately

Get Instant access to our Digital Helmet Camera ebook

You have Successfully Subscribed!