Are GoPro Cameras Waterproof? What Motorcycle Riders Need to Know

Go Pro

Getting caught in the rain on a motorcycle is inevitable. Whether your camera can handle it — and to what degree — is something you should know before you need to find out the hard way. Here is the full picture on GoPro waterproofing, what the ratings actually mean, and what to do when the weather turns.

GoPro Waterproof Ratings by Model

Model Waterproof Without Housing Depth Rating
GoPro Hero 13 Black Yes 33 ft / 10m
GoPro Hero 12 Black Yes 33 ft / 10m
GoPro Hero 11 Black Yes 33 ft / 10m
GoPro Hero 11 Black Mini Yes 33 ft / 10m
GoPro Hero (2024) Yes 33 ft / 10m
GoPro Hero 10 Black Yes 33 ft / 10m

Every current GoPro model is waterproof to 33 feet (10 metres) without any housing or case. For motorcycle riding, this means heavy rain, puddle spray, and road wash are fully within the camera’s design specification.

What the 33ft / 10m Rating Actually Means

The 10-metre depth rating is tested under static pressure — a camera sitting in still water at that depth. It is not the same as high-pressure jet exposure. For motorcycle riding, this distinction rarely matters: rain on a moving bike is low-velocity water contact, well within the camera’s capability.

Where riders sometimes run into problems is with damaged seals. The USB-C port door on the Hero 13 Black needs to be firmly closed during rain riding. After significant use, the rubber gasket can wear. GoPro recommends inspecting and replacing the seals periodically if the camera is regularly used in wet conditions.

Riding in Rain: What to Expect

GoPro’s waterproof rating is designed to hold up through sustained rain exposure across the Hero 10 through Hero 13 lineup. A few practical notes:

  • Water on the lens is the bigger problem than water getting into the camera. Rain droplets create smearing and flare. GoPro’s Max Lens Mod 2.0 has a hydrophobic coating that sheds water better than the standard lens. A thin application of Rain-X on the lens between rides also helps significantly.
  • Check the USB-C port door is fully sealed before riding in rain — it is easy to leave slightly ajar after charging.
  • After a wet ride, rinse with fresh water and let the camera dry with the door open before charging. This extends the life of the port seals.

When You Might Need the Protective Housing

GoPro sells a separate Protective Housing that adds additional physical protection. For motorcycle use, this is worth considering if you ride off-road where the camera is exposed to significant mud and debris impact, or if you do motocross or enduro where a crash could send the camera into rocks at speed. For road riding and typical weather, the built-in waterproofing is sufficient without any additional housing.

Alternatives with Equal Waterproofing

The DJI Osmo Action 5 Pro is waterproof to 10 metres without a housing — the same as GoPro. The Insta360 Ace Pro 2 is also waterproof to 10 metres. The DJI Osmo Action 3 has a deeper rating at 16 metres without a housing. See our best motorcycle helmet cameras guide for a full waterproofing comparison.

Frequently Asked Questions

Can I use my GoPro in heavy rain while riding?

Yes. All current GoPro models are waterproof to 33 feet / 10 metres without a housing, well above what any rainstorm will expose the camera to during a ride.

Will rain damage the GoPro microphone?

The microphone ports are protected by the same waterproof seals as the rest of the camera. Water ingress is not a risk during rain, but water near the ports will temporarily affect audio quality until the camera dries out.

Do I need to let a GoPro dry out after riding in rain?

It is good practice. Rinse with fresh water after exposure to mud or road grime, then air dry with the USB port door open before recharging. This extends the life of the port seals over time.

Reviewed by the Digital Helmet Cameras Editorial Team. Compiled from GoPro’s published waterproofing and weather-resistance specifications. Prices and availability change; check current listings.

Official resources: GoPro Hero 13 Black waterproofing specifications | Full GoPro camera range.
How to Mount a GoPro on a Motorcycle Helmet: Step-by-Step Guide

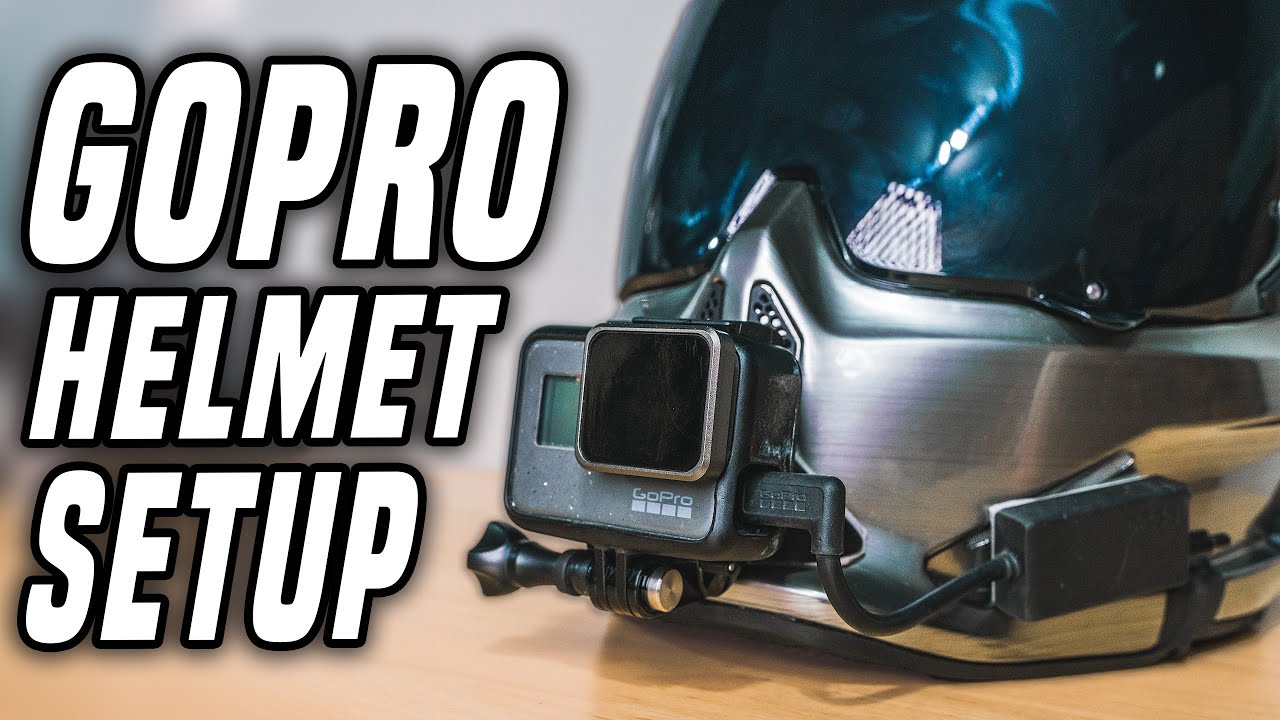
The BEST GoPro Helmet Mount Setup (for EVERY Helmet) | *Plus GoPro settings!*

Mounting a GoPro to a motorcycle helmet is straightforward — but there are several decisions that significantly affect the quality of your footage, the security of the mount, and whether your camera survives a crash. This step-by-step guide covers the three most common mounting methods with specific hardware recommendations for each helmet type.

The Three Main Ways to Mount a GoPro on a Motorcycle Helmet

Method 1: Chin Mount (Best for Full-Face Helmets)

The chin mount is the recommended position for motorcycle filming. The camera sits on the chin bar of your full-face helmet, pointing forward, at roughly eye level.

What you need:

  • GoPro Helmet Chin Mount (~$49.99) OR a compatible third-party chin mount (ULANZI U-400 ~$18, Telesin ~$15)
  • GoPro Hero 13 (or any current GoPro)
  • Optional: Anti-vibration mount pad if you’re on a high-vibration bike

Step-by-step installation:

  1. Identify the correct chin bar adapter for your helmet — the GoPro Helmet Chin Mount ships with multiple adapter plates for different chin bar widths
  2. Slide the adapter around the chin bar and fasten the two securing screws finger-tight first to confirm it sits level
  3. Tighten the screws firmly with the included hex key — the mount should not move when you pull it forward or sideways
  4. Click the GoPro onto the mount’s quick-release clip
  5. Adjust the camera angle downward approximately 10–15° from straight ahead — this compensates for the natural forward lean of your head when riding
  6. Test-record a 30-second clip and review the angle before your first ride

How to check the angle is right: The horizon should appear in the upper third of the frame when you’re in your normal riding position. Too high and you’ll see only road. Too low and you’ll see sky.

Method 2: Top Mount (For Any Helmet Type)

The top mount attaches to the top or back of the helmet and is the standard method for open-face, modular, and half-helmets where a chin mount isn’t possible.

Option A — Vented Helmet Strap Mount (no adhesive, reversible):

  • GoPro Vented Helmet Strap Mount (~$19.99) — adjustable strap fits around any helmet vent system
  • Position the camera as far forward on the helmet as the strap allows
  • Run the strap through two adjacent vents, tighten, and clip the GoPro on
  • Limitation: not as secure as adhesive mounts; can slip on smooth shells

Option B — Adhesive Curved Mount (permanent, most secure):

  • GoPro Curved Adhesive Mount (~$8 for 3-pack)
  • Clean the helmet surface with the included alcohol wipe — adhesive fails on dirty or waxed surfaces
  • Peel the 3M backing and press the mount firmly for 60 seconds in the centre of the top of the helmet
  • Allow 24 hours cure time before riding — the 3M VHB adhesive needs this time to reach full strength
  • Attach the GoPro mount buckle and twist-lock it into position

Important: Adhesive mounts are semi-permanent. Removal is possible but may leave residue or damage helmet paint. Consider this before committing to a smooth-shell helmet.

Method 3: Side Mount

Side mounting uses the same adhesive or strap system as the top mount but positioned at the temple or side of the helmet. This gives an offset angle rather than the standard forward POV.

When to use side mount: For variety shots and creative B-roll when you have a second camera or are doing slow-speed riding. Not recommended for sustained motorway riding due to aerodynamic drag and lateral vibration.

Which Mount Position Is Right For You?

Helmet Type Recommended Mount Product
Full-face (road) Chin mount GoPro Helmet Chin Mount or ULANZI U-400
Full-face (motocross) Chin mount GoPro Helmet Chin Mount with breakaway
Modular/flip-front Top mount (chin works if chin bar is solid) GoPro Vented Strap or adhesive
Open-face / 3/4 Top mount GoPro Vented Strap
Half helmet Top mount (compact camera only) Adhesive curved mount

Securing the Mount for Highway Speeds

At motorway speeds, aerodynamic forces put stress on both the camera and mount. These steps prevent camera loss:

  1. Use the tether — GoPro’s adhesive mounts include a tether attachment point. Thread the included safety tether through the camera’s tether hole and attach to the mount or helmet strap. If the camera detaches, it won’t hit traffic.
  2. Check the quick-release buckle before every ride — pull the camera forward and backward. It should be solid with no movement.
  3. Loctite Blue on the chin mount screws prevents vibration loosening over time without permanently bonding (unlike Red Loctite).
  4. Replace worn thumb screws — the knurled plastic screws on GoPro mounts strip over time. Metal replacement screws (~$5 on Amazon) are far more durable for motorcycle use.

Adjusting Camera Angle for Correct Framing

The GoPro mount buckles allow adjustment in 30° increments. For most riders:

  • Chin mount: position 2 or 3 clicks down from horizontal gives correct horizon placement
  • Top mount: position 1 or 2 clicks down — less correction needed from the elevated position

The exact angle depends on your riding position. Riders with a more aggressive forward lean need less downward tilt than riders in an upright touring position. Do a quick test ride at the start, review the footage, and adjust one click at a time until the horizon sits correctly.

Using the Mount Advisor for Your Specific Setup

Helmet shapes and chin bar profiles vary significantly between brands. Our Mount Advisor tool identifies the specific mount hardware compatible with your helmet model and camera, and recommends the optimal angle adjustment for your riding position.

Frequently Asked Questions

Will a GoPro chin mount fit my Shoei/Arai/Bell helmet?

Most chin mounts include multiple adapter plates for different chin bar widths. GoPro’s own Helmet Chin Mount is compatible with the majority of major helmet brands. For Arai helmets specifically, the narrower chin bar sometimes needs the narrowest adapter plate — check the Mount Advisor for your specific model.

Can I remove an adhesive mount without damaging my helmet?

Yes, with care. Use a hair dryer to warm the adhesive pad for 30 seconds, then use dental floss slid underneath the mount to cut through the adhesive layer. Remove remaining adhesive residue with Goo Gone or isopropyl alcohol. There may be slight paint dulling under the pad if the helmet has a gloss finish.

How do I prevent the GoPro from vibrating loose mid-ride?

Three steps: (1) Check the quick-release buckle is fully engaged (listen for the click). (2) Apply Loctite Blue to the chin mount screws and allow to cure for 24 hours. (3) Use an anti-vibration mount pad underneath if you’re on a high-vibration engine. Replace the twist-lock buckle if you notice any play in the connection.

Official resources: GoPro official mount accessories | GoPro Hero 13 setup guide.

GoPro Helmet Camera Guide: Best Models & Settings for Motorcycle Riders

helmet1

GoPro has dominated motorcycle helmet camera use for over a decade — and for good reason. The combination of best-in-class stabilization, a mature accessory ecosystem, and proven durability makes GoPro the default choice for most riders. This guide covers every current GoPro model worth considering for motorcycle helmet use, with specific recommendations by rider type and budget.

GoPro’s site currently lists the HERO13 Black alongside newer models such as the MISSION 1 series. This guide covers the HERO13 Black and earlier models; check GoPro’s current lineup before buying.

Current GoPro Models Ranked for Motorcycle Use

Model Stabilization Max Resolution Battery Life Price Verdict
Hero 13 Black HyperSmooth 6.0 5.3K/60fps ~90 min ~$399 Best overall
Hero 12 Black HyperSmooth 6.0 5.3K/60fps ~90 min ~$299 Best value upgrade
Hero 11 Black HyperSmooth 5.0 5.3K/60fps ~70 min ~$249 Still excellent
Hero (entry) HyperSmooth 5.0 2.7K/60fps ~80 min ~$179 Best budget GoPro
Hero 10 Black HyperSmooth 4.0 5.3K/60fps ~60 min Discontinued Skip — dated

GoPro Hero 13 Black: A Top Pick for Motorcycle Helmet Use

What’s New Over the Hero 12

The Hero 13 introduced two significant upgrades for motorcycle riders:

  1. HyperSmooth 6.0 — improved high-frequency vibration handling compared to HyperSmooth 6.0 on the Hero 12. At sustained motorway speeds with engine vibration, the Hero 13 produces smoother results.
  2. Modular Lens System — the Hero 13 accepts interchangeable lens modules: the standard wide lens, Ultra Wide Max Lens Mod 2.0 (177° with horizon lock), Macro Lens Mod, and Anamorphic Lens Mod. For motorcycle use, the Max Lens Mod 2.0 is the standout upgrade — it provides a dramatically wider perspective while maintaining perfect horizon stability.

Best Settings for the Hero 13 on a Motorcycle

For road riding (motorway + A-roads):

  • 4K / 60fps — enough resolution for editing, smooth playback
  • HyperSmooth Boost mode ON
  • Horizon Lock ON
  • Linear lens (removes fisheye distortion — license plates stay readable)
  • ISO max 1600 (clean in daylight)
  • Protune OFF unless you’re colour grading

For track days:

  • 4K / 120fps (slow-motion capability)
  • HyperSmooth Standard (Boost not available at 4K/120fps)
  • Linear lens
  • GPS ON (records speed data for overlay)

For motovlogging (talking to camera):

  • 4K / 30fps (looks more “standard video”, less action-sport-like)
  • Narrow FOV or Linear (keeps face centred, less background distortion)
  • HyperSmooth Standard
  • Media Mod for external microphone connection

GoPro Helmet Mount Options

GoPro’s mounting system is the industry standard — more accessories are compatible with GoPro’s proprietary mount than any other camera brand.

Chin Mount (Recommended)

GoPro Helmet Chin Mount (~$49.99) — purpose-built for the Hero 13/12/11. Quick-release clip, compatible with Shoei GT-Air 2, Arai RX-7V, Bell Race Star, AGV Pista, and most major full-face helmets. The most secure and vibration-dampened mounting position for road and track use.

Top Mount

GoPro Vented Helmet Strap Mount (~$19.99) — adjustable strap system for top mounting on vented helmets. Works with any helmet style. Moderate aerodynamic drag at highway speeds.

GoPro Helmet Front + Side Mount (~$19.99) — adhesive curved mount for smooth-shell helmets. Apply to clean helmet surface with 24-hour cure time before riding.

Third-Party Mounts Worth Considering

  • RAM Mounts Tough-Strap with GoPro adapter (~$35) — more secure than GoPro’s own adhesive mounts; ideal for track use where security is critical
  • Peak Design Sports Chin Mount (~$59.99) — premium quality, works with Peak Design’s capture clip ecosystem
  • Telesin Chin Mount (~$15) — budget option, works with all GoPro hero cameras

GoPro Hero 13 vs. DJI Osmo Action 5 Pro

These are two of the strongest action cameras for motorcycle use among the models compared here. Here is the comparison:

Feature GoPro Hero 13 DJI Osmo Action 5 Pro
Price ~$399 ~$269
Stabilization HyperSmooth 6.0 ✅ RockSteady 4.0 ✅
Battery life (4K/60fps) ~90 min ~130 min ✅
Sensor size 1/1.9″ 1/1.3″ ✅
Max resolution 5.3K/60fps ✅ 4K/120fps
Modular lenses Yes ✅ No
Dual screen No Yes ✅
Mount ecosystem Largest ✅ Large
Low light Very good Best in class ✅

Choose GoPro Hero 13 if: mount compatibility matters, you want maximum resolution, or you’re already in the GoPro ecosystem.
Choose DJI Action 5 Pro if: battery life is the priority (long touring, full race days) or low-light riding is common.

Accessories That Make GoPro Footage Better

  • Enduro Battery (~$25) — 20% more capacity in cold weather. Essential for UK/northern European riders in autumn and winter.
  • Media Mod (~$79) — adds a cold shoe for external microphones, a 3.5mm audio input, and a second USB-C port. Required for clean audio when motovlogging.
  • Protective Lens Filters (~$15–20 for 3-pack) — UV + circular polariser + ND filters. The polariser reduces road and visor reflections in bright conditions. The ND filter allows slower shutter speeds in bright conditions without overexposure.

Frequently Asked Questions

Is the GoPro Hero 13 worth the upgrade from Hero 11?

The Hero 13 has HyperSmooth 6.0, better battery life (+30%), and the modular lens system the Hero 11 doesn’t. If you’re a regular rider who shoots frequently, yes — the stabilization and battery improvements are meaningful. For occasional use, the Hero 11 at $150 less remains excellent value.

Can I use a GoPro for motovlogging?

Yes, but you’ll want the Media Mod and an external microphone. The GoPro’s internal mic records acceptable audio below 80 km/h. Above that speed, wind noise dominates. With the Media Mod and a Rode Wireless GO II or DJI Mic Mini, you get clean audio at any speed. See our Settings Optimizer for exact motovlog setup recommendations.

What’s the best GoPro for a beginner motorcycle rider?

The GoPro Hero (entry-level) at ~$179 is the best starting point. It has HyperSmooth 5.0, records 2.7K/60fps, and is fully waterproof. Once you’ve used it for a few months and understand what you want from your footage, you’ll know whether upgrading to a Hero 13 is worth it for your specific use.

Official resources: Full GoPro camera lineup and specifications | GoPro camera comparison tool.

Best Helmet Camera Settings for Motorcycle Racing & Track Days

GoPro: Jeremy Seewer 2022 FIM MXGP Round 11 Moto 2 from Germany

The difference between amateur and professional motorcycle racing footage often comes down to camera settings, not camera brand. Racers and instructors use on-bike and helmet cameras to analyse cornering technique, racing lines, and braking points — and the right settings make the difference between footage you can learn from and footage that’s just noise. This guide covers optimal camera settings for motorcycle racing, track days, and performance riding.

What Racing Footage Is Actually Used For

Understanding your goal determines your settings. Racing camera footage serves three distinct purposes:

  1. Technique analysis: Reviewing your own cornering, braking points, and body position to identify areas for improvement.
  2. Content creation: YouTube/social media footage from track days and race weekends.
  3. Safety/incident documentation: Evidence in the event of an on-track incident.

The optimal settings differ for each purpose. Most riders prioritise analysis and content — and the settings below cover both.

Best Settings for Track Day / Racing Footage

GoPro Hero 13 Black — Recommended Track Settings

Setting Value Reason
Resolution 4K / 120fps Slow-motion capability at full resolution
Lens Linear (no distortion) Accurate representation of lines and distances
Stabilization HyperSmooth Standard Boost crops too much at 4K/120fps
Horizon Lock ON Keeps frame level through high-lean corners
Shutter 1/240s Double the frame rate
ISO Max 1600 Clean image in daylight
White Balance Auto Track lighting changes; auto handles it
Color Flat (Log) Preserves dynamic range for editing
GPS ON Records speed/GPS data overlay

DJI Osmo Action 5 Pro — Recommended Track Settings

Setting Value Reason
Resolution 4K / 120fps Slow motion at HD quality
FOV Normal or Wide Normal for technique analysis; Wide for content
RockSteady Standard ON 4K/120fps limits Boost mode
Horizon Steady ON Critical for corner footage
Color D-Cinelike Flat profile for post-production
Shutter 1/240s Double frame rate

Why Frame Rate Matters for Racing Analysis

At 60fps, a corner entry at 160 km/h is over in approximately 12 frames. At 120fps, you get 24 frames of the same action — twice the detail to analyse braking point, turn-in timing, and body position.

For professional race analysis, data overlay software (MOTEC, AiM, Racelogic VBOX) syncs GPS and engine data with camera footage. Even without dedicated software, GoPro’s GPS overlay in the Quik app shows speed, corner speed, and braking points as a timeline — useful for comparing laps and identifying where you’re losing time.

Camera Positioning for Maximum Technical Value

Chin Mount: Best for Technique Analysis

The chin mount gives you the rider’s perspective — you can see your own body position, bar inputs, and how the track looks from where you’re sitting. Comparing sessions with a coach or more experienced rider using the same footage format allows frame-by-frame technique comparison.

Top Mount: Best for Cornering Spectacle

The elevated angle from a top mount captures lean angle visually — you can see the bike leaning and the road rushing past. For content creation, this is more dramatic. For technique analysis, it’s less useful because you lose the rider’s eye-line perspective.

Chest Mount: Additional Option for Analysis

A chest-mounted camera (GoPro Chesty harness) shows hand positions on the handlebars and weight distribution changes through corners. Not useful for helmet-focused analysis but adds a second angle for multi-camera track day edits.

GPS and Telemetry Integration

GoPro Hero 13 records GPS data automatically. In the GoPro Quik app, you can enable a speed/altitude/map overlay on your footage without any additional hardware. This turns standard track footage into analysis-capable data.

For more detailed telemetry, the Racelogic VBOX Sport ($899) records GPS at 10Hz and synchronises with camera footage. This is serious motorsport-level analysis hardware — used by trackday instructors and amateur racers for precise lap time analysis.

Protecting Your Camera at Track Events

Track incidents happen even to experienced riders. Protective considerations:

  • Use a quick-release chin mount, not permanent adhesive — the camera should detach cleanly in a crash
  • Consider a UV filter over the lens ($8–15) to protect the glass from debris and scratches
  • Don’t use the naked camera at track days without at least the minimal frame — the exposed lens element is vulnerable
  • Register your camera’s serial number with the manufacturer — replacement programmes exist for incidents

Post-Session Review: Getting Value from Your Footage

The most effective use of track day footage is systematic review with a specific question in mind. Rather than watching the whole session, focus on:

  • Specific corners where you lost time — compare your turn-in point to a faster lap of the same corner
  • Braking points — in slow motion at 120fps, you can see exactly when and how hard brakes are applied
  • Body position — from a chest or chin mount perspective, compare your position in fast and slow laps
  • Reference markers — use the GPS overlay to compare corner speeds between sessions

Use our Settings Optimizer tool to generate exact recommended settings for your specific camera and track conditions.

Frequently Asked Questions

Can I use a helmet camera at official motorcycle race events?

Rules vary by sanctioning body and event. MSA/MSUK regulations allow helmet cameras at club events and sprint meetings. International competition (FIM, BSB) has specific regulations about camera mounting and housing. Always check the event regulations — some require specific mount types to maintain helmet certification.

What’s the best way to analyse cornering using helmet camera footage?

Set your timeline to the slowest playback your editing software allows (most allow 1/4 or 1/8 speed on 120fps footage — effective 480fps). Watch specifically for: when you first start braking (look for front dip), when you apply steering input, when you look through the corner exit, and when you open the throttle. These timing decisions determine lap times far more than outright speed.

Official resources: GoPro Hero 13 Black specifications | GoPro firmware and updates.

How to Film Motocross: Camera Settings, Techniques & Best Angles

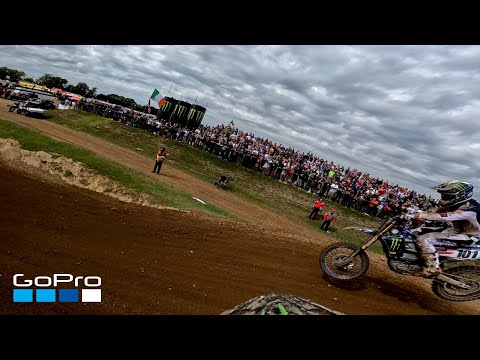
GoPro: Justin Barcia - 450 Moto 1 - 2022 Lucas Oil Pro Motocross Championship Unadilla MX

Filming motocross races — whether your own performance or someone else’s — produces completely different challenges than road riding footage. The combination of high speed, jumps, roost, tight corners, and unpredictable race conditions requires a specific approach to get footage worth watching. This guide covers techniques, camera placement, and settings that produce professional-quality motocross race footage.

Filming Your Own Riding: Helmet Cam Setup

Camera Placement for MX Racing

Chin mount: the standard for motocross
All major GoPro-sponsored motocross and MXGP athletes use chin mounts. The reasons are practical: the chin bar absorbs vibration from the rough terrain, the camera is sheltered from direct roost, and the perspective closely matches the rider’s eye line — which means viewers see what the rider sees through jumps, berms, and whoops.

Use a breakaway mount design for racing (not permanent adhesive) — if the helmet hits the ground, you want the camera to detach cleanly rather than applying rotational force to the helmet.

Best Settings for Race Footage

Situation Resolution Frame Rate Stabilization
Full race documentation 4K 60fps HyperSmooth Boost
Jump slow-motion 2.7K or 4K 120fps Standard
Long gate drop to checkered flag 2.7K 60fps Boost (saves battery)
Practice lap analysis 1080p 120fps Any

Key setting: Horizon Lock ON — corners in motocross involve significant body lean. With Horizon Lock off, the camera tilts with your body, making footage look chaotic. With Horizon Lock on, the horizon stays level and corners look controlled and intentional.

Battery Management for Race Day

A standard motocross heat runs 30–35 minutes. A full race day with practice, qualifying, and 2 motos can run 4–5 hours of actual riding. Plan for:

  • 2–3 batteries for GoPro Hero 13 (90 min each)
  • 1–2 batteries for DJI Osmo Action 5 Pro (160 min each)
  • Charge between sessions in the paddock via USB-C power bank

Use the Battery & Trip Planner to calculate exactly how much power you need for your race day schedule.

Filming Someone Else Racing: Ground Camera Techniques

Filming riders from trackside produces a very different type of motocross content — and for compelling action footage, ground cameras and multiple angles produce better spectator content than a single helmet cam.

Position 1: The Berm Exit

Position yourself just outside the exit of a fast berm corner, low to the ground. As riders exit the berm at full throttle, they pass within feet of the camera. At 60fps, this produces blurring of the background while the rider stays sharp — a cinematic effect without any post-production work.

Position 2: Jump Face and Landing

Set up on the side of a significant jump — not directly in line with the trajectory (obvious safety reason), but at 45°. Shoot at 120fps minimum to capture the full arc of the jump in slow motion. This is the most watchable type of motocross footage and the highest-traffic shot type on YouTube motocross channels.

Position 3: Start Gate

The holeshot is pure energy — 20+ bikes launching simultaneously. Set up wide at a 45° angle to the start gate, 30fps for the real-time chaos look or 120fps for slow-motion gate drop analysis.

Best Cameras for Trackside Motocross Filming

For filming from the side of the track (not helmet mounting), a different set of priorities applies:

  • Zoom capability: Action cameras have fixed wide lenses — you need to be close to the action. For distance shots, a camera with optical zoom (Sony ZV-E10 with kit lens, or a 70–200mm telephoto) captures riders on the far side of the track.
  • High frame rate: 120fps minimum to freeze the details of riders in the air.
  • Burst photo mode: GoPro Hero 13 shoots 27MP bursts at 30fps — capturing split-second moments between video clips.

Audio for MX Race Footage

The sound of motocross is half the content — tyre roost, engine scream, landing impacts. External microphone options:

  • Rode VideoMicro II — compact directional mic that attaches to a camera hotshoe. Directional pattern focuses on the action in front of you.
  • Zoom H1n — separate handheld recorder. Record raw engine and crowd audio separately, sync in editing for clean multi-track audio.
  • Smartphone mic — modern iPhones and Samsung flagships record excellent ambient audio. A separate phone on a mini tripod pointing at the track is surprisingly effective.

Editing Your Motocross Footage

Two tools dominate motocross content editing:

  • GoPro Quik (free) — automated editing with beat-sync. Creates a watchable highlight reel in minutes. Limited control but excellent for quick social content.
  • DaVinci Resolve (free) — full professional editing suite. Used by professional moto videographers. Has a learning curve but the Fusion compositor enables colour grading and effects that Quik can’t match.

Not sure which camera fits your motocross filming needs? Our Camera Recommender tool has a specific motocross profile that factors in vibration handling, frame rate, and budget.

Frequently Asked Questions

Do professional MX riders get paid to use GoPro?

Major MXGP and AMA Pro riders are typically sponsored by GoPro or DJI — they use specific cameras as part of their sponsorship agreements. The cameras they use are production models, not custom units, which is why the footage you see from factory riders is achievable with consumer cameras.

What’s the safest way to mount a camera on a motocross helmet?

Use a dedicated motocross chin mount with a breakaway release mechanism. Avoid permanent adhesive mounts that can’t release during a crash. Check that your helmet’s certification (ECE 22.06 or DOT) isn’t voided by external modifications — most chin mounts avoid this by attaching to the chin bar without adhesive rather than bonding to the helmet shell.

Official resources: GoPro Hero 13 Black | DJI Osmo Action 4.

Best GoPro Cameras for Motocross & Off-Road Riding

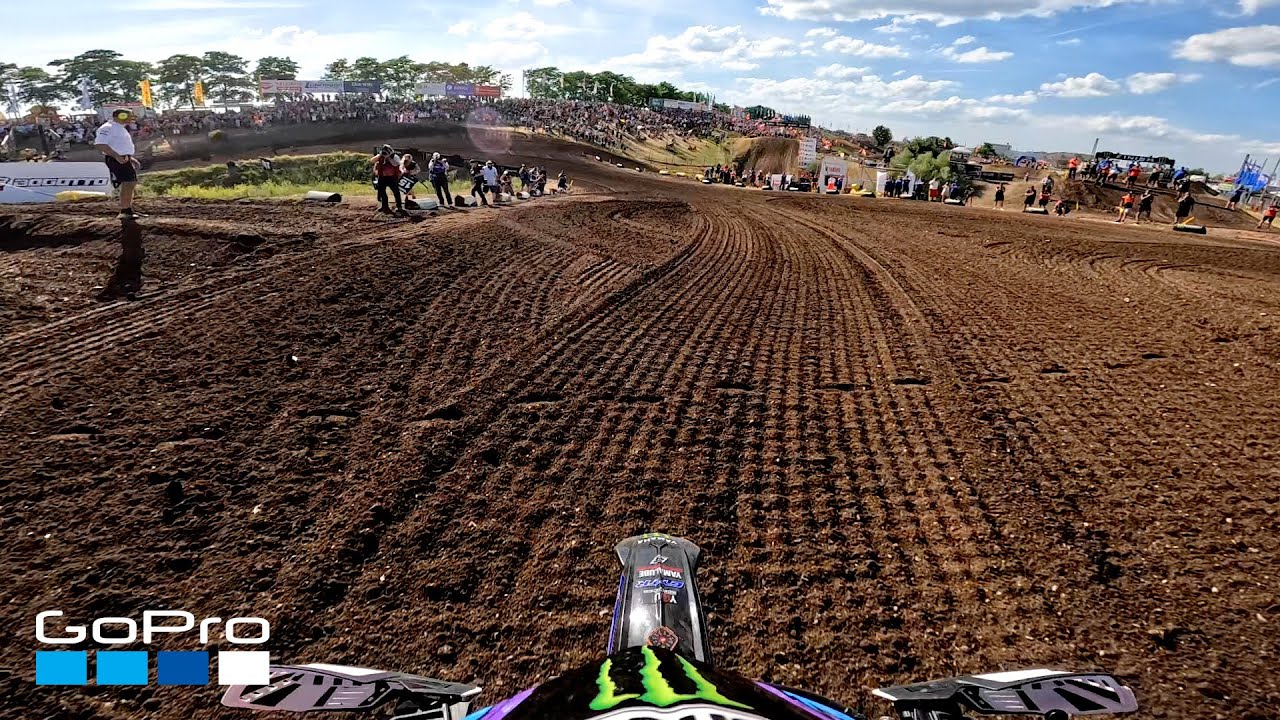
GoPro: Jeremy Seewer 2022 FIM MXGP Qualifying Moto from MXoN Redbud

Motocross is one of the most demanding environments you can put a helmet camera through — constant vibration, dirt, mud, crashes, and extreme g-forces through jumps and corners. This guide covers the best cameras for motocross use specifically, with settings that work for the unique demands of off-road racing and recreational riding.

What Makes Motocross Different from Road Riding

Motocross footage has different requirements to motorway riding footage. The challenges are:

  • High-frequency vibration — 2-stroke and 4-stroke mx bikes vibrate differently from road bikes. Cheaper cameras struggle to compensate.
  • Extreme exposure changes — jumps into bright sky, landing in tree shadows, dust clouds. Dynamic range is critical.
  • Impact protection — crashes are more common. Cameras need to survive falls.
  • Roost and mud — debris thrown by other riders hits the camera directly.
  • Compact size — a large camera block on a motocross helmet can catch the ground or handlebars in a crash.

Best Cameras for Motocross Riders

1. GoPro Hero 13 Black — Best Overall for MX

GoPro has dominated motocross and off-road filming for a reason: HyperSmooth 6.0 handles the violent vibration patterns of 2-stroke MX bikes better than any competitor. The rugged housing is genuinely protective (survives a 6-foot drop onto concrete per GoPro’s testing). At 5.3K/60fps, you have the resolution to crop to the exact angle you want in editing.

Best settings for motocross:

  • 2.7K / 120fps (for slow-motion jump and corner analysis)
  • Wide lens (captures the full bike and body position)
  • HyperSmooth Boost
  • Protune ON, Shutter 1/240s, ISO max 1600

Price: ~$399

2. DJI Osmo Action 5 Pro — Best for Long Moto Days

A full day of riding in the desert or at an enduro event can run 6+ hours. The Osmo Action 5 Pro’s 160-minute battery life at 4K/30fps — significantly better than GoPro — means fewer stops for battery changes during riding. The 1/1.3-inch sensor handles the harsh contrast of bright desert and dark tree canopy better than smaller-sensor cameras.

Best settings for motocross:

  • 4K / 60fps (standard) or 2.7K / 120fps (slow motion)
  • RockSteady 4.0 ON
  • Horizon Steady ON
  • Wide FOV

Price: ~$269

3. Insta360 GO 3S — Best Lightweight Option

At just 35g, the GO 3S is the lightest helmet camera option for motocross. When you’re already wearing a full-face helmet, goggles, neck brace, and chest protector, minimising camera weight matters. The magnetic mounting system makes it easy to move between your helmet, chest protector, and handlebars.

Trade-offs: 2.7K/30fps maximum resolution (not competitive with GoPro/DJI), smaller sensor means weaker low-light performance. But for riders who do social content rather than professional production, the weight and ease-of-use advantages are compelling.

Price: ~$299

Helmet Camera Mounting for Motocross

Chin Mount (Best Choice)

The chin mount is the safest and most stable option for motocross because the chin bar absorbs vibration. In a crash, the camera is more protected than a top mount. Peak Design Sports Chin Mount and GoPro’s own Helmet Chin Mount are both used by professional MX riders.

Side Mount (Avoid)

Side mounts catch air and debris, and in a crash can catch the ground and wrench the helmet. Not recommended for motocross.

Top Mount

Used by some GoPro-sponsored riders for its elevated perspective. More vulnerable in crashes. If you use a top mount, use a breakaway adhesive mount that releases on impact rather than a rigid mount that transfers crash forces to the helmet.

Camera Settings for Jump Footage

Capturing jumps in slow motion is one of the highest-value shots in motocross content. The key settings:

  • Frame rate: 120fps minimum, 240fps if your camera supports it at acceptable resolution
  • GoPro Hero 13: 2.7K/240fps or 4K/120fps
  • DJI Osmo Action 5 Pro: 4K/120fps
  • Shutter speed: Double the frame rate (240fps → 1/480s)
  • This makes jump sequences look professional even from a basic chin mount setup

Protecting Your Camera from Roost and Mud

Debris from other riders’ tyres hits the camera at 50+ mph. Solutions:

  • UV filter over the lens protects the glass and is easy to replace (~$8) vs. a cracked lens element
  • Protective housing for GoPro adds extra protection but note it slightly reduces image quality
  • Post-ride cleaning: Use a blower brush first to remove grit before wiping the lens with a cloth — wiping dry grit scratches the coating

Use our Camera Recommender to get a specific camera recommendation matched to your motocross or off-road riding style and budget.

Frequently Asked Questions

Can a GoPro Hero 13 survive a motocross crash?

GoPro claims the Hero 13 can survive drops onto concrete from 6 feet. In practice, riders report it survives most casual crashes intact. Hard impacts directly onto the camera can crack the housing or lens. For serious racing, a protective case or buying a second camera as backup is worth considering.

What’s better for motocross — 60fps or 120fps?

Record at 120fps if you want the option of slow-motion playback. Standard 60fps footage looks smoother than 30fps at the speeds involved in motocross. Most experienced MX content creators record everything at the highest frame rate available because you can always speed up 120fps to look like 60fps, but you can’t add frames you didn’t capture.

Official resources: GoPro Hero 13 Black official page | Full GoPro camera range.

Five Cool Things To Do With A GoPro

Beyond Basic POV Footage

Most riders start out just strapping a GoPro to a helmet and recording whatever happens. Once the basics are covered, there’s a lot more the camera can do.

1. Time-Lapse for Long Rides

A multi-hour touring day makes for a very long video at normal speed. GoPro’s built-in TimeWarp/time-lapse modes compress hours of riding into a few minutes while still smoothing out motion, which is a far more watchable way to document a long trip than raw footage.

2. Multi-Angle Setups

Running a second camera on a chest, handlebar, or tail mount alongside the helmet camera gives an editor real angle variety to cut between — a POV shot alone gets repetitive fast, but POV cut against a third-person angle reads as far more dynamic footage.

3. External Microphone Audio

Built-in mics on helmet-mounted cameras pick up a lot of wind noise at speed. A cameras with a 3.5mm or USB-C mic input paired with an external microphone — even a basic lavalier — is a noticeable upgrade for anyone planning to actually use the audio, not just the video.

4. Livestreaming

Newer GoPro models support direct livestreaming to platforms like YouTube via the GoPro app and a phone’s data connection. This turns a ride into something viewers can watch live rather than only after the fact — useful for events, races, or just sharing a ride with people who can’t be there.

5. Quick Edits with the Companion App

The GoPro Quik app can auto-detect highlight moments and cut a short, shareable edit directly on a phone, without needing a full desktop editing workflow. For someone who just wants a 30-second clip to post rather than a full production, this is usually enough.

Gopro Hero 12 Release Date

AMLnZu s7gAuALpdx5MlOG7LFAG8Q 0XP65SsygygNSYgs800 c k c0x00ffffff no rj

The Annual Pulse: Awaiting the Next GoPro Leap

You’re watching last year’s footage, wondering if the highlights could be sharper, the colors richer, or the stabilization even smoother. The itch for an upgrade is real, but timing is everything. Buy too soon, and you miss a major leap. Wait too long, and you sacrifice a season of adventures. This cycle of anticipation defines the GoPro community. Understanding the rhythm of innovation is your strategic advantage. It transforms you from a passive consumer into an informed planner, ready to harness cutting-edge technology the moment it arrives. Mastering the GoPro Hero 12 release date pattern is the key to unlocking your next era of capture without regret.

Decoding the GoPro Release Cadence

GoPro has perfected a predictable launch tempo. This consistency is your most reliable forecasting tool. Examining the recent past reveals a clear trend that points directly to the future.

  • Hero 9 Black: Announced September 16, 2020.
  • Hero 10 Black: Announced September 16, 2021.
  • Hero 11 Black: Announced September 14, 2022.

The pattern is unmistakable: a mid-September announcement. This strategic timing allows GoPro to showcase new hardware just before the holiday shopping season begins, ensuring maximum impact and availability for end-of-year adventures.

The Signal Amidst the Noise: Official Hints and Credible Leaks

Navigating the rumor mill requires separating hopeful speculation from credible evidence. Focus on sources with a proven track record.

The Official Channel: What GoPro is Saying

As of now, GoPro maintains its standard pre-launch silence. Official confirmation will come first through a press invitation to a launch event, typically issued 1-2 weeks prior. Your best action is to follow GoPro’s official social media channels and subscribe to their newsletter. The first official word will appear there.

Sifting the Rumors: Where Leaks Emerge

Credible information often surfaces through regulatory and retail pipelines. Filings with agencies like the FCC (Federal Communications Commission) are a solid indicator, often appearing 1-2 months before launch. Similarly, unexpected product listings or placeholder pages on retailer websites can be a telltale sign. Based on this, credible tech analysts universally predict a GoPro Hero 12 release date announcement in the second week of September 2023.

The Launch Playbook: From Announcement to Your Hands

The release date is not a single moment but a phased process. Knowing this sequence helps you plan your move.

The Announcement vs. The Ship Date

GoPro typically announces the camera via a digital launch event. Pre-orders almost always open immediately following the presentation. Historically, shipping begins within 7-10 days of the announcement. If the pattern holds, a September 12 announcement would see first units shipping by late September.

The Immediate Market Shift

The launch triggers immediate market changes. The predecessor model, the Hero 11 Black, will see an official price reduction from GoPro and retailers, often by $50 to $100. The Hero 12 itself will launch at the standard flagship price point, which has been $399 for the base model in recent years. Initial stock of the new model can sell quickly, so pre-ordering is advised if you want it for an early-fall trip.

Your Strategic Decision: Buy, Wait, or Save?

Armed with the timeline, you can choose the optimal path for your needs and budget. Use this framework.

Your Scenario Recommended Action Rationale
The Early Adopter
You need the latest specs and don’t mind paying full price.
Pre-order the Hero 12 immediately after the September announcement. Guarantees you the newest technology first. You’ll capture fall and winter adventures with the latest features.
The Value-Conscious Planner
You want the Hero 12 but seek a better deal.
Wait for a post-holiday sale, likely in January or February. GoPro often runs promotions early in the new year. You get the new model at a discount, sacrificing only a few months.
The Budget-First Adventurer
Current performance meets your needs; price is the primary driver.
Buy a discounted Hero 11 Black immediately after the Hero 12 launch. The Hero 11 Black is a phenomenal camera. Its price drop represents the best value in the lineup, offering top-tier performance at a lower cost.

Beyond the Calendar: The Engine of Anticipation

The date matters because of what it delivers. While specs are unconfirmed, informed speculation points to logical evolutions. Expect refinements to the excellent 10-bit color and HyperSmooth 5.0 stabilization from the Hero 11. Rumors and hopes often center on further improved low-light performance, enhanced battery efficiency, and new, creator-focused software features or accessory integrations. These potential upgrades are the real reason to watch the calendar—they define the leap you’re waiting for.

Mastering the Timeline, Capturing Your Moment

All evidence converges on a familiar horizon: mark your calendar for mid-September. This knowledge disarms the anxiety of the unknown. You are no longer guessing; you are planning. Whether you secure the Hero 12 on day one to push your creative limits immediately, or you strategically snag a Hero 11 at its lowest price, you are in control. This is the reward of understanding the cycle—the confident anticipation of the tool that will document your next great story. The countdown is on, and your perfect camera awaits.

Get Your Download Immediately

Get Instant access to our Digital Helmet Camera ebook

You have Successfully Subscribed!