Best Slow-Motion Settings for Motorcycle Helmet Cameras (120fps & 240fps Guide)

GoPro: Top 10 Slow Motion Action

Slow motion footage from a helmet camera is one of the most effective tools for creating compelling motorcycle content — and for analysing your own riding technique. But getting it right requires specific settings that most riders don’t configure correctly. This guide covers the exact slow-motion settings for GoPro Hero 13, DJI Osmo Action 5 Pro, and Insta360 cameras, plus when to use each mode for the best results.

How Slow Motion Works: The Basics

Slow motion video is simply footage recorded at a higher frame rate than it’s played back. Standard video plays at 24 or 30fps. If you record at 120fps and play back at 30fps, the footage plays at 1/4 speed — four times slower than real time.

Record at Play back at Slow-motion factor Looks like
60fps 30fps 2x slower Subtle — smooth movement
120fps 30fps 4x slower Clear slow-motion effect
240fps 30fps 8x slower Very dramatic slow motion
240fps 24fps 10x slower Cinema slow motion

Best Slow-Motion Settings by Camera

GoPro Hero 13 Black

The Hero 13 is the most capable action camera for slow motion in its price range:

  • 4K / 120fps — Best quality slow motion. 4x slow at full HD playback. Use this for: corner sequences, jump footage, arrival/departure shots at speed.
  • 2.7K / 240fps — 8x slow motion with excellent quality. Use this for: water splashes, tyre roost, crash analysis, jump apexes in motocross.
  • 1080p / 240fps — 8x slow motion. Lower resolution but useful for long takes where storage matters.

Critical shutter speed setting: At 120fps, set shutter to 1/240s. At 240fps, set shutter to 1/480s. This follows the “180° shutter rule” — shutter speed double the frame rate — and creates natural motion blur that makes slow motion look cinematic rather than stiff.

Stabilization at high frame rates: HyperSmooth Boost is not available at 4K/120fps on the Hero 13 — use Standard mode. The difference is minimal at the speeds involved in slow-motion sequences.

DJI Osmo Action 5 Pro

  • 4K / 120fps — RockSteady 3.0 applies at this mode. Very smooth 4x slow motion suitable for cinematic sequences.
  • 2.7K / 120fps — More stable than 4K at the same frame rate due to slightly more crop tolerance.
  • 1080p / 240fps — 8x slow motion. Adequate for action sequences where full resolution isn’t needed.

Note: The Action 5 Pro does not offer 240fps at 4K. For maximum slow motion quality, use 2.7K or 1080p at 240fps, or 4K at 120fps for the best balance.

Insta360 X5

The X5 handles slow motion differently because of its 360° format:

  • 5.7K 360° / 30fps normal speed — then apply FlowState stabilization and reframe in the app.
  • 4K Single Lens / 100fps — Approximately 3x slow motion. Limited compared to GoPro/DJI for slow motion but the reframing advantage compensates.

For slow-motion motorcycle content with the X5, plan to reframe in the Insta360 Studio app: choose your angle, apply FlowState, then export. The result looks like a tracking shot that follows the action — which is more professional-looking than a fixed-angle slow-motion clip.

Top 8 Motorcycle Slow-Motion Shots Worth Capturing

1. Corner Entry and Exit

At 120fps, the moment of turn-in and lean becomes visually dramatic. Position your chin mount camera and review the footage to see your own body position and technique. For content, corner sequences at 4x slow are universally engaging.

2. Tyre Roost and Gravel Spray

The debris thrown by tyres is invisible in real time — at 240fps it becomes a shower of individual rocks and dust. Best captured from a third-party camera position, not helmet mount.

3. Jump Apex

The split-second when a motorcycle is fully airborne at the top of a jump is peak motocross content. 240fps captures the full arc and landing with enough detail to see suspension compression.

4. Water Splash / River Crossing

Adventure riding through water features is iconic. At 120–240fps, water spray creates dramatic visual patterns. The Osmo Action 5 Pro and GoPro Hero 13 are both fully waterproof — no additional housing needed.

5. Gear Change Sequence

A close-up mount on the gear lever at 240fps captures the mechanical precision of a racing gear change. Difficult to set up but a uniquely detailed shot that enthusiast audiences appreciate.

6. Arrival at a Layby or Summit

Slowing down from cruising speed to a stop at a scenic location — at 120fps this becomes a graceful arrival shot. Pair with wide FOV to include landscape context.

7. Gravel Road Spray

On unpaved roads, the rooster tail of gravel and dust thrown up at speed becomes cinematic at 120fps. Best captured by a second rider following at a safe distance.

8. Low-Sun Riding

Early morning or late evening light creates dramatic lens flare and shadow patterns at regular speed. In slow motion at 120fps, light shifts become visible movement — the landscape changes as you move through it.

Editing Slow-Motion Footage

Key editing principles for slow-motion motorcycle clips:

  • Don’t over-use it — slow motion is most effective as punctuation. Two or three slow-motion moments in a 3–5 minute video is ideal. Full-length slow-motion rides become fatiguing to watch.
  • Match music to playback speed — slow-motion sequences need slower, more dramatic music. Beat-sync slow-motion to a music breakdown is a proven formula.
  • Cut before the interesting moment, not at it — start your slow-motion clip slightly before the peak action. The lead-in makes the action hit harder.
  • DaVinci Resolve’s Speed Ramp — ramp from normal speed into slow motion and back out. This transition style is used in professional automotive and motorcycle content.

For personalized settings recommendations for your specific camera and riding conditions, use our Footage Settings Optimizer tool.

Frequently Asked Questions

Why does my slow-motion footage look choppy?

Most likely cause: the footage was recorded at 120fps but not interpreted correctly in your editing software. Import the clip and change the playback speed to 25% (for 120fps played at 30fps) or confirm your NLE has auto-detected the high frame rate. If using GoPro Quik, the slow motion is applied automatically.

Does slow motion use more battery and storage?

Yes — higher frame rates increase both data rate and processor load. At 4K/120fps on the GoPro Hero 13, battery life drops to approximately 50 minutes vs. 90 minutes at 4K/60fps. Storage: 4K/120fps uses approximately 8–9 GB per hour. Use a 128GB card minimum for extended slow-motion sessions.

What’s the difference between 120fps and 120p on camera menus?

They mean the same thing. Some cameras use “fps” (frames per second) and others use “p” (progressive scan) to describe frame rate. 120fps = 120p = the same 120 frames per second recording mode.

Official resources: GoPro camera specifications | DJI Osmo Action 4 | Insta360 Ace Pro 2.

Glide Gear POV 100 Helmet Mount Review: Can It Handle Motorcycle Vibration?

Glide Gear POV 100 Video Camera DSLR POV Helmet

Reviewed by the Digital Helmet Cameras Editorial Team. Based on manufacturer specifications and publicly available user feedback; not independent lab or road testing. Prices and availability change, so check current listings.

What the Glide Gear POV 100 Actually Is

The Glide Gear POV 100 is a helmet mounting rig designed for mirrorless and DSLR cameras — not action cameras. That’s the essential context for this review. It’s built for the rider or filmmaker who wants to mount a Sony ZV-E10, Fujifilm X-S20, or similar compact mirrorless camera to a helmet for footage quality that action cameras can’t match: real depth of field, interchangeable lenses, and sensor performance in low light that no action cam provides.

If you’re looking for a GoPro or DJI helmet mount, this isn’t it. If you want to mount a larger camera to your helmet and get professional-quality POV footage, read on.

You can find the POV 100 on Amazon or directly at glidegear.net.

Build Quality and Design

The POV 100 is machined aluminum with a robust pivot arm and an integrated elastomer vibration isolation puck — the component that makes the difference between usable and unusable footage when mounted to a vibrating vehicle. The mounting interface is standard 1/4″-20 and 3/8″ screws, compatible with virtually any camera quick-release plate system.

The mount attaches to a helmet via a large, flat adhesive base plate or a strap system depending on the version. The adhesive version is more secure for sustained use; the strap version is better if you’re mounting temporarily or across multiple helmets.

Build quality is clearly above consumer-grade accessories. The pivot arm holds adjustment under load — important because a mirrorless camera and lens combination can easily weigh 1-1.5 lbs, which creates leverage on the mount at speed.

What to Expect on a Motorcycle Helmet

This section is based on the mount’s design and general vibration principles, not our own testing. As an illustrative load, consider a compact mirrorless camera such as a Sony ZV-E10 with a small pancake lens, roughly 0.8 lbs in total:

Vibration Isolation

The elastomer isolation puck is designed to reduce high-frequency vibration from the engine and road surface. Without it, a mirrorless camera on a rigid mount produces footage with a characteristic “jelly” from the rolling shutter that’s difficult to fix in post. Isolation like this reduces the effect but does not eliminate it, and it becomes less effective as speed and camera weight increase.

At higher speeds, aerodynamic forces become a factor. A camera and lens can act as a sail, and any mount can flex under sustained buffeting. For highway touring this is a concern; for canyon riding and lower-speed ADV use it matters less.

Weight Distribution

A 1.5 lb camera mounted to a helmet is noticeable, and neck fatigue after extended wear is a commonly reported issue that doesn’t come up with a lightweight action camera like a GoPro. This is a real constraint — the POV 100 is suited for planned filming sessions, not all-day wearing. Budget your usage accordingly.

Footage Quality

When it works, the footage is in a different league from action cameras. Real shallow depth of field blurs the background while keeping your handlebar or a pursuing rider in sharp focus. Low-light handling is dramatically better. The ability to swap lenses — from a wide 16mm to a 35mm telephoto — gives you creative options that no action camera ecosystem can match.

Setup on a Motorcycle Helmet

  1. Choose a full-face or adventure helmet with a reinforced crown area. The POV 100’s base plate needs a flat, solid surface — flip-up helmets and open-face lids won’t work well.
  2. Mount the base plate centrally for weight balance. Off-center placement adds asymmetric neck load.
  3. Adjust the pivot arm extension to position the lens just above your helmet’s visor line, pointed at your natural eye-level horizon.
  4. Always use a safety tether from the camera body to your helmet strap or chin bar. A dropped mirrorless camera at speed is a serious road hazard.
  5. Route cables cleanly if using power or an external monitor — hook-and-loop straps along the helmet’s edge work well.

Camera Settings for Motorcycle POV

Manual mode is essential for consistent motorcycle footage with a mirrorless camera. Key starting settings:

  • Shutter speed: At least 1/500s to freeze road texture and eliminate rolling shutter jitter
  • Aperture: f/5.6–f/8 for deep depth of field (critical when your focus distance changes constantly at speed)
  • ISO: As low as light permits — keep under 800 for clean footage
  • Autofocus mode: Continuous AF with face/subject tracking if your camera supports it; zone AF otherwise

Who Should Buy the POV 100

The POV 100 is the right tool for a specific type of rider: someone who is filming motorcycle content professionally or seriously, wants footage quality that action cameras can’t deliver, and is willing to manage the weight and planning that a larger camera demands.

It is not the right tool for everyday riding footage, long-distance touring, or anyone who wants a camera they can forget about while riding.

Strengths Limitations
Compatible with mirrorless and DSLR cameras Weight causes neck fatigue on long wearing sessions
Vibration isolation puck designed for lower-speed riding Possible aerodynamic flex at sustained highway speeds
Solid aluminum construction handles the load Significantly more complex setup than action cam mounts
Standard 1/4″-20 interface — works with any camera Requires permanent or semi-permanent helmet modification
Footage quality that action cameras can’t match Not suited for all-day wearing or casual use

If you’re considering the POV 100 for cinematic motorcycle content, also look at alternatives like the SmallRig helmet mount systems designed for mirrorless cameras.

5 Best Action Cameras for Motorcycle Riders: Ranked

Top 5 Best Action Cameras of 2023 |Watch before you Buy

Reviewed by the Digital Helmet Cameras Editorial Team. Based on manufacturer specifications and publicly available user feedback; not independent lab or road testing. Prices and availability change, so check current listings.

Models covered: the cameras named in this guide. Manufacturers release new models regularly, so check current lineups, specifications and prices on the manufacturer pages before buying.

How These Are Ranked

The cameras on this list earned their spots based on published specifications and user-reported performance under vibration, temperature change, and sustained recording — the conditions that define actual motorcycle riding, not controlled studio tests.

This ranking weighs performance under highway commuting, canyon riding, and dirt-road conditions — the situations that define real motorcycle use.

The 5 Best Action Cameras for Motorcycle Riders

1. GoPro Hero 13 Black — Best Overall

Hypersmooth 6.0 stabilization is widely regarded as best-in-class for motorcycle use — it handles the specific combination of engine vibration and road surface feedback that makes other cameras produce blurry, jittery footage. Published sample footage at 4K60fps looks sharp and well exposed.

The Hero 13 is waterproof to 10m without a housing. The new Enduro battery runs significantly longer in cold weather than previous versions — important for early-season mountain riding. The Max Lens Mod 2.0 is worth adding for a 177° field of view that fully captures the peripheral context of riding.

What it doesn’t do well: the compact form factor means battery life at 4K60fps is around 70 minutes. You’ll need spares for a full day. Voice commands can be unreliable over wind and engine noise, so do not depend on them at speed.

Find it on Amazon | More at gopro.com

2. DJI Osmo Action 4 — Best Sensor for Low-Light Riding

The Action 4 has a 1/1.3-inch sensor — the largest in this camera class. At dawn, dusk, or on shaded canyon roads, this translates directly to cleaner, more detailed footage. If a significant portion of your riding happens outside of bright midday conditions, the Action 4’s sensor advantage is worth paying for.

RockSteady 4.0 is excellent. The magnetic quick-release system is faster to operate with gloves than GoPro’s standard finger mount. The front-facing screen is large and readable even at a glance in sunlight. Battery life at 4K60fps runs around 80 minutes — slightly better than GoPro.

The DJI mount ecosystem is smaller than GoPro’s, but the magnetic system compatibility with third-party mounts has grown significantly. If you’re starting fresh rather than expanding an existing kit, this is easier to justify.

Find it on Amazon | More at dji.com

3. Insta360 Ace Pro 2 — Best Stabilization for Rough Terrain

The Ace Pro 2 uses AI-powered Active HDR that automatically adapts to high-contrast lighting — the tunnel exits, forest shadows, and bright alpine open sections that give other cameras exposure fits. The footage comes out usable more consistently than cameras where you need to manually lock settings.

On dirt roads and cobbled surfaces, the stabilization is competitive with GoPro’s Hypersmooth. The 150° field of view gives you an immersive but not distorted image — closer to what your eye actually sees than ultra-wide cameras at 170°+.

Battery life is around 90 minutes at 4K30fps, making it the longest-lasting camera on this list in practical use.

Find it on Amazon | More at insta360.com

4. GoPro Hero 12 Black — Best Value Flagship

The Hero 12 dropped in price significantly after the Hero 13 launched and is now one of the best value propositions in motorcycle cameras. Hypersmooth 5.0 is nearly identical to 6.0 in real-world riding conditions. The 10-bit color, 10m waterproofing, and full GoPro accessory ecosystem are all present.

For riders who already own GoPro mounts and accessories, the Hero 12 is the obvious upgrade path at a price point that makes the decision easy. For new buyers comparing it against the DJI Action 4 at a similar price, the choice comes down to whether you prioritize ecosystem breadth (GoPro) or sensor size and low-light performance (DJI).

Find it on Amazon

5. DJI Osmo Action 3 — Best Under $200

The Action 3 delivers stabilization and image quality that was flagship-tier two years ago, now available for under $200 on sale. RockSteady 3.0 performs reliably on smooth and mixed-surface roads. The metal body dissipates heat well and has a strong reputation for avoiding thermal shutdowns even during sustained summer recording.

Low-light performance falls short of the Action 4 and the GoPros at their current prices. For daytime riding, it’s not a meaningful limitation. For riders who start early or finish late regularly, it is.

Find it on Amazon | More at dji.com

Which Camera Should You Buy?

If you want… Buy this
The best all-around motorcycle camera, no compromises GoPro Hero 13 Black
Better low-light performance and faster mount swaps DJI Osmo Action 4
Long battery life and consistent auto-exposure on long rides Insta360 Ace Pro 2
Flagship-quality footage at a lower price GoPro Hero 12 Black
The best stabilization under $200 DJI Osmo Action 3

For more specific comparisons, see our full motorcycle helmet camera rankings and our GoPro vs DJI vs Insta360 breakdown.

Best Motorcycle Helmet Cameras for Adventure Riding: Top 5 Ranked

Best Motorcycle Helmet Camera 2023 - Top 5 Motorcycle Helmet Camera For Adventure Riding

Reviewed by the Digital Helmet Cameras Editorial Team. Based on manufacturer specifications and publicly available user feedback; not independent lab or road testing. Prices and availability change, so check current listings.

Models covered: the cameras named in this guide. Manufacturers release new models regularly, so check current lineups, specifications and prices on the manufacturer pages before buying.

What Makes a Helmet Camera Work for Adventure Motorcycling

Adventure riding puts camera gear through conditions most action cam reviews don’t cover: sustained vibration over corrugated dirt roads, temperature swings from valley heat to mountain cold in a single day, rain that comes without warning, and riding positions that change constantly between standing on pegs and highway cruising.

These five cameras are well-suited to ADV riding based on their published waterproofing, stabilization, and battery specifications for the vibration, temperature swings, and dust/mud exposure typical of off-road adventure routes.

The 5 Best Motorcycle Helmet Cameras for Adventure Riding

1. GoPro Hero 13 Black — Best All-Around ADV Camera

The Hero 13 remains the benchmark for adventure motorcycle use. Hypersmooth 6.0 stabilization handles the kind of sustained high-frequency vibration that comes from extended gravel road riding — not just smooth tarmac. The 10-bit color and HDR capture retain detail in the high-contrast situations adventure riders encounter constantly: bright sky over dark forest trails, tunnel exits onto sunlit roads.

The Hero 13 is also waterproof to 10m without a housing, which matters when you’re not stopping to bag your camera every time clouds appear. Max Lens Mod compatibility gives you a 177° field of view for the full immersive ADV experience. Battery life is around 70 minutes at 4K60fps — bring two spares for a full day.

Find the Hero 13 on Amazon or at gopro.com.

Best for: Riders who want the most complete, proven system for demanding conditions.

2. DJI Osmo Action 4 — Best Low-Light Performance

The Osmo Action 4’s 1/1.3-inch sensor is the largest in this class. That sensor size matters for adventure riding because you’re often filming at dawn, dusk, or through heavy forest canopy where light is limited. Footage shot in these conditions with the Action 4 is reported to be noticeably cleaner than competing cameras at the same price.

RockSteady 4.0 is excellent. The magnetic quick-release system is faster to operate with gloves on than GoPro’s standard finger mounts — a meaningful practical advantage when swapping the camera between helmet and handlebar mounts during the day.

Current pricing and options at Amazon or dji.com.

Best for: Riders who regularly film in poor light or want the fastest mount swap system.

3. Insta360 Ace Pro 2 — Best for Set-and-Forget Recording

The Ace Pro 2 is well suited to riders who want to record without actively managing the camera. The AI-powered scene detection automatically adjusts exposure for the high-contrast scenarios that fool fixed settings. The Active HDR mode in 4K is designed to deliver more usable footage straight out of camera than manual settings on long rides.

The wide angle (150°) produces less edge distortion than competing ultra-wide cameras — useful when you want the footage to look cinematic rather than fisheye. Stabilization through rough terrain is strong. Battery life at 4K/30fps is around 90 minutes, among the best in this class.

See current options at Amazon or insta360.com.

Best for: Riders who want excellent footage with minimal settings management on long days.

4. GoPro Hero 12 Black — Best Value Flagship

With the Hero 13 available, the Hero 12 has dropped significantly in price and remains a fully capable ADV camera. Hypersmooth 5.0 is nearly identical to 6.0 in real-world motorcycle use. The 10-bit color, waterproofing, and full accessory ecosystem are unchanged.

If you’re already in the GoPro ecosystem with mounts and accessories, the Hero 12 is the obvious value pick. If you’re starting fresh, the price difference makes it worth comparing to the DJI Action 4 before committing.

Find the Hero 12 on Amazon.

Best for: Existing GoPro users, or riders who want flagship-tier performance at mid-range pricing.

5. DJI Osmo Action 3 — Best Budget ADV Option

The Action 3 is now the most affordable camera on this list and still delivers genuinely good ADV footage. RockSteady 3.0 holds up well on mixed surfaces. The camera has a strong reputation for thermal management, with documented reports of no overheating shutdowns during continuous 4K recording even in hot conditions — an area where some flagship cameras struggle.

It lacks the Action 4’s larger sensor, which shows in low-light performance. But for daytime adventure riding — which covers most ADV riding — the Action 3 produces footage that will surprise you given the price.

Current pricing on Amazon or at dji.com.

Best for: Budget-conscious riders who don’t want to compromise stabilization quality.

Side-by-Side Comparison

Camera Stabilization Low-Light Battery (4K60) Waterproof (no housing) Best Use Case
GoPro Hero 13 Black Hypersmooth 6.0 Very Good ~70 min 10m All-around ADV
DJI Osmo Action 4 RockSteady 4.0 Excellent ~80 min 18m Low-light & fast swaps
Insta360 Ace Pro 2 FlowState Very Good ~90 min 10m Set-and-forget recording
GoPro Hero 12 Black Hypersmooth 5.0 Very Good ~70 min 10m Value flagship
DJI Osmo Action 3 RockSteady 3.0 Good ~90 min 16m Budget ADV

Mounting Recommendations for ADV Riders

For adventure motorcycles, chin mounting is the most reliable option on dual-sport and full-face ADV helmets. It produces the most natural POV angle and benefits from reduced wind exposure compared to top and side positions. On helmets with large chin bars (like the Shoei Hornet ADV or Bell MX-9), dedicated chin mount bases are available.

For long-distance ADV touring where you want hands-free recording without actively managing the camera, pair any camera on this list with a handlebar mount as a secondary angle. The handlebar captures your controls and the road ahead, while the helmet cam captures your perspective and reactions.

For detailed mounting guidance, see our complete helmet camera mount guide.

LOOKING DB-05 Helmet Camera Review: Specs, Limits and Who It’s For

Gear Review: LOOKING DB-05 Helmet Camera 2023

Reviewed by the Digital Helmet Cameras Editorial Team. Based on manufacturer specifications and publicly available user feedback; not independent lab or road testing. Prices and availability change, so check current listings.

LOOKING DB-05: What It Is and Who It’s For

The LOOKING DB-05 is a budget-tier helmet camera. This review evaluates it using its published specifications, the manufacturer’s documentation and publicly available user feedback, to help you judge whether it fits motorcycle commuting. We have not independently tested it.

LOOKING is a Chinese brand with limited English-language support, but the DB-05 is widely available. You can check current pricing and availability on Amazon.

Build Quality and Durability

The DB-05 is housed in a hard plastic shell rated to IP68 — fully dust-tight and submersible past a meter. For a motorcycle camera, waterproofing matters: unexpected rain, road spray, and pressure washing are all real-world concerns. The battery and microSD compartment has a proper locking latch, not a rubber flap. That’s a meaningful design choice at this price.

The buttons are described as large and tactile, which should make the camera easier to operate with light gloves, though glove thickness matters.

One thing to flag: adhesive mount bases that ship with budget cameras like this are commonly regarded as adequate but not confidence-inspiring for highway speeds. A third-party metal mount base is a worthwhile upgrade for sustained highway use. Use a safety tether regardless.

Image Quality: What to Actually Expect

The DB-05 uses a 12MP Sony CMOS sensor. The headline specs are 4K at 30fps and 2.7K at 60fps with a 170° ultra-wide field of view. Here is what those specs mean for motorcycle use, based on typical results for cameras in this class:

Setting Typical Result on Motorcycle Suggested Use
4K / 30fps Good detail, slight rolling shutter jitter at speed Use for slower riding or stationary shots
2.7K / 60fps Best overall for moving footage — smoother motion Recommended default for motorcycle use
1080p / 60fps Smallest files, still sharp, easy to edit Good choice for daily commuting

Electronic image stabilization (EIS) in cameras of this class typically works acceptably on smooth tarmac and struggles on rough chip-seal or gravel, where residual jitter is common. It’s not a RockSteady or Hypersmooth, and it shouldn’t be expected to perform like one.

Colour is generally decent in good light. Auto white balance on budget cameras often shifts in shade or low-contrast scenes; locking exposure and white balance helps, but it works around the limitation rather than solving it.

Battery Life on the Motorcycle

The manufacturer rates the battery at 90 minutes, though that figure is typically only achievable at 1080p — expect closer to 80 minutes at 2.7K/60fps with Wi-Fi off, based on user reports. Spare batteries are cheap and small enough to carry in a jacket pocket; two batteries is a reasonable minimum for anything longer than a day trip.

Mounting Options for Riders

The DB-05 uses a GoPro-compatible quick-release buckle system. That means you can use the full GoPro accessory ecosystem for mounts, including:

  • Chin mount: Best overall angle for motorcycle POV footage. The 170° FOV fills the frame naturally from this position.
  • Side mount: Adds a slightly cinematic third-person element. More wind buffeting in the audio.
  • Top mount: Wide sky and road capture — looks dynamic but captures less of the riding experience itself.

Who the LOOKING DB-05 Is For

The DB-05 is a legitimate option for motorcycle commuters who want to capture daily riding without spending GoPro money. It’s also a reasonable choice as a secondary camera — leaving it on the bike while your main camera is mounted to your helmet.

It is not the right tool for track days, sustained highway riding where stabilization quality matters, or serious content creation. The EIS isn’t strong enough and the build quality of the mounts isn’t up to those demands.

If your budget is around $80 and you want a camera specifically for casual motorcycle use, the DB-05 delivers. If you can stretch to $200, the budget cameras we compare at that tier are substantially better performers.

Quick Summary

The assessments below are editorial judgments based on published specifications and user feedback, not test results.

Category Assessment Notes
Image quality (good light) Good Sharp at 2.7K/60fps, natural color
Image quality (low light) Fair Noise appears quickly below bright conditions
Stabilization Fair Works on smooth roads, struggles on rough surfaces
Battery life Good ~80 min per user reports; spares are cheap
Durability Good IP68 waterproofing; upgrade the included mounts
Value for money Good Solid for the price — know what you’re buying

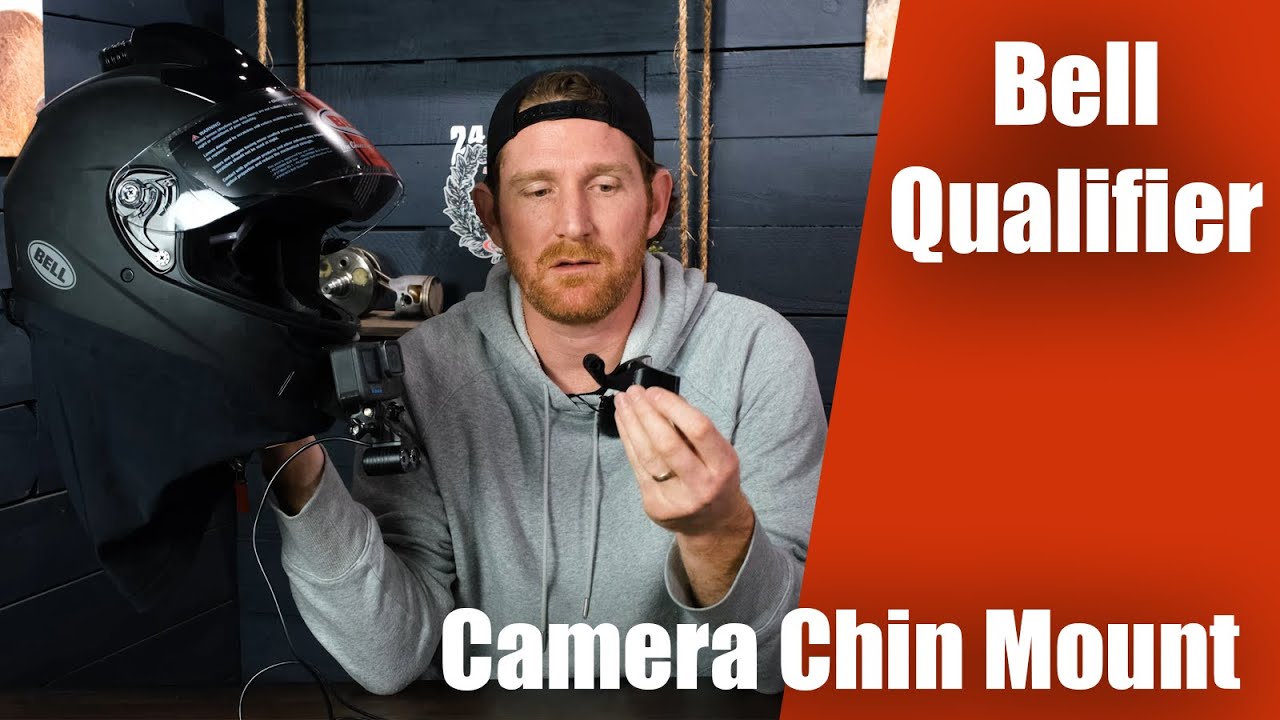
Bell Qualifier Helmet Chin Mount Review: Fit and Compatibility with GoPro, DJI Osmo & Insta360

Bell Qualifier Helmet Chin Mount For GoPro , DJI Osmo, Insta360 Action Cameras | Light Mount

Reviewed by the Digital Helmet Cameras Editorial Team. Based on manufacturer specifications and publicly available user feedback; not independent lab or road testing. Prices and availability change, so check current listings.

Why Chin Mounting Suits the Bell Qualifier

Riders commonly move through a few mounting positions on the Bell Qualifier — crown-mounted adhesive, side mounts clipped to the visor channel — before settling on a chin mount, since a mount aimed too high tends to capture mostly road and sky. Chin mounting is generally considered to give the most usable footage angle on this helmet.

The Bell Qualifier helmet chin mount is designed specifically for this helmet’s chin bar contour. That matters more than it sounds. Generic adhesive mounts that claim universal fit often sit at a slight angle on the Qualifier’s curved chin bar, which means your footage ends up off-horizontal no matter how carefully you align the camera. A purpose-made mount seats flush.

What’s Included and Where to Buy

The most widely used version comes with a curved 3M VHB adhesive base, an adjustable pivot arm, a standard GoPro-style finger mount adapter, and a secondary 1/4″-20 light mount attachment. You can find current options on Amazon. Bell’s accessory page at bellhelmets.com lists OEM-approved mounting options if you want to go that route.

Installing the Mount on the Bell Qualifier

Installation takes about 20 minutes done properly. The 3M VHB adhesive is effectively permanent — once cured, removing it will leave marks on the chin bar. A few things worth knowing before you start:

  1. Use 70% isopropyl alcohol, not acetone. Acetone can dull the paint and weaken the ABS shell beneath it.
  2. Do a dry fit first. The Qualifier’s chin bar tapers slightly toward the edges. Hold the mount in position and look through your visor to confirm the camera lands on your natural eye line — not angled down at the road.
  3. Wait 24 hours before loading a camera. VHB needs a full cure cycle to reach full strength — mounting a camera before the adhesive has cured risks the mount shifting during the first ride.

Camera Compatibility

The mount ships with a GoPro-style prong adapter. For DJI Osmo Action 3 or 4, you’ll need a DJI-to-GoPro adapter or DJI’s own mount plate — both are inexpensive and widely available. For Insta360 (ONE RS, X3, Ace Pro), the standard GoPro prong works directly with Insta360’s included GoPro-compatible baseplates.

What to Expect on a Motorcycle

Based on the mount design and general chin-mount behavior, two things stand out:

Vibration at highway speed: At highway speeds, some high-frequency vibration may show up in GoPro footage unless HyperSmooth is set to its strongest option; DJI’s RockSteady is generally reported to reduce it substantially. The pivot arm introduces a small amount of flex — that’s the tradeoff for adjustability. If you want zero flex, a fixed-arm chin mount is more appropriate for sustained high-speed riding.

Wind noise: The camera sits in relatively clean air at chin height. Wind noise is generally less severe than with top or side mounts, which catch more direct airflow. At 60mph+ you will still want the camera’s wind noise reduction set to high, but chin position is commonly reported to give the cleanest raw audio.

The Secondary Light Mount

The 1/4″-20 light attachment turns the mount into a dual-purpose platform for a compact LED video light on dusk rides. Getting the light angled below the camera’s field of view takes some trial and error — if it sits even slightly too high, it causes direct flare into the lens. For most riders, the light mount is a bonus feature rather than a primary reason to buy.

Verdict: Who Should Buy This

If you ride a Bell Qualifier regularly and want a stable chin mount for action camera footage, the purpose-made fit justifies the price over generic alternatives. The specific contouring to the Qualifier’s chin bar makes a real difference in stability and angle consistency.

If you swap cameras between multiple helmets or want to frequently move the camera between mounts, the permanent adhesive base is a limitation. In that case, pair it with a quick-release plate on top of the pivot arm, such as a Peak Design plate, which makes one-handed camera removal easy.

What Works Well Limitations
Precise fit to Qualifier’s chin bar contour Permanent adhesive — no repositioning after curing
Eye-level angle produces natural POV footage Pivot arm flex at high speed without electronic stabilization
GoPro-standard interface: works with GoPro, DJI, Insta360 Light mount requires careful positioning to avoid lens flare
Less wind noise than top or side mounts Cure time means no same-day installation and riding

For more on chin mounting technique and angle setup, see our full Helmet Camera Mount Guide.

Helmet Safety Standards and Camera Mounts: What You Need to Know

Evolving Helmet Safety Standards and the Impact of Camera Integration

Helmets Are Certified Safety Equipment

Helmets sold for motorcycling, cycling, and other high-risk activities are typically certified against a recognized safety standard — DOT and Snell in the United States, ECE in much of the rest of the world, and various sport-specific standards for cycling and equestrian helmets. These standards test the helmet’s ability to absorb impact and protect the wearer in a crash. That certification applies to the helmet as manufactured — not necessarily to the helmet after aftermarket modification.

How Camera Mounting Can Interact With Helmet Safety

This matters for camera mounting because some mounting methods are more invasive than others:

  • Adhesive mounts (the most common type for action cameras) attach to the outer shell without penetrating it, and are generally considered the lowest-risk mounting method from a certification standpoint.
  • Drilling or cutting into the shell to attach a mount can compromise the structural integrity the certification was based on, even if the change looks minor. This is generally not recommended by helmet or camera manufacturers.
  • Mount position matters too — a rigid mount and camera body sitting directly over a primary impact zone (the crown or the area that typically contacts the ground first in a fall for a given sport) is a different risk profile than one mounted lower or further back.

General Guidance

The most consistent advice across camera and helmet manufacturers is: follow the mount manufacturer’s installation instructions exactly, don’t permanently modify a certified helmet to fit a mount, and check whether your specific helmet manufacturer has published any guidance on accessory mounting (some do, particularly for motorsport and cycling helmets). If in doubt, an adhesive mount designed for your specific helmet’s curvature is the safest default option.

This Isn’t a Legal Conclusion

Helmet certification rules and any regulations around modifying safety equipment vary by jurisdiction and by sport. This is general background information, not legal advice — check your local regulations and your helmet’s specific manufacturer guidance for anything beyond general best practice.

How Action Camera Technology Has Evolved: Resolution, Stabilization, and Battery Life

The Evolution of Helmet Cameras: High-Resolution Video, Battery Innovations, and Advanced Features

How Action Camera Hardware Has Evolved

Action cameras have gone through several generations of meaningful improvement since the category became mainstream. The specific numbers vary by brand and model year, but the general direction of progress has been consistent across the industry.

Resolution and Frame Rate

Early action cameras topped out at standard or high-definition resolution with limited frame rate options. Current cameras commonly shoot 4K at high frame rates as standard, with higher-end models offering even greater resolution for cropping and reframing flexibility in post-production. Higher frame rates at high resolution have also become more accessible, which matters for slow-motion footage of fast-moving action.

Stabilization

This is arguably where the biggest practical improvement has happened. Early cameras relied on physical gimbals or produced noticeably shaky footage from vibration and hand movement. Electronic image stabilization has advanced enough that many current cameras produce gimbal-smooth footage without any external stabilizing hardware, which is a significant difference for helmet-mounted use where the camera is exposed to constant small vibrations.

Battery Life and Charging

Battery capacity and efficiency have both improved, but so have power demands from higher resolutions and processing-heavy features, so real-world runtime hasn’t necessarily grown as fast as capacity numbers alone would suggest. What has clearly improved is charging speed and convenience — fast-charging docks and swappable battery systems have made it much easier to keep a camera running through a full day of use.

Ruggedization

Many current cameras are waterproof to a meaningful depth without needing a separate protective housing, a real change from earlier generations that typically required a bulky external case for any water exposure. This also tends to improve audio quality, since housing-free designs let the microphone pick up sound directly rather than through a plastic case.

What to Take Away

When comparing a current camera against an older model, resolution numbers alone understate the real-world difference — stabilization quality and battery/charging convenience are usually where the generational gap is most noticeable in actual riding conditions.

Insta360 Unveils Advanced Motorcycle Camera Solutions at EICMA 2024

Insta360 Unveils Advanced Motorcycle Camera Solutions at EICMA 2024

Beyond the Helmet: How Insta360’s EICMA 2024 Reveal Redefines Ride Recording

You lean into the perfect hairpin, the bike singing beneath you, only to later find your camera was fixed on your handlebars, missing the crucial interplay of lean and road. You witness a stunning mountain vista, but the audio is a relentless, useless roar of wind. These aren’t just missed shots; they’re lost chapters of your story. Modern motorcycling is an experience to be captured and relived, yet traditional cameras force a limiting choice of perspective.

The solution is a paradigm shift. At EICMA 2024, Insta360 unveiled advanced motorcycle camera solutions designed not just to record, but to comprehensively document. This ecosystem is the key to mastering the art of the ride story, transforming you from a passive recorder into the director of your two-wheeled epic.

Foundational Choices: The New Hardware Ecosystem

Your choice of capture system is the bedrock of your storytelling. Insta360’s 2024 lineup provides specialized tools for different narrative styles, moving beyond the one-size-fits-all approach.

Selection and Sizing – Choosing Your Narrative Lens

Your riding style dictates your primary camera.

The 360-Degree Storyteller: Cameras like the X4 are for the rider who refuses to miss a moment. Mount it once, and in post-production, you choose between a sweeping follow-cam view, a tight shot of the instrument cluster, or a reactive shot of the scenery you just passed. It captures the entire environment, granting total creative freedom later.

The Action-Centric POV: The Ace Pro, especially in its Motorcycle Kit, is for high-intensity, fixed-perspective recording. Its large sensor excels in low-light tunnels and captures crisp, stabilized footage when you want a traditional, immersive first-person view from your helmet.

The Modular Workhorse: The ONE RS system offers adaptability. Swap between a 360 lens and a 4K Boost Lens on the same core, perfect for the rider who wants both narrative options without buying two complete cameras.

Location and Setup – Strategic Mounting for Optimal Capture

Mounting is half the battle. Each location tells a different part of the story.

Helmet Chin: Offers an immersive, rider’s-eye view that matches head movement. It is ideal for technical riding footage but can be susceptible to wind noise.

Helmet Side: Provides a classic “rider profile” angle, excellent for showing lean angle and helmet checks. Ensure the mount is secure to avoid vibration.

Handlebars/Tank: Gives a dynamic, front-facing view of the road and instruments. Use a vibration-dampening adapter to prevent high-frequency shakes from ruining your footage.

Tail/Swingarm: Creates dramatic, trailing shots of the bike and road. This position is exposed to the most debris; use a lens guard religiously.

Core Components & Tech Breakdown

Solution Core Technology Key Characteristics for Riders
Ace Pro Motorcycle Kit 1/1.3″ Sensor, 8K Video Exceptional low-light performance for dawn rides or tunnels; Leica-designed lens ensures sharpness; Motorcycle Bundle includes quiet frame and adhesive mounts to minimize wind noise.
X4 as a Bike Cam 8K 360 Capture, 72MP Photos Shoot first, choose your angle later with revolutionary post-production freedom; Built-in GPS for adding data overlays like speed and route; 10-bit color for richer, more editable footage.
ONE RS Modular System Interchangeable Lens Mods Ultimate flexibility—switch between a 360 lens for adventures and a 4K lens for track days; Cost-effective way to access multiple shooting styles.

The Core System: Management and Control

A motorcycle camera is a dynamic system. Controlling these three variables transforms raw clips into cinematic sequences.

Perspective & Framing

The Target: To create dynamic, multi-angle edits that look like you had a chase car and a drone, all from a single 360 camera.

The Consequence: Without active reframing, 360 footage remains a flat, spherical curiosity. Static, single-perspective shots fail to engage an audience.

The Tools: This is where Insta360’s software shines. Use Auto Frame to let AI track you and the action automatically. For full control, use Keyframing in Insta360 Studio or the app to smoothly direct the viewer’s eye from a wide establishing shot to a tight detail, crafting a professional narrative flow.

Audio Fidelity

The Target: A balanced audio mix: clear voice comms, the visceral growl of your engine, and the ambient sounds of the environment, all free from destructive wind roar.

The Consequence: Unwatchable footage. Deafening wind noise is the number one killer of motorcycle video audio.

The Tools: Start with hardware: use the Motorcycle Kit’s “quiet frame” or a dedicated foam windslip. For 360 cams, position the camera closer to your body to use it as a windbreak. In post, leverage the new Wind Noise Reduction algorithms in Insta360’s desktop software for a final, clean polish.

Stabilization & Dynamic Range

The Target: Silky-smooth footage on bumpy backroads, with detail preserved in both shadowy forest roads and glaringly bright asphalt.

The Consequence: Jerky, nauseating video or footage where the sky is a white blob and the tunnel is a black hole.

The Tools: FlowState Stabilization (especially in 360 mode) is your invisible gimbal. For high-contrast scenes, enable Active HDR on compatible cameras to balance light and dark areas. Use 4K 120fps slow-motion (Ace Pro) to dramatically highlight critical moments like a perfect apex or a trail obstacle.

Advanced Practices: The Art of the Ride Edit

Capture is only data. Editing is where you build your story.

Preparation: Workflow Foundations

Adopt a ruthless file management system. Create a folder for each ride date. Use the Insta360 app to quickly generate and export highlight clips for social media, but for serious projects, transfer the full original files to a computer. Your first edit should always be a “selects” timeline—a string of your best, unedited moments from the day.

Ongoing Inputs: Editing Techniques

For 360 footage, start your edit in Insta360’s dedicated software to set your keyframes and perspectives, then export those angles as standard video files for fine-cutting in your preferred editor. Master the “invisible selfie stick” effect, where the stick holding the 360 camera is automatically erased, creating magical floating third-person shots. Sync multiple camera angles using a common audio track or a visual cue like a turn signal flash.

Selection and Strategy: Crafting the Narrative

Choose clips that show progression: a wide landscape, then a tight shot of you reacting to it. Select moments that demonstrate skill—a smooth downshift, a controlled brake—not just speed. Sequence for emotional impact: build anticipation with winding road shots, release it with an open straight, and conclude with a satisfying destination shot. Your soundtrack should follow this same arc.

Threat Management: Problem Prevention & Solution

Proactive habits prevent heartbreak.

Prevention: The Pre-Ride Checklist

This five-minute ritual saves hours of grief. 1) Lens Inspection: Clean with a microfiber cloth; a smudge ruins every shot. 2) SD Card: Format it in-camera to ensure compatibility and free space. 3) Power: Confirm all batteries are at 100%. 4) Mount Integrity: Tug on the camera; check adhesive mounts for lifting. 5) Test Record: Do a 30-second recording and review playback for issues.

Intervention: Troubleshooting Common Issues

Adopt a diagnostic mindset:

Issue: Footage is shaky.

Response: Tier 1: Ensure mount is tight and on a solid surface. Tier 2: Verify FlowState Stabilization is enabled in camera settings. Tier 3: Apply a vibration-dampening base.

Issue: File corruption or camera freeze.

Response: Tier 1: Power cycle the camera. Tier 2: Try a different, high-speed V30-rated SD card. Tier 3: Connect to Insta360 app for a firmware check/reinstall.

The Action Plan: A Rider’s Seasonal Camera Guide

Season/Phase Primary Tasks What to Focus On
Summer / Touring Charge multiple batteries. Clean lenses at every fuel stop. Use highest bitrate (e.g., 8K/5.7K) for key scenic rides. Pack lens guards for gravel roads. Long, sweeping scenic shots. Time-lapses of changing landscapes. Capturing the full story of multi-day journeys.
Fall / Canyon Riding Utilize Active HDR for mixed light under trees. Leverage 120fps slow-mo for dramatic cornering shots. Secure mounts for aggressive riding. Dynamic, action-oriented editing. Showing technical skill and bike control. The interplay of light, shadow, and motion.
Winter / Cold & Storage Fully charge, then remove batteries from cameras. Store equipment in a sealed, dry container with desiccant. Archive and organize year’s footage. Editing your best clips into a year-end highlight reel. Planning camera angles and stories for the next season.

The principle is now clear: total environmental capture leads to total creative freedom. Your journey evolves from selecting a camera to strategically mounting it, managing its digital variables, and finally crafting a compelling narrative in the edit bay. The tools unveiled by Insta360 at EICMA 2024 empower this entire process. They transform you from a passenger in your own story to its author. The reward is no longer just a ride logged, but an adventure perfected—an unparalleled archive where every road, every corner, and every vista is captured not just as it happened, but as you felt it. Your two-wheeled masterpiece awaits its director.

Helmet Camera Rules in Equestrian Sports: What Riders Should Know

Navigating the Debate: The Evolution of Helmet Camera Policies in Equestrian Sports

Camera Rules Vary by Discipline and Organization

Unlike motorsport or action-sports filming, equestrian competition doesn’t have one universal rule about helmet cameras. Different disciplines and different governing and show organizations set their own policies, and those policies can differ significantly — some events welcome cameras without restriction, others require prior approval, and some restrict or prohibit recording devices during competition rounds entirely.

Common Reasons Organizations Regulate Cameras

While specific rules vary, the underlying concerns tend to fall into a few general categories:

  • Rider and horse safety. Some organizations are cautious about any equipment attached to a helmet that wasn’t part of its original certified design, out of concern for how it might behave in a fall.
  • Fairness and privacy for other competitors. Recording during a shared warm-up area or a judged test can raise questions about capturing other riders or horses without their knowledge.
  • Distraction concerns. Devices that require any interaction during a round (starting/stopping recording, checking a screen) can conflict with rules focused on rider focus and horse welfare.

What This Means for Riders

Because rules differ by organization and even by specific show or venue, the only reliable approach is to check the current rulebook or ask event organizers directly before mounting a camera for a competition round — don’t assume that because a camera was fine at one show, or in training, it will be permitted at another. Schooling shows, clinics, and casual riding are generally far less restrictive than sanctioned competition, which is why most riders’ helmet-camera footage comes from training rather than competition rounds.

A Reasonable Default

If you’re unsure, treat competition rounds as camera-restricted by default and confirm permission in advance, while using your camera freely during lessons, schooling, and practice — the settings where the footage is usually most useful for actually improving your riding anyway.

Get Your Download Immediately

Get Instant access to our Digital Helmet Camera ebook

You have Successfully Subscribed!