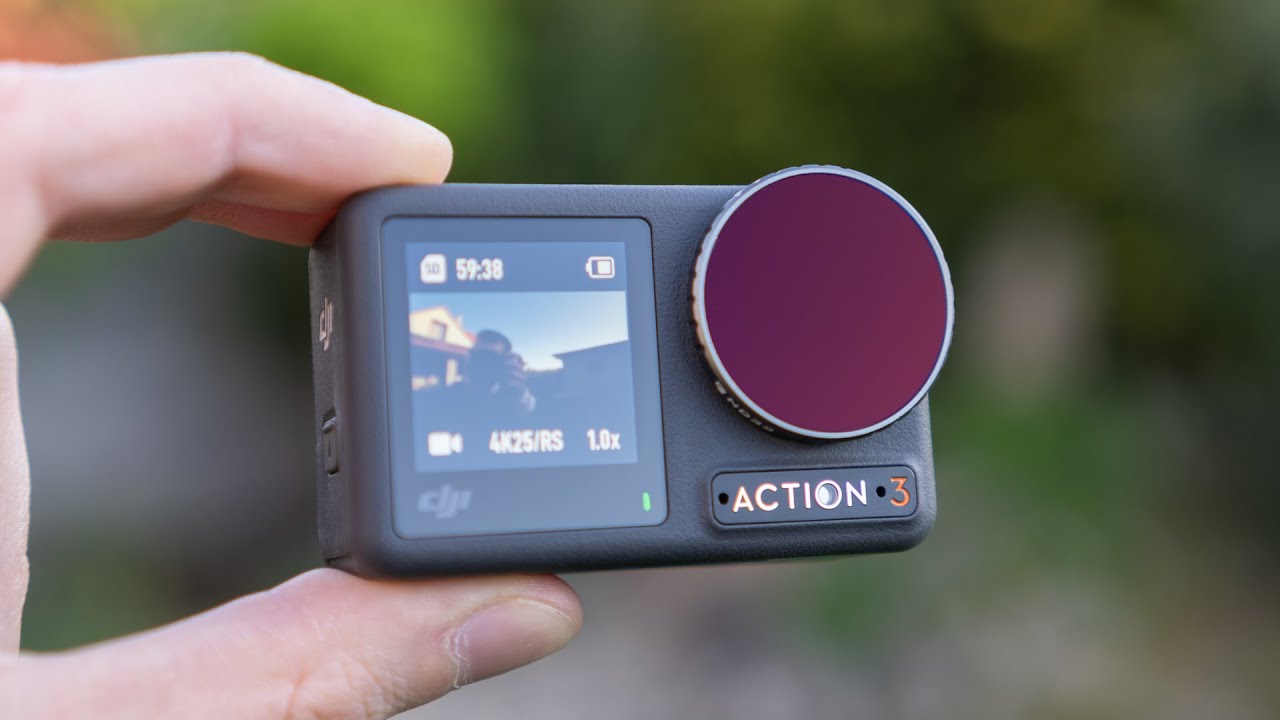
DJI Osmo Action 3: Ultra Wide vs Wide Angle for Motorcycle Filming

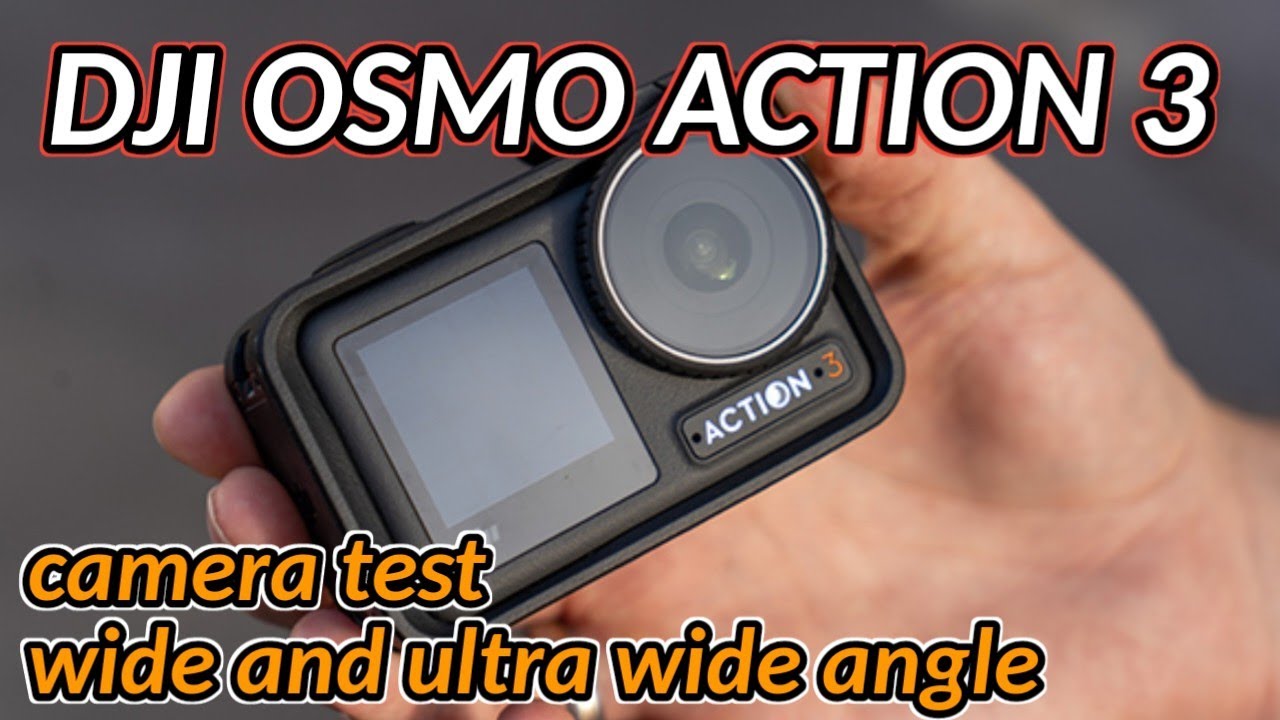
DJI OSMO ACTION 3 CAMERA TEST | 1080P 60FPS | ULTRA WIDE and WIDE angle | next video for review

Reviewed by the Digital Helmet Cameras Editorial Team. Based on manufacturer specifications and publicly available user feedback; not independent lab or road testing. Prices and availability change, so check current listings.

Why Field of View Matters More Than Most Riders Realize

The DJI Osmo Action 3 offers two primary field of view (FOV) modes: Ultra Wide (about 155°) and a narrower Wide mode (roughly 145°; check DJI’s spec page for exact figures). That difference sounds small on paper. On a motorcycle, it has a meaningful effect on how your footage looks, how well stabilization performs, and how natural the riding perspective appears to a viewer.

This guide compares both settings across the conditions that matter most for motorcycle use (winding roads, highway sections and scenic overlooks), based on how field of view and stabilization interact, to help you choose which to use and when to switch.

Understanding the Two FOV Modes

Ultra Wide

The Ultra Wide setting captures almost the full peripheral field of vision — you see the full width of a canyon road, the sky above, and the road surface below simultaneously. For motorcycle riding, this creates a highly immersive first-person perspective. It’s also more forgiving for mounting angle: small errors in vertical alignment matter less when you’re capturing such a broad swath of the scene.

The tradeoff is distortion. At this angle, the edges of the frame curve noticeably. Straight road edges and horizon lines bow. This looks natural for action footage — our brains accept the fisheye perspective in an action context. It looks wrong in any situation where the camera is meant to represent natural vision, like a slow-paced scenic ride where distortion draws attention to itself.

Wide (narrower)

The narrower Wide setting produces a more natural-looking image with significantly less edge distortion. Straight lines stay straighter. The horizon reads as horizontal. The perspective is closer to what a camera mounted at eye level would naturally see.

The tradeoff: you lose scene coverage at the edges. In tight canyon sections where the road curves close to both sides of the frame, you may clip the edge of the road. For riders who publish content where visual quality matters over immersiveness — touring videos, scenic route documentation — Wide often produces more polished-looking footage.

Stabilization: How FOV Affects Performance

The Osmo Action 3’s RockSteady stabilization works by digitally cropping into the recorded frame to compensate for movement. Ultra Wide mode, with its larger original field of view, gives the stabilization algorithm more pixel data to work with before the crop.

The likely result: stabilization has slightly more room to work in Ultra Wide mode, so on rough chip-seal roads Ultra Wide footage may be marginally smoother than Wide footage with the same settings. Any difference is small, and results vary with mount, road surface and settings.

For most paved motorcycle riding, both modes stabilize well. If you’re doing off-road or ADV riding on rough surfaces, Ultra Wide gives the stabilization algorithm more headroom.

Which FOV Suits Which Scenario

These suggestions are based on how each mode behaves, not on measured results.

Scenario Better FOV Why
Tight canyon roads with close walls or guardrails Ultra Wide Captures full road width; immersive feel matches the confined space
Open mountain highways with long sight lines Wide Reduces distortion; horizon looks natural in scenic footage
Dense forest single-track or ADV trails Ultra Wide Maximum coverage; stabilization handles rough surface better
Group ride footage looking back at following riders Wide Less facial distortion on riders close to frame edges
Selfie-style clips at pull-offs Ultra Wide Includes more background scenery at arm’s length
Tunnel entry/exit transitions Ultra Wide More scene data helps stabilization handle the camera adjustment

1080p 60fps: Why This Resolution Makes Sense for Motorcycle Riders

1080p at 60fps is often underestimated as a “lesser” setting compared to 4K, but for motorcycle riders it’s worth understanding when it makes sense:

  • Storage efficiency: 1080p/60fps files are roughly 25% the size of 4K/60fps files. On a long touring day, this matters for card capacity.
  • Playback compatibility: 1080p is natively compatible with every platform and device without transcoding.
  • Slow motion: 1080p/60fps plays back at 2x slow motion in a 30fps timeline — enough for smooth corner highlights without stepping up to 4K/120fps (which produces much larger files).

For daily riding documentation and social media, 1080p/60fps is a practical choice. For content you plan to display on large screens or that represents showcase routes, 4K is worth the storage.

Recommended Settings for Motorcycle Use

A suggested starting configuration for the DJI Osmo Action 3 on a motorcycle (adjust to your conditions):

  • FOV: Ultra Wide as default; switch to Wide for open, scenic routes or group footage
  • Resolution: 4K/60fps for canyon riding and feature content; 1080p/60fps for all-day touring
  • Stabilization: RockSteady ON for all moving footage; HorizonSteady for switchback and aggressive cornering sections
  • White Balance: Auto on sunny days; lock to Cloudy (6500K) on overcast days to prevent color shift

Find the DJI Osmo Action 3 on Amazon or at dji.com. For detailed setup and mounting guidance, see our full DJI Action Camera guide.

Glide Gear POV 100 Helmet Mount Review: Can It Handle Motorcycle Vibration?

Glide Gear POV 100 Video Camera DSLR POV Helmet

Reviewed by the Digital Helmet Cameras Editorial Team. Based on manufacturer specifications and publicly available user feedback; not independent lab or road testing. Prices and availability change, so check current listings.

What the Glide Gear POV 100 Actually Is

The Glide Gear POV 100 is a helmet mounting rig designed for mirrorless and DSLR cameras — not action cameras. That’s the essential context for this review. It’s built for the rider or filmmaker who wants to mount a Sony ZV-E10, Fujifilm X-S20, or similar compact mirrorless camera to a helmet for footage quality that action cameras can’t match: real depth of field, interchangeable lenses, and sensor performance in low light that no action cam provides.

If you’re looking for a GoPro or DJI helmet mount, this isn’t it. If you want to mount a larger camera to your helmet and get professional-quality POV footage, read on.

You can find the POV 100 on Amazon or directly at glidegear.net.

Build Quality and Design

The POV 100 is machined aluminum with a robust pivot arm and an integrated elastomer vibration isolation puck — the component that makes the difference between usable and unusable footage when mounted to a vibrating vehicle. The mounting interface is standard 1/4″-20 and 3/8″ screws, compatible with virtually any camera quick-release plate system.

The mount attaches to a helmet via a large, flat adhesive base plate or a strap system depending on the version. The adhesive version is more secure for sustained use; the strap version is better if you’re mounting temporarily or across multiple helmets.

Build quality is clearly above consumer-grade accessories. The pivot arm holds adjustment under load — important because a mirrorless camera and lens combination can easily weigh 1-1.5 lbs, which creates leverage on the mount at speed.

What to Expect on a Motorcycle Helmet

This section is based on the mount’s design and general vibration principles, not our own testing. As an illustrative load, consider a compact mirrorless camera such as a Sony ZV-E10 with a small pancake lens, roughly 0.8 lbs in total:

Vibration Isolation

The elastomer isolation puck is designed to reduce high-frequency vibration from the engine and road surface. Without it, a mirrorless camera on a rigid mount produces footage with a characteristic “jelly” from the rolling shutter that’s difficult to fix in post. Isolation like this reduces the effect but does not eliminate it, and it becomes less effective as speed and camera weight increase.

At higher speeds, aerodynamic forces become a factor. A camera and lens can act as a sail, and any mount can flex under sustained buffeting. For highway touring this is a concern; for canyon riding and lower-speed ADV use it matters less.

Weight Distribution

A 1.5 lb camera mounted to a helmet is noticeable, and neck fatigue after extended wear is a commonly reported issue that doesn’t come up with a lightweight action camera like a GoPro. This is a real constraint — the POV 100 is suited for planned filming sessions, not all-day wearing. Budget your usage accordingly.

Footage Quality

When it works, the footage is in a different league from action cameras. Real shallow depth of field blurs the background while keeping your handlebar or a pursuing rider in sharp focus. Low-light handling is dramatically better. The ability to swap lenses — from a wide 16mm to a 35mm telephoto — gives you creative options that no action camera ecosystem can match.

Setup on a Motorcycle Helmet

  1. Choose a full-face or adventure helmet with a reinforced crown area. The POV 100’s base plate needs a flat, solid surface — flip-up helmets and open-face lids won’t work well.
  2. Mount the base plate centrally for weight balance. Off-center placement adds asymmetric neck load.
  3. Adjust the pivot arm extension to position the lens just above your helmet’s visor line, pointed at your natural eye-level horizon.
  4. Always use a safety tether from the camera body to your helmet strap or chin bar. A dropped mirrorless camera at speed is a serious road hazard.
  5. Route cables cleanly if using power or an external monitor — hook-and-loop straps along the helmet’s edge work well.

Camera Settings for Motorcycle POV

Manual mode is essential for consistent motorcycle footage with a mirrorless camera. Key starting settings:

  • Shutter speed: At least 1/500s to freeze road texture and eliminate rolling shutter jitter
  • Aperture: f/5.6–f/8 for deep depth of field (critical when your focus distance changes constantly at speed)
  • ISO: As low as light permits — keep under 800 for clean footage
  • Autofocus mode: Continuous AF with face/subject tracking if your camera supports it; zone AF otherwise

Who Should Buy the POV 100

The POV 100 is the right tool for a specific type of rider: someone who is filming motorcycle content professionally or seriously, wants footage quality that action cameras can’t deliver, and is willing to manage the weight and planning that a larger camera demands.

It is not the right tool for everyday riding footage, long-distance touring, or anyone who wants a camera they can forget about while riding.

Strengths Limitations
Compatible with mirrorless and DSLR cameras Weight causes neck fatigue on long wearing sessions
Vibration isolation puck designed for lower-speed riding Possible aerodynamic flex at sustained highway speeds
Solid aluminum construction handles the load Significantly more complex setup than action cam mounts
Standard 1/4″-20 interface — works with any camera Requires permanent or semi-permanent helmet modification
Footage quality that action cameras can’t match Not suited for all-day wearing or casual use

If you’re considering the POV 100 for cinematic motorcycle content, also look at alternatives like the SmallRig helmet mount systems designed for mirrorless cameras.

DJI Osmo Action 3 on a Motorcycle: 10 Shots Worth Capturing (Mounts & Settings)

Reviewed by the Digital Helmet Cameras Editorial Team. Based on manufacturer specifications and publicly available user feedback; not independent lab or road testing. Prices and availability change, so check current listings.

Why the DJI Osmo Action 3 Works Exceptionally Well on a Motorcycle

Most cameras can record motorcycle riding. Few do it well. The Osmo Action 3 is one of the few — RockSteady 3.0 handles vibration that makes other cameras produce blurry footage, the magnetic mount system is fast to operate with gloves, and the 16m waterproofing means you don’t have to think about rain.

But knowing the camera is capable and knowing how to use it are different things. These are the 10 shots worth capturing — the angles, settings, and scenarios where the Action 3 can produce footage worth keeping.

Essential Setup Before You Ride

Before getting into the shots: pre-configure three video modes in the Action 3’s quick-toggle menu so you can switch without entering full settings mid-ride.

  • Mode A: 4K / 60fps / RockSteady ON — your default for most riding
  • Mode B: 1080p / 120fps / RockSteady ON — for slow-motion highlights
  • Mode C: 4K / 30fps / HorizonSteady ON — for scenic and overlook shots

10 Shots Worth Capturing on Your Motorcycle

1. The Canyon Entry — Chin Mount, 4K60fps

The moment a road transitions from straight to winding is one of the most satisfying in motorcycling. Capture it from a chin mount with the camera angled to show the road ahead and the first curve. The Action 3’s RockSteady keeps the frame steady as you begin banking through the first corners. This shot works best with the entrance fully framed — leave it rolling for 60-90 seconds rather than starting and stopping.

2. The Tight Switchback — Chin Mount, HorizonSteady ON

Aggressive switchbacks produce footage where the horizon tilts dramatically without horizon lock. Switch to Mode C (HorizonSteady) for mountain switchback sequences. The camera maintains a level frame even as you bank to extreme lean angles, producing footage that conveys the tightness of the turn without making the viewer disoriented.

3. The Handlebar Shot — Handlebar Mount, 4K60fps

The DJI magnetic system makes it easy to run a second mount. A camera on the left handlebar pointing back and slightly down captures your controls, your gear, and the road surface behind the front wheel. This angle makes a compelling B-roll cut for any edited motorcycle video — it shows speed through road detail rather than distant scenery.

4. The Alpine Overlook — Tripod, Timelapse Mode

When you stop at a high-elevation overlook, set the Action 3 on its included frame as a mini-tripod and run a timelapse while you take a break. The built-in timelapse with interval shooting produces stunning cloud movement and shadow play across mountain terrain. Aim for 30-minute timelapses at 2-second intervals — this yields about 15 seconds of compressed footage that captures the whole sky changing.

5. The Group Ride — Chin Mount, 4K60fps, Looking Back

A chin mount tilted slightly back (5-10 degrees upward) captures riders following you through corners. RockSteady keeps your head movements from creating jarring cuts. This is one of the most compelling angles for group ride footage — it shows the pack flowing through the same curves you just navigated. Ask riders to maintain consistent spacing for a cleaner shot.

6. The Dawn Start — Handlebar Mount, 4K30fps

Early light on empty roads is photogenic but challenging. Set the handlebar-mounted camera to 4K/30fps (less data demand on the processor, better low-light handling) and let it run from before sunrise through the first hour of riding. Expect some noise in very low light, since small sensors are the main limitation here. An empty road transitioning from dark to golden light usually makes for attractive footage.

7. The Slow-Motion Corner Exit — Chin Mount, 1080p/120fps

Switch to Mode B (120fps slow-motion) when you hit a series of flowing corners you want to capture in detail. The 120fps footage plays back at 4x slow motion, showing the lean angle, tire contact, and exit line in a way that 60fps can’t. These clips cut well between real-time canyon footage — the contrast between full speed and slow motion makes both feel more dynamic.

8. The Rest Stop Portrait — Selfie Mode, Wide FOV

The Action 3’s front screen and wide field of view make it an easy selfie camera at fuel stops and scenic pull-offs. Hold it at arm’s length at helmet height to include your surroundings in the frame. The magnetic mount makes it fast to detach from the helmet mount and hold handheld without tools. These clips add a personal dimension to riding footage that pure POV angles don’t provide.

9. The Tunnel Pass — Handlebar Mount, 4K60fps, EV Locked

Tunnels are exposure nightmares for auto-exposure cameras — they enter bright, go dark, then exit bright again, and the camera chases exposure the whole time. Before entering a tunnel, lock your exposure manually in the Action 3’s settings to the midpoint (tap the screen, hold, and set EV). The footage won’t be perfectly exposed throughout, but it will be consistent and usable, which is more valuable than auto-exposure that’s always wrong.

10. The Arrival — Chin Mount, 4K60fps

The approach to a destination — a mountain town, a summit, a campground — is the natural ending shot of any motorcycle footage. Let the camera run for the final five miles of the day. The footage of pulling in, stopping, and removing your helmet is a natural, satisfying conclusion to any riding video.

Settings Reference

Shot Type Resolution / FPS Stabilization Mounting Position
General riding 4K / 60fps RockSteady ON Chin mount
Tight corners / switchbacks 4K / 30fps HorizonSteady ON Chin mount
Slow-motion highlights 1080p / 120fps RockSteady ON Chin mount
Handlebar / road detail 4K / 60fps RockSteady ON Left handlebar, facing back
Timelapse at overlooks Timelapse mode Not needed (static) Tripod / frame stand
Tunnel transitions 4K / 60fps RockSteady ON Handlebar, EV locked manual

Find the DJI Osmo Action 3 on Amazon or at dji.com. For mounting options specific to motorcycle helmets, see our helmet camera mount guide.

DJI Osmo Action 3 vs Insta360 X3 vs GoPro Hero 11 for Motorcycles: Comparison

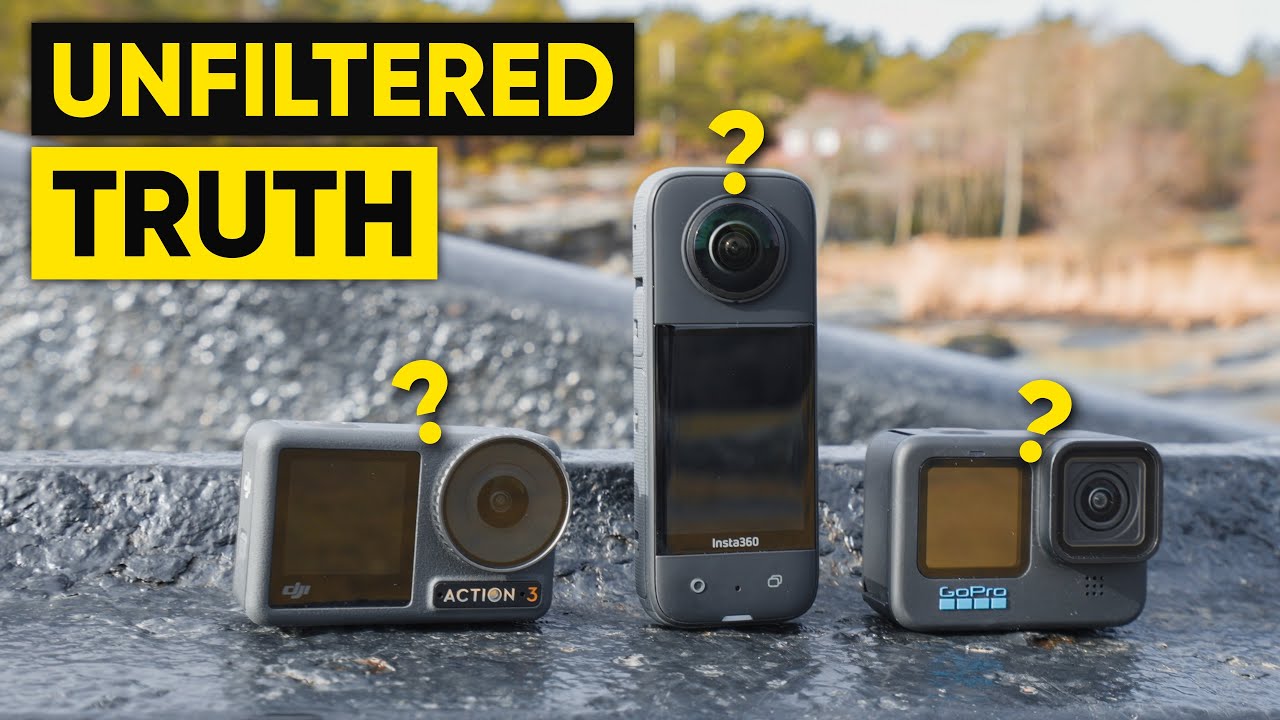
DJI Action 3 vs Insta360 X3 vs GoPro HERO 10/11 - 6 Months Later HONEST Review!

Reviewed by the Digital Helmet Cameras Editorial Team. Based on manufacturer specifications and publicly available user feedback; not independent lab or road testing. Prices and availability change, so check current listings.

What Matters for Motorcycle Riders

This comparison looks at the DJI Osmo Action 3, the Insta360 X3 and the GoPro Hero 11 Black side by side, not just by which has the highest spec on paper but by which is designed to hold up to daily riding. It draws on manufacturer specifications and publicly available owner feedback; we have not run our own head-to-head test.

All three are older models. Check current lineups from DJI, Insta360 and GoPro before buying; this comparison is best used as a value guide.

DJI Osmo Action 3

Strengths

The magnetic mount system is one of the Action 3’s standout features for motorcycle use. It is designed to make swapping the camera between a helmet and a handlebar mount quick, even with gloves on, and it is generally described as faster than the mounts on the other cameras here.

DJI has shipped firmware updates that improved stabilization since launch, and HorizonSteady mode is reported to handle aggressive lean angles well, which matters on winding roads where you are constantly banking through corners.

Limitations

Low-light performance is the Action 3’s most commonly reported weakness. Dawn starts and tunnel passages are reported to produce more noise than the GoPro and more still than the Action 4. For riders who do a lot of early-morning or late-evening riding, this is a real limitation.

The companion app (DJI Mimo) is stable but basic. For anything beyond quick previews and simple edits, expect to move files to a desktop.

Insta360 X3

Strengths

The ability to decide on framing after the ride is a genuine advantage of 360° footage. When something unexpected happens, such as wildlife crossing or a scenic moment, the X3 captures the whole scene, which can turn footage that would otherwise be discarded into well-composed clips in post.

Insta360’s mobile app offers AI-assisted Auto Frame, which tracks movement and produces edits automatically. For sharing on social media without desktop editing time, this is the fastest workflow of the three cameras.

Limitations

The dual-lens bubble design calls for a protective case for serious motorcycle use, since gravel, road grit and low-speed tip-overs threaten the lenses. With a case, the camera is bulkier than either competitor and more aerodynamically intrusive on the helmet.

Battery life in 360° mode is the shortest of the three, at roughly 60-65 minutes by published and user-reported figures, so a full riding day means more battery management. Single-lens 4K mode extends runtime but loses the reframing advantage.

Low-light 360° footage tends to show more grain than single-lens mode, since the dual-lens design limits sensor size per lens.

GoPro Hero 11 Black

Strengths

The ecosystem is the Hero 11’s biggest advantage. Third-party mounts, lens mods and accessories are widely available. The Max Lens Mod gives a 177° field of view that approaches the X3’s immersiveness for a fraction of the bulk, and the accessory library means you can solve almost any mounting challenge without custom solutions.

In low light, GoPro’s larger sensor is generally reported to give the Hero 11 the cleanest footage of the three, with better dynamic range and less noise at dawn or in shaded forest roads.

Limitations

Touchscreens on most action cameras become less responsive in cold weather or with gloves, and the Hero 11 is no exception. Set modes before you ride.

Charging speed is the weakest of the three. On long days, topping up a battery during a rest stop takes longer than with DJI’s fast-charge system.

Which Camera for Which Rider

Rider Type Suggested Camera Why
Daily commuter and weekend rider who wants minimal hassle DJI Osmo Action 3 Quick mount swaps, HorizonSteady stabilization, fast charging on the go
Content creator who publishes riding footage regularly Insta360 X3 Reframe after the ride; saves footage you would otherwise discard
Rider who prioritizes footage quality in all light conditions GoPro Hero 11 Black Strong low-light reputation, most complete accessory ecosystem

Based on published specifications and owner feedback: the DJI Osmo Action 3 suits daily riding best, the GoPro Hero 11 is the strongest choice for dawn and mountain riding where low light matters, and the Insta360 X3 is worth the extra bulk specifically for content that will be edited and shared, where the reframing workflow pays off.

Check current pricing: DJI Osmo Action 3 on Amazon | Insta360 X3 on Amazon | GoPro Hero 11 Black on Amazon

See also our GoPro vs DJI vs Insta360 comparison for a comparison that includes newer models.

DJI Osmo Action 3 for Motorcycle Riding: Long-Term Durability Considerations

DJI OSMO ACTION 3 Long Term Review

Reviewed by the Digital Helmet Cameras Editorial Team. Based on manufacturer specifications and publicly available user feedback; not independent lab or road testing. Prices and availability change, so check current listings.

Why Long-Term Use Matters

Most action camera reviews are written within days of unboxing. That is useful for specs and first impressions, but it says less about what matters for motorcycle riders: how a camera holds up after months of engine vibration, UV exposure, temperature cycling and regular use. This guide looks at those long-term considerations for the DJI Osmo Action 3 using DJI’s published specifications, general knowledge of how action cameras age, and publicly available owner feedback. We have not run our own long-term test.

The Osmo Action 3 is an older model, and DJI has since released newer Osmo Action cameras. Treat this as a value and durability guide, and check DJI’s current lineup before buying.

What Tends to Matter Over Time

The Magnetic Mount System

The magnetic quick-release system is one of the Action 3’s headline features. It is designed to let you move the camera from a helmet chin mount to a handlebar mount quickly, even with gloves on. Magnetic mounts are sometimes assumed to be less secure than mechanical locks at highway speed, but DJI designed the system to hold reliably. A wrist tether or safety strap is still sensible insurance regardless of mount system.

Heat

Early Action 3 reviews in 2022 flagged overheating as a concern. In motorcycle use this is generally less of an issue, because a helmet-mounted camera sits in moving air, and DJI has released firmware updates that address thermal behavior. The scenario to watch is stationary recording in direct sun, such as a long stop with the camera running and facing the sun. Stop recording during extended breaks, which also saves storage.

Stabilization

RockSteady 3.0 is software-driven, so stabilization quality does not depend on mechanical wear. On smooth tarmac, electronic stabilization can produce very smooth footage. On rough chip-seal roads, some residual jitter is normal with any electronic stabilization system. HorizonSteady keeps the frame level through lean angles and is popular for canyon riding.

Battery Aging

Lithium-ion batteries lose capacity gradually with charge cycles. After a year or more of regular use, it is reasonable to expect noticeably shorter runtimes than the rated figure, and a spare battery that has seen fewer cycles will hold up better. This is normal aging and applies to GoPro and Insta360 batteries too. A USB-C power bank and a charging routine at fuel stops help on touring days.

Common Wear Points to Inspect

  • Lens protector: Front protectors collect micro-scratches from dust and grit. Replacement protectors are inexpensive, and replacing them periodically is normal maintenance.
  • Touchscreen: Touchscreens on most action cameras become less responsive in cold weather or with gloves, so plan to set modes before you ride.
  • Battery door and seals: Inspect latches and seals periodically, especially after dusty or wet rides, since waterproofing depends on them.

Firmware Updates

DJI has released firmware updates for the Action 3 since launch, including stabilization and exposure improvements. Check for updates periodically via the DJI Mimo app or dji.com’s downloads page.

Is It Worth Buying Now?

Because newer models exist, the Action 3 is often available at a lower price than at launch. For riders who mostly ride in good light and prioritize value, it can still be a sensible choice. The Action 4’s larger sensor is generally considered a meaningful upgrade for low-light riding. Check the current price on Amazon or at dji.com for bundle options.

Long-Term Summary

Factor What to expect Notes
Magnetic mount Designed for repeated use Use a tether regardless
Stabilization Software-based; does not wear Firmware updates may improve it
Battery life Declines gradually with cycles Normal lithium-ion aging
Heat Less of an issue in moving air Avoid stationary recording in direct sun
Wear items Lens protector, seals, latches Inspect and replace as needed

The DJI Osmo Action 3 has a strong reputation as a reliable, durable motorcycle camera. The main takeaway: it is designed to get out of the way and let you ride.

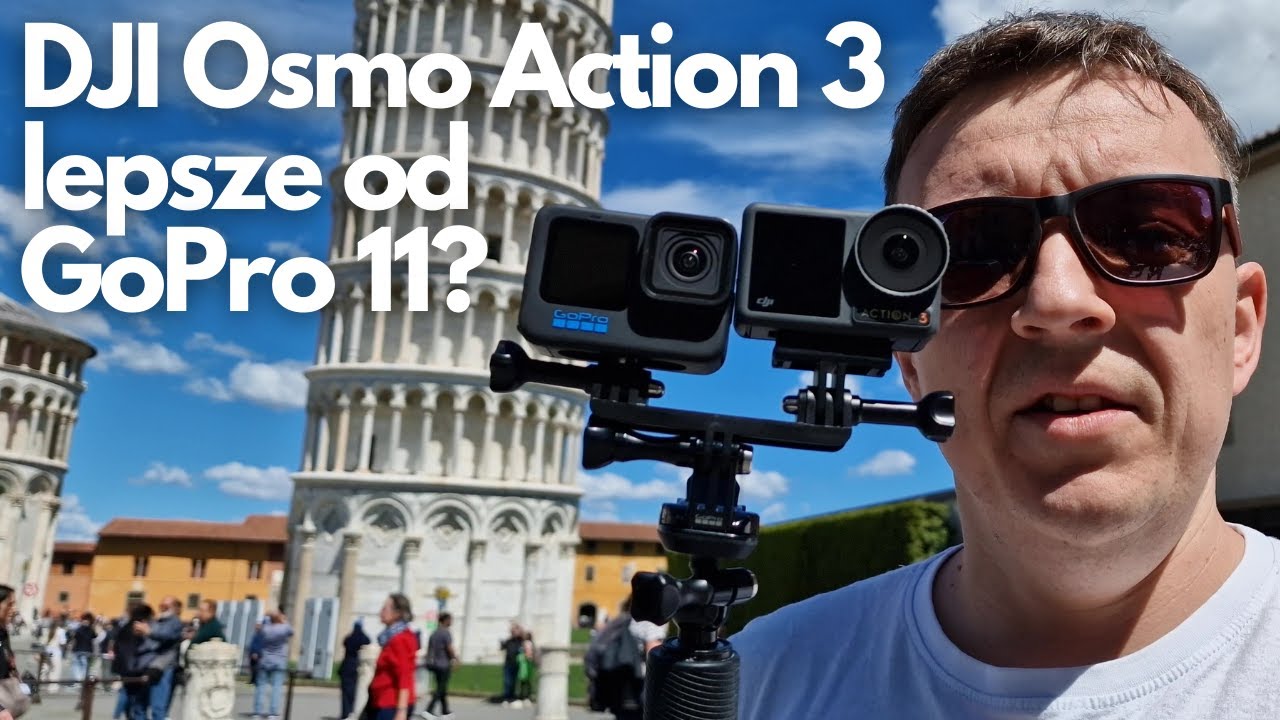
DJI Osmo Action 3 vs GoPro Hero 11 Black for Motorcycle Riders: Which Is Better?

DJI OSMO ACTION 3 vs GOPRO HERO 11 BLACK | Porównanie, test, recenzja

Reviewed by the Digital Helmet Cameras Editorial Team. Based on manufacturer specifications and publicly available user feedback; not independent lab or road testing. Prices and availability change, so check current listings.

The Setup: How This Comparison Works

This comparison looks at the DJI Osmo Action 3 and GoPro Hero 11 Black using published specifications and reported owner experience, across the conditions that matter most for motorcycle use: highway commuting, canyon roads and multi-day touring.

Both cameras are now at least a generation behind their successors, so they are often available at lower prices than at launch. Check current availability and pricing; this is best read as a value comparison of older models.

Hardware and Mounting

The physical experience of these two cameras couldn’t be more different as a motorcycle rider.

The Osmo Action 3 uses a magnetic quick-release system. The camera snaps onto the mount baseplate and locks with a quarter-turn. With gloves on, this is noticeably faster than most GoPro mounts. Swapping the camera between a helmet and a handlebar mount during a stop is designed to be a quick, one-handed job. The front-facing screen is also larger and more readable in direct sunlight than the Hero 11’s.

The Hero 11 Black uses GoPro’s classic finger-pin mount. It’s the universal standard — compatible with the widest range of third-party accessories, cases, and mounts available anywhere. If you have existing GoPro mounts, that ecosystem lock-in is real value. The trade-off is that removing and reattaching the camera with gloves requires more dexterity.

Image Quality

The Hero 11’s 8:7 sensor ratio is genuinely useful for motorcycle content creators who publish across platforms. You can film once and crop vertically for Instagram Reels or horizontally for YouTube without quality loss. That’s a practical workflow advantage if you’re creating content rather than just capturing personal footage.

In good light, both cameras produce excellent footage. GoPro has a slight edge in highlight retention — on bright canyon roads with deep shadows, the Hero 11 recovers more sky detail. The Action 3’s color science is more natural straight out of camera; the GoPro’s default color is more saturated, which looks good for social sharing but requires more grading if you want a cinematic look.

In low light — early morning canyon runs, tunnels, or dusk highway riding — the Hero 11 has a meaningful advantage. Its larger sensor pixels produce cleaner footage in low-contrast conditions than the Action 3.

Stabilization: Where They Differ Most

Both cameras have excellent stabilization by any objective standard. The character is different:

HyperSmooth 5.0 (GoPro) is almost aggressively smooth. On rough chip-seal roads, it produces footage that feels gimbal-mounted. Some riders find this looks artificial; others love it. The horizon lock is effective but doesn’t handle aggressive lean angles as well as DJI’s.

RockSteady 3.0 (DJI) produces footage that feels more natural — a subtle sense of motion is preserved while jitter is removed. The horizon lock in HorizonSteady mode is better at maintaining a level frame during aggressive cornering and lean angles. For canyon riding where you’re constantly banking, the Action 3’s horizon handling is generally considered more reliable.

Battery Life and Charging

At 4K60fps, both cameras are rated for around 65-70 minutes per charge. The real difference is charging speed: the Action 3’s proprietary fast-charging dock brings a battery to 80% in 18 minutes — enough to top off during a fuel stop — while GoPro’s standard USB-C charging takes closer to an hour for a full charge.

Spare Action 3 batteries are cheaper than GoPro’s Enduro batteries, though GoPro’s Enduro significantly extends cold-weather runtime — a consideration if you ride in temperatures below 40°F.

Audio Quality

Both cameras have wind noise reduction that works at reasonable speeds. Above 60mph, neither is truly clean without a foam windscreen. The Hero 11 has a slight edge on the built-in microphones at high speeds. If you’re using the cameras for solo footage without commentary, it doesn’t matter much. If you narrate your rides, the GoPro is marginally better without external mic accessories.

Both support external microphones via USB-C adapter. GoPro’s Media Mod ecosystem is more polished if you want an integrated external mic solution.

Who Should Buy Which Camera

You Should Buy the DJI Osmo Action 3 If… You Should Buy the GoPro Hero 11 Black If…
You swap mounts frequently during rides You have existing GoPro mounts and accessories
You prioritize fast battery charging on touring days You want maximum accessory and mount ecosystem options
You ride in cold weather regularly (battery swap is easier with gloves) You publish content across multiple platforms (vertical + horizontal)
Natural color science matters to you without heavy grading You regularly ride at dawn, dusk, or in low-light conditions
You prioritize horizon stability during aggressive cornering You want the most aggressive stabilization for rough roads

You can find the DJI Osmo Action 3 on Amazon and the GoPro Hero 11 Black on Amazon. Both manufacturers — DJI and GoPro — also sell directly with bundle options worth checking.

For comparisons that include newer models (Action 4, Action 5 Pro and Hero 13), see our best motorcycle helmet camera rankings.

5 Best Action Cameras for Motorcycle Riders: Ranked

Top 5 Best Action Cameras of 2023 |Watch before you Buy

Reviewed by the Digital Helmet Cameras Editorial Team. Based on manufacturer specifications and publicly available user feedback; not independent lab or road testing. Prices and availability change, so check current listings.

Models covered: the cameras named in this guide. Manufacturers release new models regularly, so check current lineups, specifications and prices on the manufacturer pages before buying.

How These Are Ranked

The cameras on this list earned their spots based on published specifications and user-reported performance under vibration, temperature change, and sustained recording — the conditions that define actual motorcycle riding, not controlled studio tests.

This ranking weighs performance under highway commuting, canyon riding, and dirt-road conditions — the situations that define real motorcycle use.

The 5 Best Action Cameras for Motorcycle Riders

1. GoPro Hero 13 Black — Best Overall

Hypersmooth 6.0 stabilization is widely regarded as best-in-class for motorcycle use — it handles the specific combination of engine vibration and road surface feedback that makes other cameras produce blurry, jittery footage. Published sample footage at 4K60fps looks sharp and well exposed.

The Hero 13 is waterproof to 10m without a housing. The new Enduro battery runs significantly longer in cold weather than previous versions — important for early-season mountain riding. The Max Lens Mod 2.0 is worth adding for a 177° field of view that fully captures the peripheral context of riding.

What it doesn’t do well: the compact form factor means battery life at 4K60fps is around 70 minutes. You’ll need spares for a full day. Voice commands can be unreliable over wind and engine noise, so do not depend on them at speed.

Find it on Amazon | More at gopro.com

2. DJI Osmo Action 4 — Best Sensor for Low-Light Riding

The Action 4 has a 1/1.3-inch sensor — the largest in this camera class. At dawn, dusk, or on shaded canyon roads, this translates directly to cleaner, more detailed footage. If a significant portion of your riding happens outside of bright midday conditions, the Action 4’s sensor advantage is worth paying for.

RockSteady 4.0 is excellent. The magnetic quick-release system is faster to operate with gloves than GoPro’s standard finger mount. The front-facing screen is large and readable even at a glance in sunlight. Battery life at 4K60fps runs around 80 minutes — slightly better than GoPro.

The DJI mount ecosystem is smaller than GoPro’s, but the magnetic system compatibility with third-party mounts has grown significantly. If you’re starting fresh rather than expanding an existing kit, this is easier to justify.

Find it on Amazon | More at dji.com

3. Insta360 Ace Pro 2 — Best Stabilization for Rough Terrain

The Ace Pro 2 uses AI-powered Active HDR that automatically adapts to high-contrast lighting — the tunnel exits, forest shadows, and bright alpine open sections that give other cameras exposure fits. The footage comes out usable more consistently than cameras where you need to manually lock settings.

On dirt roads and cobbled surfaces, the stabilization is competitive with GoPro’s Hypersmooth. The 150° field of view gives you an immersive but not distorted image — closer to what your eye actually sees than ultra-wide cameras at 170°+.

Battery life is around 90 minutes at 4K30fps, making it the longest-lasting camera on this list in practical use.

Find it on Amazon | More at insta360.com

4. GoPro Hero 12 Black — Best Value Flagship

The Hero 12 dropped in price significantly after the Hero 13 launched and is now one of the best value propositions in motorcycle cameras. Hypersmooth 5.0 is nearly identical to 6.0 in real-world riding conditions. The 10-bit color, 10m waterproofing, and full GoPro accessory ecosystem are all present.

For riders who already own GoPro mounts and accessories, the Hero 12 is the obvious upgrade path at a price point that makes the decision easy. For new buyers comparing it against the DJI Action 4 at a similar price, the choice comes down to whether you prioritize ecosystem breadth (GoPro) or sensor size and low-light performance (DJI).

Find it on Amazon

5. DJI Osmo Action 3 — Best Under $200

The Action 3 delivers stabilization and image quality that was flagship-tier two years ago, now available for under $200 on sale. RockSteady 3.0 performs reliably on smooth and mixed-surface roads. The metal body dissipates heat well and has a strong reputation for avoiding thermal shutdowns even during sustained summer recording.

Low-light performance falls short of the Action 4 and the GoPros at their current prices. For daytime riding, it’s not a meaningful limitation. For riders who start early or finish late regularly, it is.

Find it on Amazon | More at dji.com

Which Camera Should You Buy?

If you want… Buy this
The best all-around motorcycle camera, no compromises GoPro Hero 13 Black
Better low-light performance and faster mount swaps DJI Osmo Action 4
Long battery life and consistent auto-exposure on long rides Insta360 Ace Pro 2
Flagship-quality footage at a lower price GoPro Hero 12 Black
The best stabilization under $200 DJI Osmo Action 3

For more specific comparisons, see our full motorcycle helmet camera rankings and our GoPro vs DJI vs Insta360 breakdown.

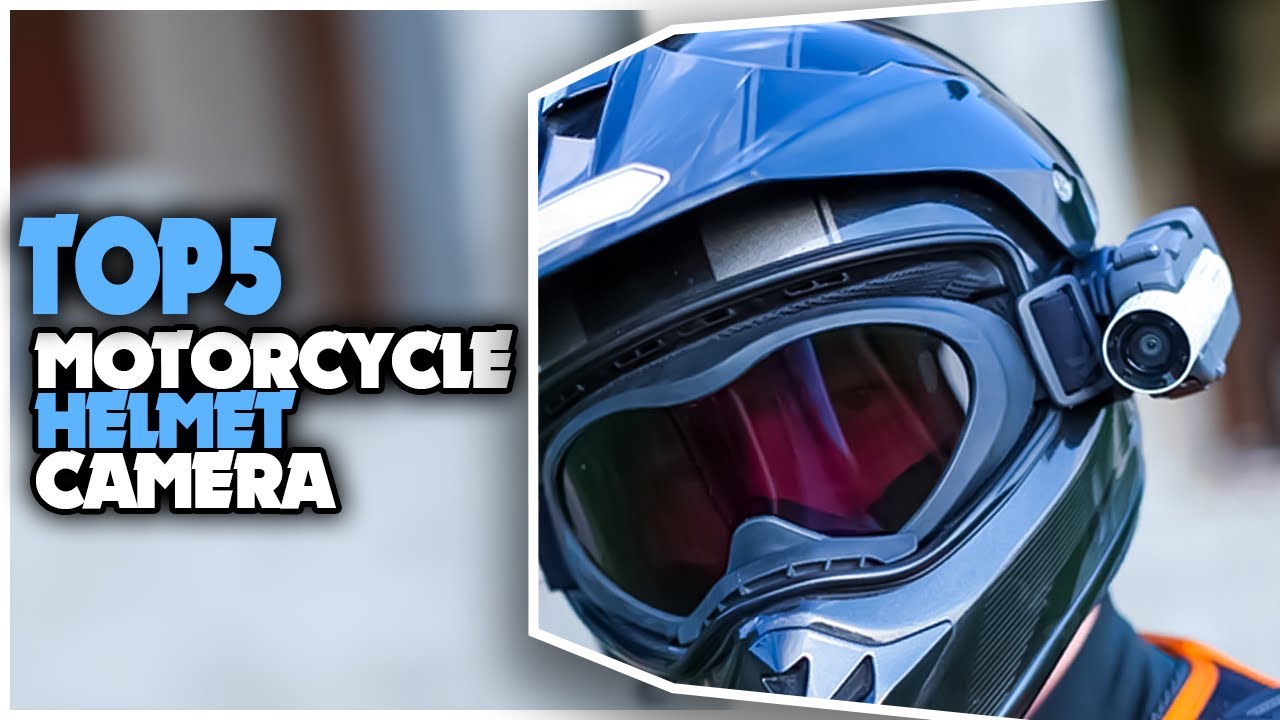
Best Motorcycle Helmet Cameras for Adventure Riding: Top 5 Ranked

Best Motorcycle Helmet Camera 2023 - Top 5 Motorcycle Helmet Camera For Adventure Riding

Reviewed by the Digital Helmet Cameras Editorial Team. Based on manufacturer specifications and publicly available user feedback; not independent lab or road testing. Prices and availability change, so check current listings.

Models covered: the cameras named in this guide. Manufacturers release new models regularly, so check current lineups, specifications and prices on the manufacturer pages before buying.

What Makes a Helmet Camera Work for Adventure Motorcycling

Adventure riding puts camera gear through conditions most action cam reviews don’t cover: sustained vibration over corrugated dirt roads, temperature swings from valley heat to mountain cold in a single day, rain that comes without warning, and riding positions that change constantly between standing on pegs and highway cruising.

These five cameras are well-suited to ADV riding based on their published waterproofing, stabilization, and battery specifications for the vibration, temperature swings, and dust/mud exposure typical of off-road adventure routes.

The 5 Best Motorcycle Helmet Cameras for Adventure Riding

1. GoPro Hero 13 Black — Best All-Around ADV Camera

The Hero 13 remains the benchmark for adventure motorcycle use. Hypersmooth 6.0 stabilization handles the kind of sustained high-frequency vibration that comes from extended gravel road riding — not just smooth tarmac. The 10-bit color and HDR capture retain detail in the high-contrast situations adventure riders encounter constantly: bright sky over dark forest trails, tunnel exits onto sunlit roads.

The Hero 13 is also waterproof to 10m without a housing, which matters when you’re not stopping to bag your camera every time clouds appear. Max Lens Mod compatibility gives you a 177° field of view for the full immersive ADV experience. Battery life is around 70 minutes at 4K60fps — bring two spares for a full day.

Find the Hero 13 on Amazon or at gopro.com.

Best for: Riders who want the most complete, proven system for demanding conditions.

2. DJI Osmo Action 4 — Best Low-Light Performance

The Osmo Action 4’s 1/1.3-inch sensor is the largest in this class. That sensor size matters for adventure riding because you’re often filming at dawn, dusk, or through heavy forest canopy where light is limited. Footage shot in these conditions with the Action 4 is reported to be noticeably cleaner than competing cameras at the same price.

RockSteady 4.0 is excellent. The magnetic quick-release system is faster to operate with gloves on than GoPro’s standard finger mounts — a meaningful practical advantage when swapping the camera between helmet and handlebar mounts during the day.

Current pricing and options at Amazon or dji.com.

Best for: Riders who regularly film in poor light or want the fastest mount swap system.

3. Insta360 Ace Pro 2 — Best for Set-and-Forget Recording

The Ace Pro 2 is well suited to riders who want to record without actively managing the camera. The AI-powered scene detection automatically adjusts exposure for the high-contrast scenarios that fool fixed settings. The Active HDR mode in 4K is designed to deliver more usable footage straight out of camera than manual settings on long rides.

The wide angle (150°) produces less edge distortion than competing ultra-wide cameras — useful when you want the footage to look cinematic rather than fisheye. Stabilization through rough terrain is strong. Battery life at 4K/30fps is around 90 minutes, among the best in this class.

See current options at Amazon or insta360.com.

Best for: Riders who want excellent footage with minimal settings management on long days.

4. GoPro Hero 12 Black — Best Value Flagship

With the Hero 13 available, the Hero 12 has dropped significantly in price and remains a fully capable ADV camera. Hypersmooth 5.0 is nearly identical to 6.0 in real-world motorcycle use. The 10-bit color, waterproofing, and full accessory ecosystem are unchanged.

If you’re already in the GoPro ecosystem with mounts and accessories, the Hero 12 is the obvious value pick. If you’re starting fresh, the price difference makes it worth comparing to the DJI Action 4 before committing.

Find the Hero 12 on Amazon.

Best for: Existing GoPro users, or riders who want flagship-tier performance at mid-range pricing.

5. DJI Osmo Action 3 — Best Budget ADV Option

The Action 3 is now the most affordable camera on this list and still delivers genuinely good ADV footage. RockSteady 3.0 holds up well on mixed surfaces. The camera has a strong reputation for thermal management, with documented reports of no overheating shutdowns during continuous 4K recording even in hot conditions — an area where some flagship cameras struggle.

It lacks the Action 4’s larger sensor, which shows in low-light performance. But for daytime adventure riding — which covers most ADV riding — the Action 3 produces footage that will surprise you given the price.

Current pricing on Amazon or at dji.com.

Best for: Budget-conscious riders who don’t want to compromise stabilization quality.

Side-by-Side Comparison

Camera Stabilization Low-Light Battery (4K60) Waterproof (no housing) Best Use Case
GoPro Hero 13 Black Hypersmooth 6.0 Very Good ~70 min 10m All-around ADV
DJI Osmo Action 4 RockSteady 4.0 Excellent ~80 min 18m Low-light & fast swaps
Insta360 Ace Pro 2 FlowState Very Good ~90 min 10m Set-and-forget recording
GoPro Hero 12 Black Hypersmooth 5.0 Very Good ~70 min 10m Value flagship
DJI Osmo Action 3 RockSteady 3.0 Good ~90 min 16m Budget ADV

Mounting Recommendations for ADV Riders

For adventure motorcycles, chin mounting is the most reliable option on dual-sport and full-face ADV helmets. It produces the most natural POV angle and benefits from reduced wind exposure compared to top and side positions. On helmets with large chin bars (like the Shoei Hornet ADV or Bell MX-9), dedicated chin mount bases are available.

For long-distance ADV touring where you want hands-free recording without actively managing the camera, pair any camera on this list with a handlebar mount as a secondary angle. The handlebar captures your controls and the road ahead, while the helmet cam captures your perspective and reactions.

For detailed mounting guidance, see our complete helmet camera mount guide.

LOOKING DB-05 Helmet Camera Review: Specs, Limits and Who It’s For

Gear Review: LOOKING DB-05 Helmet Camera 2023

Reviewed by the Digital Helmet Cameras Editorial Team. Based on manufacturer specifications and publicly available user feedback; not independent lab or road testing. Prices and availability change, so check current listings.

LOOKING DB-05: What It Is and Who It’s For

The LOOKING DB-05 is a budget-tier helmet camera. This review evaluates it using its published specifications, the manufacturer’s documentation and publicly available user feedback, to help you judge whether it fits motorcycle commuting. We have not independently tested it.

LOOKING is a Chinese brand with limited English-language support, but the DB-05 is widely available. You can check current pricing and availability on Amazon.

Build Quality and Durability

The DB-05 is housed in a hard plastic shell rated to IP68 — fully dust-tight and submersible past a meter. For a motorcycle camera, waterproofing matters: unexpected rain, road spray, and pressure washing are all real-world concerns. The battery and microSD compartment has a proper locking latch, not a rubber flap. That’s a meaningful design choice at this price.

The buttons are described as large and tactile, which should make the camera easier to operate with light gloves, though glove thickness matters.

One thing to flag: adhesive mount bases that ship with budget cameras like this are commonly regarded as adequate but not confidence-inspiring for highway speeds. A third-party metal mount base is a worthwhile upgrade for sustained highway use. Use a safety tether regardless.

Image Quality: What to Actually Expect

The DB-05 uses a 12MP Sony CMOS sensor. The headline specs are 4K at 30fps and 2.7K at 60fps with a 170° ultra-wide field of view. Here is what those specs mean for motorcycle use, based on typical results for cameras in this class:

Setting Typical Result on Motorcycle Suggested Use
4K / 30fps Good detail, slight rolling shutter jitter at speed Use for slower riding or stationary shots
2.7K / 60fps Best overall for moving footage — smoother motion Recommended default for motorcycle use
1080p / 60fps Smallest files, still sharp, easy to edit Good choice for daily commuting

Electronic image stabilization (EIS) in cameras of this class typically works acceptably on smooth tarmac and struggles on rough chip-seal or gravel, where residual jitter is common. It’s not a RockSteady or Hypersmooth, and it shouldn’t be expected to perform like one.

Colour is generally decent in good light. Auto white balance on budget cameras often shifts in shade or low-contrast scenes; locking exposure and white balance helps, but it works around the limitation rather than solving it.

Battery Life on the Motorcycle

The manufacturer rates the battery at 90 minutes, though that figure is typically only achievable at 1080p — expect closer to 80 minutes at 2.7K/60fps with Wi-Fi off, based on user reports. Spare batteries are cheap and small enough to carry in a jacket pocket; two batteries is a reasonable minimum for anything longer than a day trip.

Mounting Options for Riders

The DB-05 uses a GoPro-compatible quick-release buckle system. That means you can use the full GoPro accessory ecosystem for mounts, including:

  • Chin mount: Best overall angle for motorcycle POV footage. The 170° FOV fills the frame naturally from this position.
  • Side mount: Adds a slightly cinematic third-person element. More wind buffeting in the audio.
  • Top mount: Wide sky and road capture — looks dynamic but captures less of the riding experience itself.

Who the LOOKING DB-05 Is For

The DB-05 is a legitimate option for motorcycle commuters who want to capture daily riding without spending GoPro money. It’s also a reasonable choice as a secondary camera — leaving it on the bike while your main camera is mounted to your helmet.

It is not the right tool for track days, sustained highway riding where stabilization quality matters, or serious content creation. The EIS isn’t strong enough and the build quality of the mounts isn’t up to those demands.

If your budget is around $80 and you want a camera specifically for casual motorcycle use, the DB-05 delivers. If you can stretch to $200, the budget cameras we compare at that tier are substantially better performers.

Quick Summary

The assessments below are editorial judgments based on published specifications and user feedback, not test results.

Category Assessment Notes
Image quality (good light) Good Sharp at 2.7K/60fps, natural color
Image quality (low light) Fair Noise appears quickly below bright conditions
Stabilization Fair Works on smooth roads, struggles on rough surfaces
Battery life Good ~80 min per user reports; spares are cheap
Durability Good IP68 waterproofing; upgrade the included mounts
Value for money Good Solid for the price — know what you’re buying

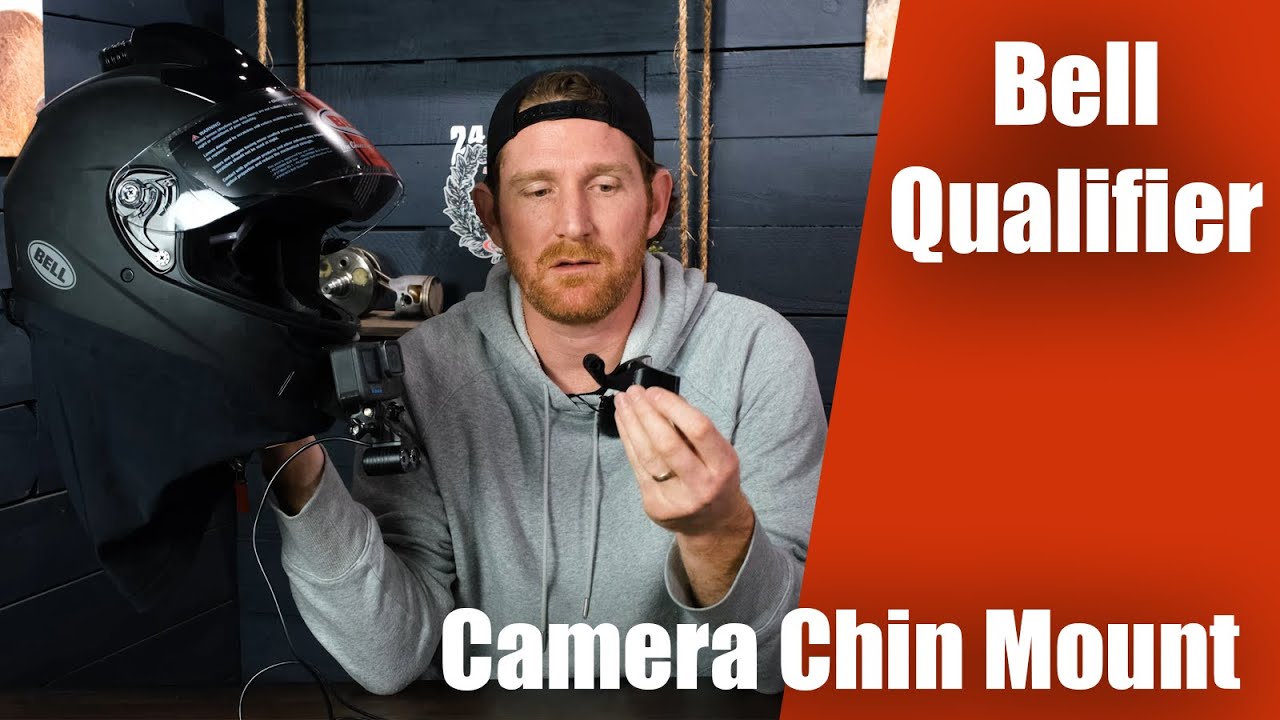
Bell Qualifier Helmet Chin Mount Review: Fit and Compatibility with GoPro, DJI Osmo & Insta360

Bell Qualifier Helmet Chin Mount For GoPro , DJI Osmo, Insta360 Action Cameras | Light Mount

Reviewed by the Digital Helmet Cameras Editorial Team. Based on manufacturer specifications and publicly available user feedback; not independent lab or road testing. Prices and availability change, so check current listings.

Why Chin Mounting Suits the Bell Qualifier

Riders commonly move through a few mounting positions on the Bell Qualifier — crown-mounted adhesive, side mounts clipped to the visor channel — before settling on a chin mount, since a mount aimed too high tends to capture mostly road and sky. Chin mounting is generally considered to give the most usable footage angle on this helmet.

The Bell Qualifier helmet chin mount is designed specifically for this helmet’s chin bar contour. That matters more than it sounds. Generic adhesive mounts that claim universal fit often sit at a slight angle on the Qualifier’s curved chin bar, which means your footage ends up off-horizontal no matter how carefully you align the camera. A purpose-made mount seats flush.

What’s Included and Where to Buy

The most widely used version comes with a curved 3M VHB adhesive base, an adjustable pivot arm, a standard GoPro-style finger mount adapter, and a secondary 1/4″-20 light mount attachment. You can find current options on Amazon. Bell’s accessory page at bellhelmets.com lists OEM-approved mounting options if you want to go that route.

Installing the Mount on the Bell Qualifier

Installation takes about 20 minutes done properly. The 3M VHB adhesive is effectively permanent — once cured, removing it will leave marks on the chin bar. A few things worth knowing before you start:

  1. Use 70% isopropyl alcohol, not acetone. Acetone can dull the paint and weaken the ABS shell beneath it.
  2. Do a dry fit first. The Qualifier’s chin bar tapers slightly toward the edges. Hold the mount in position and look through your visor to confirm the camera lands on your natural eye line — not angled down at the road.
  3. Wait 24 hours before loading a camera. VHB needs a full cure cycle to reach full strength — mounting a camera before the adhesive has cured risks the mount shifting during the first ride.

Camera Compatibility

The mount ships with a GoPro-style prong adapter. For DJI Osmo Action 3 or 4, you’ll need a DJI-to-GoPro adapter or DJI’s own mount plate — both are inexpensive and widely available. For Insta360 (ONE RS, X3, Ace Pro), the standard GoPro prong works directly with Insta360’s included GoPro-compatible baseplates.

What to Expect on a Motorcycle

Based on the mount design and general chin-mount behavior, two things stand out:

Vibration at highway speed: At highway speeds, some high-frequency vibration may show up in GoPro footage unless HyperSmooth is set to its strongest option; DJI’s RockSteady is generally reported to reduce it substantially. The pivot arm introduces a small amount of flex — that’s the tradeoff for adjustability. If you want zero flex, a fixed-arm chin mount is more appropriate for sustained high-speed riding.

Wind noise: The camera sits in relatively clean air at chin height. Wind noise is generally less severe than with top or side mounts, which catch more direct airflow. At 60mph+ you will still want the camera’s wind noise reduction set to high, but chin position is commonly reported to give the cleanest raw audio.

The Secondary Light Mount

The 1/4″-20 light attachment turns the mount into a dual-purpose platform for a compact LED video light on dusk rides. Getting the light angled below the camera’s field of view takes some trial and error — if it sits even slightly too high, it causes direct flare into the lens. For most riders, the light mount is a bonus feature rather than a primary reason to buy.

Verdict: Who Should Buy This

If you ride a Bell Qualifier regularly and want a stable chin mount for action camera footage, the purpose-made fit justifies the price over generic alternatives. The specific contouring to the Qualifier’s chin bar makes a real difference in stability and angle consistency.

If you swap cameras between multiple helmets or want to frequently move the camera between mounts, the permanent adhesive base is a limitation. In that case, pair it with a quick-release plate on top of the pivot arm, such as a Peak Design plate, which makes one-handed camera removal easy.

What Works Well Limitations
Precise fit to Qualifier’s chin bar contour Permanent adhesive — no repositioning after curing
Eye-level angle produces natural POV footage Pivot arm flex at high speed without electronic stabilization
GoPro-standard interface: works with GoPro, DJI, Insta360 Light mount requires careful positioning to avoid lens flare
Less wind noise than top or side mounts Cure time means no same-day installation and riding

For more on chin mounting technique and angle setup, see our full Helmet Camera Mount Guide.

Get Your Download Immediately

Get Instant access to our Digital Helmet Camera ebook

You have Successfully Subscribed!