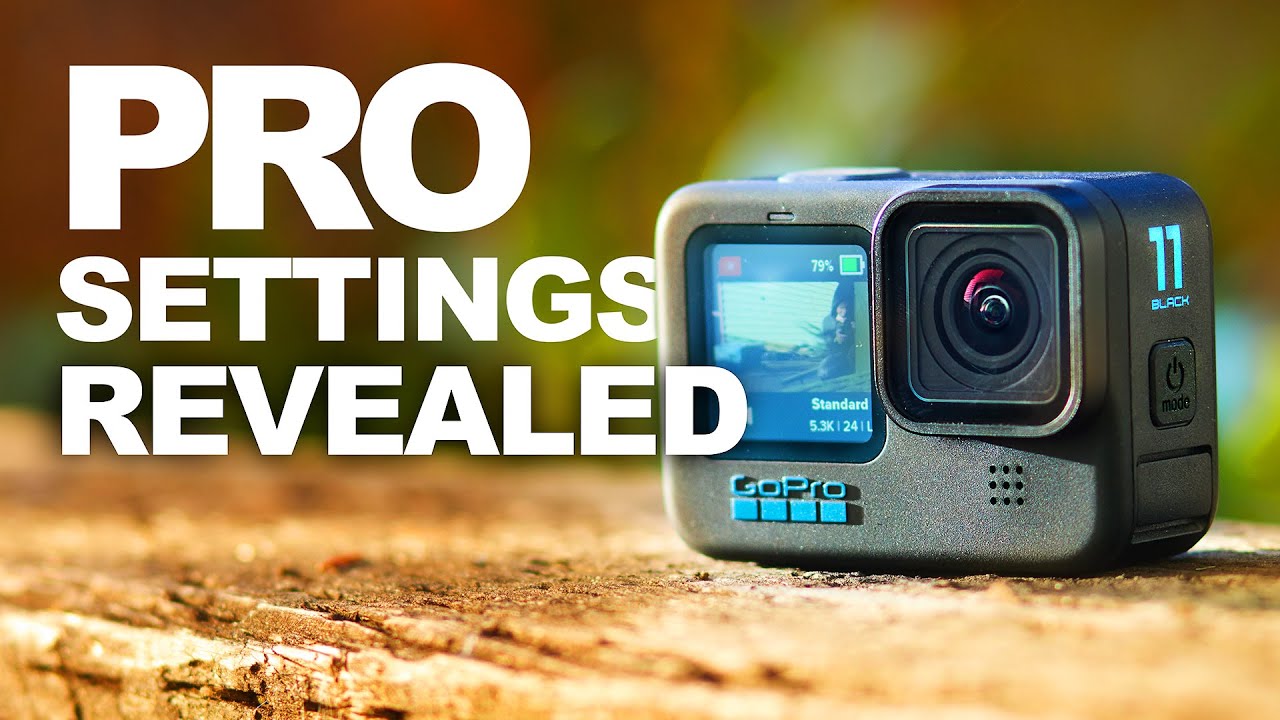
GoPro Hero 11 Black Review: Best Settings for Motorcycle Riders

GoPro Hero 11: Essential Guide + Best Settings

The GoPro Hero 11 Black was released in September 2022 and remains a capable value option for motorcycle riders now that newer GoPro models have replaced it. It is an older model, so check current availability and pricing and compare it with GoPro’s current lineup. This guide covers the real specifications, the best settings for motorcycle use, and an honest assessment of where it stands against the Hero 13 and DJI competition.

GoPro Hero 11 Black: Key Specifications

Spec Hero 11 Black
Sensor 1/1.9-inch, 27MP
Max Video 5.3K/60fps, 4K/120fps, 2.7K/240fps
Stabilization HyperSmooth 5.0 with Horizon Lock
Battery Life ~70 min at 5.3K, ~100 min at 4K/60fps
Waterproof 10m without housing
Weight 154g with battery
Storage microSD (128GB recommended)
Current Price ~$249 (down from $399 launch)

What Changed Over the Hero 10

The Hero 11 introduced the larger 1/1.9-inch sensor — the same size used in the Hero 12 and Hero 13. This is the biggest practical upgrade: more light hits the sensor, which means better dynamic range in high-contrast riding situations (tunnel exits, tree-lined roads, sunrise/sunset rides) and cleaner low-light footage.

The other significant addition was Horizon Lock — independent of HyperSmooth, this keeps the horizon perfectly level even if the camera tilts up to 45 degrees. For motorcycle use this is genuinely useful when the camera shifts slightly in a mount over long rides.

Best GoPro Hero 11 Settings for Motorcycle Riders

Daily Road Riding (motorway + A-roads)

  • Resolution: 4K / 60fps
  • Lens: Linear (removes fisheye distortion — license plates and road signs stay readable)
  • Stabilization: HyperSmooth Boost
  • Horizon Lock: On
  • ISO Max: 1600 (daytime) / 6400 (if riding at night)
  • Shutter: Auto (or manual at 1/120s for 60fps — double the frame rate)
  • White Balance: Auto
  • Color: Natural (if not colour grading) or Flat (if you edit)

Track Days / Fast Road Riding

  • Resolution: 4K / 120fps (for slow-motion replay of cornering technique)
  • Lens: Wide or Linear
  • Stabilization: HyperSmooth Standard (Boost crops in too much at 4K/120fps)
  • Shutter: 1/240s when shooting 120fps

Adventure / Off-Road Riding

  • Resolution: 2.7K / 60fps (saves storage, easier to edit)
  • Lens: Wide or SuperView (shows more of the trail)
  • Stabilization: HyperSmooth Boost
  • Horizon Lock: On

Mounting Options for the Hero 11

The Hero 11 uses GoPro’s standard mounting ecosystem, which means it’s compatible with the widest range of third-party mounts on the market.

Recommended chin mount: GoPro Helmet Chin Mount ($49.99) — specifically designed for the Hero 11’s form factor with a quick-release mechanism. Compatible with full-face helmets from Shoei, Arai, Bell, AGV, and Shark.

Side mount alternative: RAM Mounts B-size ball with GoPro adapter — more secure than adhesive at sustained highway speeds.

Top mount: GoPro’s Vented Helmet Strap is the standard solution — adjustable and works with open-face and modular helmets where a chin mount isn’t possible.

Hero 11 vs. Hero 13 Black: Is the Upgrade Worth It?

If you already own a Hero 11, upgrading to the Hero 13 Black gives you:

  • HyperSmooth 6.0 (noticeably better at high-frequency vibration from engines)
  • Faster processor (shorter startup time)
  • Better battery life (30% improvement)
  • Modular lens system (swap between wide, macro, and anamorphic)

At the current price gap (~$150), the Hero 13 upgrade is worth it if you do significant highway riding where engine vibration management matters. For occasional use, the Hero 11 at $249 remains excellent value.

Hero 11 vs. DJI Osmo Action 4

The DJI Osmo Action 4 (also ~$249) is the direct competitor. The key differences for riders:

  • Battery life: DJI wins significantly — 160 min vs. 100 min at comparable settings
  • Dual screen: DJI’s front-facing screen makes solo vlogging easier
  • Stabilization: Roughly equal in real-world riding tests
  • Ecosystem: GoPro has more accessories and wider mount compatibility
  • Low light: DJI’s 1/1.3-inch sensor is slightly larger — marginal advantage in dark conditions

Both are excellent choices at this price point. If battery life is your priority, choose DJI. If mount compatibility and ecosystem matter more, choose GoPro.

Frequently Asked Questions

What microSD card should I use with the Hero 11?

For 5.3K recording, you need a V30-rated card minimum. Recommended: SanDisk Extreme Pro 128GB (V30, ~$22) or Samsung PRO Endurance 128GB (better for continuous recording). Avoid unbranded or Class 10-only cards — they cause dropped frames at high bitrates.

Can the Hero 11 charge while recording?

Yes — via USB-C. You can run a power bank or motorcycle USB port through the side door (which means the camera is no longer waterproof while charging). GoPro’s Protective Housing allows charging while maintaining water resistance.

What is the best mount position for reducing wind noise?

Chin mount reduces wind noise significantly versus top mount because the camera is more sheltered by the chin bar. A foam windscreen (GoPro Media Mod or third-party) over the microphone reduces noise further. See our Settings Optimizer tool for custom audio recommendations.

Ready to see if the Hero 11 is right for your riding style? Try our free Camera Recommender — it takes 60 seconds and gives you a personalised pick based on your helmet, riding type, and budget.

Official resources: GoPro Hero 11 Black official page | Hero 11 firmware updates.

Techalogic DC-1 Review: The Dual-Lens Motorcycle Helmet Camera Explained

Techalogic DC-1 Review - Best Helmet Camera ?

The Techalogic DC-1 takes a completely different approach to the helmet camera market. While GoPro and DJI make general action cameras adapted for helmet use, the DC-1 is designed specifically for motorcycle riders who want a dual-lens safety camera rather than a cinematic action camera. This review covers its published specifications, where it excels, and who it’s for. We have not independently tested it.

Reviewed: Techalogic DC-1 | Price: ~$199 | Available: Amazon, Techalogic.co.uk

Techalogic DC-1: Full Specifications

Spec DC-1
Lenses Dual (front-facing wide + rear-facing wide)
Resolution 1080p/30fps (front), 720p/30fps (rear) simultaneous
Field of View 140° front / 120° rear
Stabilization Electronic Image Stabilization (EIS)
Loop Recording Yes — 1/3/5 minute segments, continuous overwrite
Storage Up to 256GB microSD (not included)
Battery Life ~3 hours (front only) / ~2 hours (dual recording)
Waterproof IP67 rated — submersible to 1m
Weight ~85g (lighter than GoPro Hero 13)
Connectivity Wi-Fi, Bluetooth, USB-C
Price ~$199 USD / ~£149 GBP

What Makes the DC-1 Different

Dual Lens: Simultaneous Front and Rear Recording

This is the DC-1’s defining feature and the main reason to choose it over a GoPro or DJI. The rear-facing lens captures what’s behind you — which is where most motorcycle incidents involving other vehicles originate. For insurance claims, evidence in the event of a collision, or documenting tailgating, this is genuinely valuable footage that no single-lens action camera can provide.

Both streams record simultaneously to the same file on the microSD card, split-screen or as separate files depending on your recording mode setting.

Loop Recording

Unlike GoPro or DJI which record until storage fills, the DC-1 records in continuous loops (1, 3, or 5 minute segments) and automatically overwrites the oldest footage when the card is full. This is the dashcam model of recording — you always have the last few hours available without ever needing to manage files or worry about storage.

If an incident occurs, the DC-1’s incident detection (via G-sensor) automatically locks the current file segment to prevent it being overwritten.

Simpler Operation with Gloves On

The DC-1 uses two physical buttons — power and record — and that’s essentially it during a ride. No touchscreen to navigate, no app required mid-ride. For motorcyclists wearing thick gloves, this is a significant practical advantage over GoPro’s touchscreen interface.

What the DC-1 Is NOT

The DC-1 is not a cinematic action camera. If you want:

  • 4K resolution for YouTube content
  • Slow-motion at 120fps+
  • Advanced colour science for grading
  • Wide ecosystem of mounts and accessories

…then a GoPro Hero 13 or DJI Osmo Action 5 Pro is the better choice. The DC-1’s 1080p/30fps quality is adequate for documentation but not competitive with current action cameras for video production.

DC-1 vs. GoPro Hero 13: Which Should You Buy?

Techalogic DC-1 GoPro Hero 13 Black
Primary purpose Safety/documentation Action/content creation
Dual lens Yes (front + rear) No
Max resolution 1080p/30fps 5.3K/60fps
Loop recording Yes No
Battery life ~3 hrs ~90 min
Ease of use with gloves Excellent Good
Cinematic quality Basic Excellent
Price ~$199 ~$399

Buy the DC-1 if: You want a always-on safety camera that documents every ride without needing to manage files. You value rear-facing coverage for insurance purposes. You do more commuting than adventure riding.

Buy the GoPro if: You create video content for YouTube or social media. You want cinematic quality. You do track days, adventure riding, or any activity where footage quality matters beyond documentation.

Expected Performance

Image Quality

At 1080p in daylight, footage from cameras in this class is generally sufficient to document events. Whether number plates are legible depends on distance, speed and light, so check sample footage before relying on it for evidence. In low light or wet conditions, expect more noise and less detail; the sensor in cameras of this type is generally smaller than in premium action cameras such as the GoPro Hero 13 (1/1.9-inch).

Stabilization

Electronic image stabilization at this level is typically adequate for smooth roads but shows its limits on rough surfaces and at sustained high speeds. For evidence recording this is acceptable; for cinematic content it would be an issue.

Mounting

The DC-1 ships with a chin mount kit compatible with most full-face helmets. The mount uses a standard screw fitting rather than GoPro’s proprietary quick-release, so you’re largely tied to Techalogic’s own accessory range for alternative positions.

Verdict

The Techalogic DC-1 fills a specific niche very well: it looks like a strong purpose-built motorcycle safety camera at this price point, based on its specifications. If your priority is always-on documentation, insurance protection, and rear-view coverage, it’s the right tool. If you want to create motorcycle content for an audience, look at GoPro or DJI instead.

Not sure which type of camera you need? Our Camera Recommender tool asks the right questions and matches you to the best option for your riding situation.

Frequently Asked Questions

Is the Techalogic DC-1 compatible with all helmets?

The DC-1’s mount kit is designed for full-face helmets. It comes with two chin bar adapter plates to fit different chin bar profiles. It is not compatible with open-face or half-helmet styles without a custom mount solution.

Does the DC-1 work in the rain?

Yes — IP67 rating means it’s fully submersible to 1 metre. Rain riding is not an issue. The lens coatings also help repel water droplets from the image.

Where can I buy the Techalogic DC-1?

The DC-1 is available on Amazon (search “Techalogic DC-1”) and directly from Techalogic.co.uk. Amazon UK and US both stock it, with US pricing around $199.

Official resources: Techalogic DC-1 official page | Techalogic website.

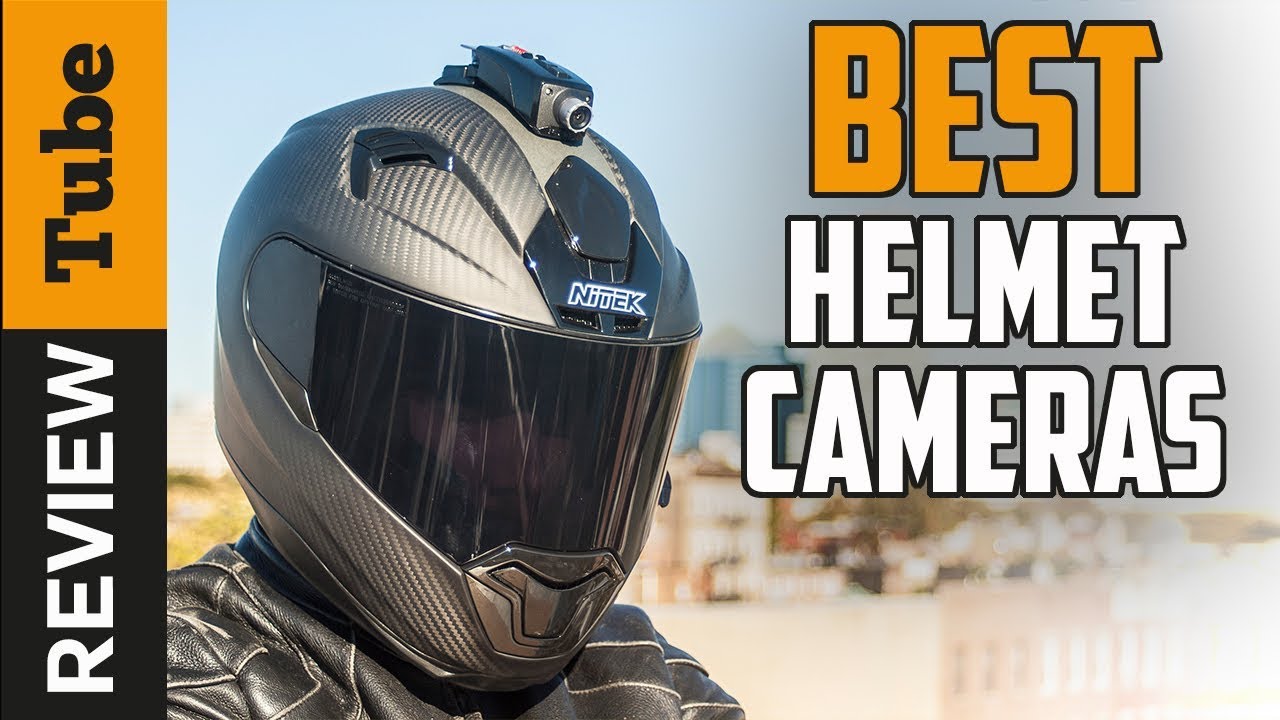
Best Helmet Cameras for Motorcycle Riders: Complete Buying Guide

✅Helmet Camera: Best Helmet Camera (Buying Guide)

Choosing a helmet camera sounds simple until you’re staring at a list of 40+ models with conflicting specs and reviews that all say the same thing. This guide cuts through the noise with specific recommendations, real specifications, and clear advice based on riding type — so you buy the right camera the first time.

Manufacturers release new models regularly (for example, DJI’s Osmo Action 6 and GoPro’s MISSION 1 series are now listed on their official sites). Check current lineups, specifications and prices before buying.

Models compared: GoPro Hero 13 Black, DJI Osmo Action 5 Pro, Insta360 X5, Techalogic DC-1, INNOVV H5

Top Helmet Camera Picks at a Glance

Camera Best For Max Resolution Stabilization Price (approx)
GoPro Hero 13 Black All-round motorcycle use 5.3K/60fps HyperSmooth 6.0 ~$399
DJI Osmo Action 5 Pro Long rides, low-light 4K/120fps RockSteady 4.0 ~$269
Insta360 X5 360° / reframeable footage 8K/360° FlowState ~$499
Insta360 GO 3S Lightweight, discreet use 2.7K/30fps FlowState ~$299
Techalogic DC-1 Dedicated motorcycle cam 1080p/30fps Electronic EIS ~$199

What Actually Matters When Choosing a Helmet Camera

Image Stabilization — The Single Most Important Spec

At highway speeds, even a securely mounted camera picks up significant vibration from road surfaces, engine resonance, and wind buffeting. Without strong stabilization, your footage is unwatchable — no matter how good the sensor is.

The three cameras with the best stabilization for motorcycle use among the models compared here are:

  • GoPro Hero 13 Black with HyperSmooth 6.0 — The gold standard for action sports. Horizon lock keeps the frame level through corners and technical sections. Designed to smooth out motorway-speed vibration, though results vary by mount, helmet and road surface.
  • DJI Osmo Action 5 Pro with RockSteady 4.0 — DJI’s electronic stabilization rivals GoPro’s in most conditions. Particularly effective at managing low-frequency vibration from engine resonance.
  • Insta360 X5 with FlowState — 360° footage benefits from post-production stabilization, which is effectively perfect since you’re choosing the viewpoint after the fact.

Resolution and Frame Rate

For motorcycle helmet cameras, the practical sweet spot is 4K at 60fps. Here’s why each spec matters:

  • 4K resolution — Gives you enough detail to crop in editing while keeping file sizes manageable. At highway speeds, fine detail (road markings, signs, other riders) becomes visible that 1080p loses.
  • 60fps minimum — Motion at speed looks choppy at 30fps. At 60fps, fast movement through corners stays smooth. For slow-motion clips, look for cameras that shoot 4K/120fps (GoPro Hero 13) or 2.7K/240fps.
  • Avoid 5.3K for daily use — The storage and battery hit isn’t worth it unless you’re producing professional content. 4K is the practical maximum for 99% of riders.

Mount Position: This Changes Everything

Where you mount your camera determines the perspective your viewers get — and how much vibration the camera absorbs.

Chin mount (recommended for motorcycles): Positions the camera at eye level, matching your natural perspective. The chin bar absorbs some vibration and the low position means wind resistance is minimal. Works with full-face helmets only. Best chin mounts: Peak Design Capture Clip, GoPro Helmet Chin Mount.

Top mount: Elevated perspective shows more of the road ahead. More aerodynamic drag at speed and slightly more vibration. Works with any helmet style. Good for adventure/touring riders who want to show scenery.

Side mount: Creative angle for B-roll but impractical as a primary mount — the leverage at speed creates visible vibration even with good stabilization.

Battery Life and Storage

Real-world battery life at 4K/60fps varies significantly from manufacturer claims:

  • GoPro Hero 13 Black: ~90 minutes (claimed 143 min at 1080p/60fps). The Enduro battery ($25) adds ~20% in cold weather.
  • DJI Osmo Action 5 Pro: ~160 minutes at 4K/30fps — best battery life in its class. The 1,950mAh battery is the largest in any action camera under $300.
  • Insta360 X5: ~81 minutes in 360° mode — higher than the X4.

For rides over 90 minutes, plan for either a USB-C power bank (most cameras support charging during recording) or carry a spare battery. Use our Battery & Trip Planner tool to calculate exactly what you need.

Audio Quality

Wind noise is the biggest audio problem for helmet cameras. At speeds above 80 km/h, internal microphones become largely unusable without a windscreen solution.

Options ranked by effectiveness:

  1. External mic (best): Rode Wireless GO II clipped inside the helmet with foam windscreen — clean audio at any speed.
  2. DJI Mic Mini: Magnetic attachment, works with DJI cameras. Effective up to ~90 km/h.
  3. Foam windscreen over internal mic: GoPro’s Media Mod includes this; also available as third-party for most cameras. Cuts wind by ~60%.
  4. Internal mic only: Only acceptable below 60 km/h.

Best Helmet Camera by Riding Type

Best for Motorcycle Road Riding: GoPro Hero 13 Black

The Hero 13’s HyperSmooth 6.0 handles motorway vibration better than any competitor. The 5.3K sensor gives you room to crop for a cinematic 16:9 result. Max Lens Mod 2.0 adds a 177° ultra-wide field of view for immersive footage. The new Quik app makes transferring and editing footage on your phone genuinely painless. Price: ~$399 (camera only), ~$649 with accessories bundle.

Best Value: DJI Osmo Action 5 Pro

At $130 less than the Hero 13, the Osmo Action 5 Pro delivers 4K/120fps, the longest battery life in the category (160 min), and a dual-screen design that makes vlogging and angle checking easy without removing the camera. The main limitation vs. GoPro is a smaller ecosystem of accessories and mounts. Price: ~$269.

Best for Adventure/Off-Road: Insta360 X5

The 8K 360° footage lets you reframe shots in editing, which means you’re never stuck with a fixed angle. If you tip the bike, crash, or find yourself going sideways, the invisible selfie stick trick creates floating, professional-looking shots without visible camera equipment. The main tradeoff: heavier than single-lens cameras (179g) and 360° requires more editing time. Price: ~$499.

Best Dedicated Motorcycle Camera: Techalogic DC-1

Unlike GoPro/DJI, the Techalogic DC-1 is built specifically for motorcycle use. It has a dual-lens design capturing front and rear simultaneously — functionally a dashcam for your helmet. The 1080p resolution is adequate for incident recording, loop recording overwrites old footage automatically, and the simple two-button operation works with riding gloves. If your priority is safety documentation over cinematic footage, this is the better choice than a GoPro. Price: ~$199.

What to Avoid

No-name “4K” cameras under $50: These claim 4K but interpolate from a 1080p sensor. Stabilization is ineffective or absent. Mounts fail at highway speeds. The GoPro Hero entry-level (Hero) at ~$179 is the minimum worth considering for motorcycle use.

Action cameras without EIS: Older GoPro Hero 9 and below, older SJCAM models, and many generic brands lack effective electronic image stabilization. Footage is unwatchable above 60 km/h regardless of mount quality.

Frequently Asked Questions

Are helmet cameras legal for motorcycle riders?

In most US states, yes — there are no laws specifically prohibiting helmet cameras. However, some states have audio recording consent laws that affect whether you can record conversations. Rules vary internationally. See our complete helmet camera legal guide for state-by-state rules.

Will a helmet camera void my helmet certification?

Adhesive mounts that modify the helmet shell can technically void DOT/ECE certification in some interpretations. To stay safe: use chin mount adapters that attach to the chin bar without adhesive, or use clip-on mounts compatible with your specific helmet model. The GoPro Helmet Chin Mount is ECE-friendly as it doesn’t modify the shell.

How much storage do I need?

At 4K/60fps, GoPro Hero 13 uses approximately 4.5GB per hour. A 128GB card gives you ~28 hours of footage, which is adequate for any ride. Use a Class 10 / V30 minimum speed-rated card — SanDisk Extreme (V30) or Samsung PRO Endurance are the two most reliable choices for continuous recording.

Can I charge the camera while riding?

Most modern helmet cameras (GoPro Hero 13, DJI Osmo Action 5 Pro, Insta360 X5) support USB-C charging during recording. You can run a cable from a USB-A or USB-C port on your motorcycle to extend recording time indefinitely — useful for long touring days.

Use our free Camera Recommender tool to get a personalised recommendation based on your helmet type, riding style, and budget.

Official resources: GoPro camera range | DJI action cameras | Insta360 Ace Pro 2.

Best Slow-Motion Settings for Motorcycle Helmet Cameras (120fps & 240fps Guide)

GoPro: Top 10 Slow Motion Action

Slow motion footage from a helmet camera is one of the most effective tools for creating compelling motorcycle content — and for analysing your own riding technique. But getting it right requires specific settings that most riders don’t configure correctly. This guide covers the exact slow-motion settings for GoPro Hero 13, DJI Osmo Action 5 Pro, and Insta360 cameras, plus when to use each mode for the best results.

How Slow Motion Works: The Basics

Slow motion video is simply footage recorded at a higher frame rate than it’s played back. Standard video plays at 24 or 30fps. If you record at 120fps and play back at 30fps, the footage plays at 1/4 speed — four times slower than real time.

Record at Play back at Slow-motion factor Looks like
60fps 30fps 2x slower Subtle — smooth movement
120fps 30fps 4x slower Clear slow-motion effect
240fps 30fps 8x slower Very dramatic slow motion
240fps 24fps 10x slower Cinema slow motion

Best Slow-Motion Settings by Camera

GoPro Hero 13 Black

The Hero 13 is the most capable action camera for slow motion in its price range:

  • 4K / 120fps — Best quality slow motion. 4x slow at full HD playback. Use this for: corner sequences, jump footage, arrival/departure shots at speed.
  • 2.7K / 240fps — 8x slow motion with excellent quality. Use this for: water splashes, tyre roost, crash analysis, jump apexes in motocross.
  • 1080p / 240fps — 8x slow motion. Lower resolution but useful for long takes where storage matters.

Critical shutter speed setting: At 120fps, set shutter to 1/240s. At 240fps, set shutter to 1/480s. This follows the “180° shutter rule” — shutter speed double the frame rate — and creates natural motion blur that makes slow motion look cinematic rather than stiff.

Stabilization at high frame rates: HyperSmooth Boost is not available at 4K/120fps on the Hero 13 — use Standard mode. The difference is minimal at the speeds involved in slow-motion sequences.

DJI Osmo Action 5 Pro

  • 4K / 120fps — RockSteady 3.0 applies at this mode. Very smooth 4x slow motion suitable for cinematic sequences.
  • 2.7K / 120fps — More stable than 4K at the same frame rate due to slightly more crop tolerance.
  • 1080p / 240fps — 8x slow motion. Adequate for action sequences where full resolution isn’t needed.

Note: The Action 5 Pro does not offer 240fps at 4K. For maximum slow motion quality, use 2.7K or 1080p at 240fps, or 4K at 120fps for the best balance.

Insta360 X5

The X5 handles slow motion differently because of its 360° format:

  • 5.7K 360° / 30fps normal speed — then apply FlowState stabilization and reframe in the app.
  • 4K Single Lens / 100fps — Approximately 3x slow motion. Limited compared to GoPro/DJI for slow motion but the reframing advantage compensates.

For slow-motion motorcycle content with the X5, plan to reframe in the Insta360 Studio app: choose your angle, apply FlowState, then export. The result looks like a tracking shot that follows the action — which is more professional-looking than a fixed-angle slow-motion clip.

Top 8 Motorcycle Slow-Motion Shots Worth Capturing

1. Corner Entry and Exit

At 120fps, the moment of turn-in and lean becomes visually dramatic. Position your chin mount camera and review the footage to see your own body position and technique. For content, corner sequences at 4x slow are universally engaging.

2. Tyre Roost and Gravel Spray

The debris thrown by tyres is invisible in real time — at 240fps it becomes a shower of individual rocks and dust. Best captured from a third-party camera position, not helmet mount.

3. Jump Apex

The split-second when a motorcycle is fully airborne at the top of a jump is peak motocross content. 240fps captures the full arc and landing with enough detail to see suspension compression.

4. Water Splash / River Crossing

Adventure riding through water features is iconic. At 120–240fps, water spray creates dramatic visual patterns. The Osmo Action 5 Pro and GoPro Hero 13 are both fully waterproof — no additional housing needed.

5. Gear Change Sequence

A close-up mount on the gear lever at 240fps captures the mechanical precision of a racing gear change. Difficult to set up but a uniquely detailed shot that enthusiast audiences appreciate.

6. Arrival at a Layby or Summit

Slowing down from cruising speed to a stop at a scenic location — at 120fps this becomes a graceful arrival shot. Pair with wide FOV to include landscape context.

7. Gravel Road Spray

On unpaved roads, the rooster tail of gravel and dust thrown up at speed becomes cinematic at 120fps. Best captured by a second rider following at a safe distance.

8. Low-Sun Riding

Early morning or late evening light creates dramatic lens flare and shadow patterns at regular speed. In slow motion at 120fps, light shifts become visible movement — the landscape changes as you move through it.

Editing Slow-Motion Footage

Key editing principles for slow-motion motorcycle clips:

  • Don’t over-use it — slow motion is most effective as punctuation. Two or three slow-motion moments in a 3–5 minute video is ideal. Full-length slow-motion rides become fatiguing to watch.
  • Match music to playback speed — slow-motion sequences need slower, more dramatic music. Beat-sync slow-motion to a music breakdown is a proven formula.
  • Cut before the interesting moment, not at it — start your slow-motion clip slightly before the peak action. The lead-in makes the action hit harder.
  • DaVinci Resolve’s Speed Ramp — ramp from normal speed into slow motion and back out. This transition style is used in professional automotive and motorcycle content.

For personalized settings recommendations for your specific camera and riding conditions, use our Footage Settings Optimizer tool.

Frequently Asked Questions

Why does my slow-motion footage look choppy?

Most likely cause: the footage was recorded at 120fps but not interpreted correctly in your editing software. Import the clip and change the playback speed to 25% (for 120fps played at 30fps) or confirm your NLE has auto-detected the high frame rate. If using GoPro Quik, the slow motion is applied automatically.

Does slow motion use more battery and storage?

Yes — higher frame rates increase both data rate and processor load. At 4K/120fps on the GoPro Hero 13, battery life drops to approximately 50 minutes vs. 90 minutes at 4K/60fps. Storage: 4K/120fps uses approximately 8–9 GB per hour. Use a 128GB card minimum for extended slow-motion sessions.

What’s the difference between 120fps and 120p on camera menus?

They mean the same thing. Some cameras use “fps” (frames per second) and others use “p” (progressive scan) to describe frame rate. 120fps = 120p = the same 120 frames per second recording mode.

Official resources: GoPro camera specifications | DJI Osmo Action 4 | Insta360 Ace Pro 2.

Best Helmet Camera Settings for Motorcycle Racing & Track Days

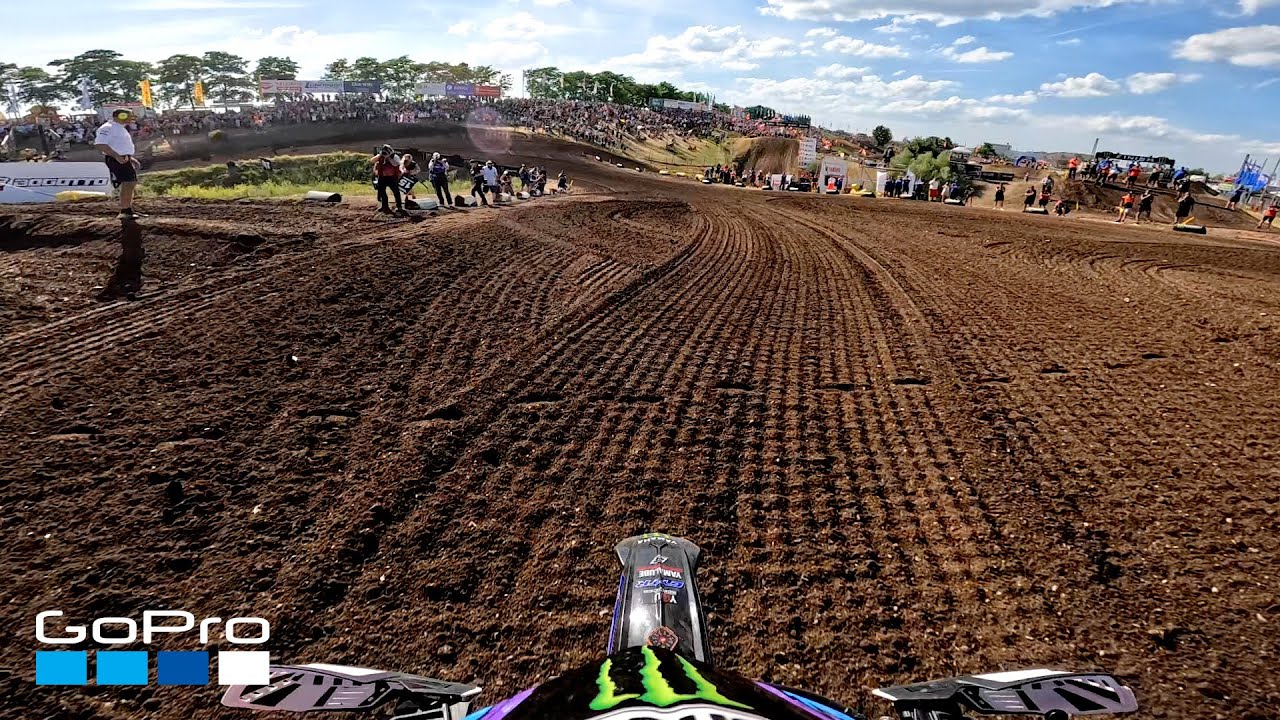
GoPro: Jeremy Seewer 2022 FIM MXGP Round 11 Moto 2 from Germany

The difference between amateur and professional motorcycle racing footage often comes down to camera settings, not camera brand. Racers and instructors use on-bike and helmet cameras to analyse cornering technique, racing lines, and braking points — and the right settings make the difference between footage you can learn from and footage that’s just noise. This guide covers optimal camera settings for motorcycle racing, track days, and performance riding.

What Racing Footage Is Actually Used For

Understanding your goal determines your settings. Racing camera footage serves three distinct purposes:

  1. Technique analysis: Reviewing your own cornering, braking points, and body position to identify areas for improvement.
  2. Content creation: YouTube/social media footage from track days and race weekends.
  3. Safety/incident documentation: Evidence in the event of an on-track incident.

The optimal settings differ for each purpose. Most riders prioritise analysis and content — and the settings below cover both.

Best Settings for Track Day / Racing Footage

GoPro Hero 13 Black — Recommended Track Settings

Setting Value Reason
Resolution 4K / 120fps Slow-motion capability at full resolution
Lens Linear (no distortion) Accurate representation of lines and distances
Stabilization HyperSmooth Standard Boost crops too much at 4K/120fps
Horizon Lock ON Keeps frame level through high-lean corners
Shutter 1/240s Double the frame rate
ISO Max 1600 Clean image in daylight
White Balance Auto Track lighting changes; auto handles it
Color Flat (Log) Preserves dynamic range for editing
GPS ON Records speed/GPS data overlay

DJI Osmo Action 5 Pro — Recommended Track Settings

Setting Value Reason
Resolution 4K / 120fps Slow motion at HD quality
FOV Normal or Wide Normal for technique analysis; Wide for content
RockSteady Standard ON 4K/120fps limits Boost mode
Horizon Steady ON Critical for corner footage
Color D-Cinelike Flat profile for post-production
Shutter 1/240s Double frame rate

Why Frame Rate Matters for Racing Analysis

At 60fps, a corner entry at 160 km/h is over in approximately 12 frames. At 120fps, you get 24 frames of the same action — twice the detail to analyse braking point, turn-in timing, and body position.

For professional race analysis, data overlay software (MOTEC, AiM, Racelogic VBOX) syncs GPS and engine data with camera footage. Even without dedicated software, GoPro’s GPS overlay in the Quik app shows speed, corner speed, and braking points as a timeline — useful for comparing laps and identifying where you’re losing time.

Camera Positioning for Maximum Technical Value

Chin Mount: Best for Technique Analysis

The chin mount gives you the rider’s perspective — you can see your own body position, bar inputs, and how the track looks from where you’re sitting. Comparing sessions with a coach or more experienced rider using the same footage format allows frame-by-frame technique comparison.

Top Mount: Best for Cornering Spectacle

The elevated angle from a top mount captures lean angle visually — you can see the bike leaning and the road rushing past. For content creation, this is more dramatic. For technique analysis, it’s less useful because you lose the rider’s eye-line perspective.

Chest Mount: Additional Option for Analysis

A chest-mounted camera (GoPro Chesty harness) shows hand positions on the handlebars and weight distribution changes through corners. Not useful for helmet-focused analysis but adds a second angle for multi-camera track day edits.

GPS and Telemetry Integration

GoPro Hero 13 records GPS data automatically. In the GoPro Quik app, you can enable a speed/altitude/map overlay on your footage without any additional hardware. This turns standard track footage into analysis-capable data.

For more detailed telemetry, the Racelogic VBOX Sport ($899) records GPS at 10Hz and synchronises with camera footage. This is serious motorsport-level analysis hardware — used by trackday instructors and amateur racers for precise lap time analysis.

Protecting Your Camera at Track Events

Track incidents happen even to experienced riders. Protective considerations:

  • Use a quick-release chin mount, not permanent adhesive — the camera should detach cleanly in a crash
  • Consider a UV filter over the lens ($8–15) to protect the glass from debris and scratches
  • Don’t use the naked camera at track days without at least the minimal frame — the exposed lens element is vulnerable
  • Register your camera’s serial number with the manufacturer — replacement programmes exist for incidents

Post-Session Review: Getting Value from Your Footage

The most effective use of track day footage is systematic review with a specific question in mind. Rather than watching the whole session, focus on:

  • Specific corners where you lost time — compare your turn-in point to a faster lap of the same corner
  • Braking points — in slow motion at 120fps, you can see exactly when and how hard brakes are applied
  • Body position — from a chest or chin mount perspective, compare your position in fast and slow laps
  • Reference markers — use the GPS overlay to compare corner speeds between sessions

Use our Settings Optimizer tool to generate exact recommended settings for your specific camera and track conditions.

Frequently Asked Questions

Can I use a helmet camera at official motorcycle race events?

Rules vary by sanctioning body and event. MSA/MSUK regulations allow helmet cameras at club events and sprint meetings. International competition (FIM, BSB) has specific regulations about camera mounting and housing. Always check the event regulations — some require specific mount types to maintain helmet certification.

What’s the best way to analyse cornering using helmet camera footage?

Set your timeline to the slowest playback your editing software allows (most allow 1/4 or 1/8 speed on 120fps footage — effective 480fps). Watch specifically for: when you first start braking (look for front dip), when you apply steering input, when you look through the corner exit, and when you open the throttle. These timing decisions determine lap times far more than outright speed.

Official resources: GoPro Hero 13 Black specifications | GoPro firmware and updates.

How to Film Motocross: Camera Settings, Techniques & Best Angles

GoPro: Justin Barcia - 450 Moto 1 - 2022 Lucas Oil Pro Motocross Championship Unadilla MX

Filming motocross races — whether your own performance or someone else’s — produces completely different challenges than road riding footage. The combination of high speed, jumps, roost, tight corners, and unpredictable race conditions requires a specific approach to get footage worth watching. This guide covers techniques, camera placement, and settings that produce professional-quality motocross race footage.

Filming Your Own Riding: Helmet Cam Setup

Camera Placement for MX Racing

Chin mount: the standard for motocross
All major GoPro-sponsored motocross and MXGP athletes use chin mounts. The reasons are practical: the chin bar absorbs vibration from the rough terrain, the camera is sheltered from direct roost, and the perspective closely matches the rider’s eye line — which means viewers see what the rider sees through jumps, berms, and whoops.

Use a breakaway mount design for racing (not permanent adhesive) — if the helmet hits the ground, you want the camera to detach cleanly rather than applying rotational force to the helmet.

Best Settings for Race Footage

Situation Resolution Frame Rate Stabilization
Full race documentation 4K 60fps HyperSmooth Boost
Jump slow-motion 2.7K or 4K 120fps Standard
Long gate drop to checkered flag 2.7K 60fps Boost (saves battery)
Practice lap analysis 1080p 120fps Any

Key setting: Horizon Lock ON — corners in motocross involve significant body lean. With Horizon Lock off, the camera tilts with your body, making footage look chaotic. With Horizon Lock on, the horizon stays level and corners look controlled and intentional.

Battery Management for Race Day

A standard motocross heat runs 30–35 minutes. A full race day with practice, qualifying, and 2 motos can run 4–5 hours of actual riding. Plan for:

  • 2–3 batteries for GoPro Hero 13 (90 min each)
  • 1–2 batteries for DJI Osmo Action 5 Pro (160 min each)
  • Charge between sessions in the paddock via USB-C power bank

Use the Battery & Trip Planner to calculate exactly how much power you need for your race day schedule.

Filming Someone Else Racing: Ground Camera Techniques

Filming riders from trackside produces a very different type of motocross content — and for compelling action footage, ground cameras and multiple angles produce better spectator content than a single helmet cam.

Position 1: The Berm Exit

Position yourself just outside the exit of a fast berm corner, low to the ground. As riders exit the berm at full throttle, they pass within feet of the camera. At 60fps, this produces blurring of the background while the rider stays sharp — a cinematic effect without any post-production work.

Position 2: Jump Face and Landing

Set up on the side of a significant jump — not directly in line with the trajectory (obvious safety reason), but at 45°. Shoot at 120fps minimum to capture the full arc of the jump in slow motion. This is the most watchable type of motocross footage and the highest-traffic shot type on YouTube motocross channels.

Position 3: Start Gate

The holeshot is pure energy — 20+ bikes launching simultaneously. Set up wide at a 45° angle to the start gate, 30fps for the real-time chaos look or 120fps for slow-motion gate drop analysis.

Best Cameras for Trackside Motocross Filming

For filming from the side of the track (not helmet mounting), a different set of priorities applies:

  • Zoom capability: Action cameras have fixed wide lenses — you need to be close to the action. For distance shots, a camera with optical zoom (Sony ZV-E10 with kit lens, or a 70–200mm telephoto) captures riders on the far side of the track.
  • High frame rate: 120fps minimum to freeze the details of riders in the air.
  • Burst photo mode: GoPro Hero 13 shoots 27MP bursts at 30fps — capturing split-second moments between video clips.

Audio for MX Race Footage

The sound of motocross is half the content — tyre roost, engine scream, landing impacts. External microphone options:

  • Rode VideoMicro II — compact directional mic that attaches to a camera hotshoe. Directional pattern focuses on the action in front of you.
  • Zoom H1n — separate handheld recorder. Record raw engine and crowd audio separately, sync in editing for clean multi-track audio.
  • Smartphone mic — modern iPhones and Samsung flagships record excellent ambient audio. A separate phone on a mini tripod pointing at the track is surprisingly effective.

Editing Your Motocross Footage

Two tools dominate motocross content editing:

  • GoPro Quik (free) — automated editing with beat-sync. Creates a watchable highlight reel in minutes. Limited control but excellent for quick social content.
  • DaVinci Resolve (free) — full professional editing suite. Used by professional moto videographers. Has a learning curve but the Fusion compositor enables colour grading and effects that Quik can’t match.

Not sure which camera fits your motocross filming needs? Our Camera Recommender tool has a specific motocross profile that factors in vibration handling, frame rate, and budget.

Frequently Asked Questions

Do professional MX riders get paid to use GoPro?

Major MXGP and AMA Pro riders are typically sponsored by GoPro or DJI — they use specific cameras as part of their sponsorship agreements. The cameras they use are production models, not custom units, which is why the footage you see from factory riders is achievable with consumer cameras.

What’s the safest way to mount a camera on a motocross helmet?

Use a dedicated motocross chin mount with a breakaway release mechanism. Avoid permanent adhesive mounts that can’t release during a crash. Check that your helmet’s certification (ECE 22.06 or DOT) isn’t voided by external modifications — most chin mounts avoid this by attaching to the chin bar without adhesive rather than bonding to the helmet shell.

Official resources: GoPro Hero 13 Black | DJI Osmo Action 4.

Best GoPro Cameras for Motocross & Off-Road Riding

GoPro: Jeremy Seewer 2022 FIM MXGP Qualifying Moto from MXoN Redbud

Motocross is one of the most demanding environments you can put a helmet camera through — constant vibration, dirt, mud, crashes, and extreme g-forces through jumps and corners. This guide covers the best cameras for motocross use specifically, with settings that work for the unique demands of off-road racing and recreational riding.

What Makes Motocross Different from Road Riding

Motocross footage has different requirements to motorway riding footage. The challenges are:

  • High-frequency vibration — 2-stroke and 4-stroke mx bikes vibrate differently from road bikes. Cheaper cameras struggle to compensate.
  • Extreme exposure changes — jumps into bright sky, landing in tree shadows, dust clouds. Dynamic range is critical.
  • Impact protection — crashes are more common. Cameras need to survive falls.
  • Roost and mud — debris thrown by other riders hits the camera directly.
  • Compact size — a large camera block on a motocross helmet can catch the ground or handlebars in a crash.

Best Cameras for Motocross Riders

1. GoPro Hero 13 Black — Best Overall for MX

GoPro has dominated motocross and off-road filming for a reason: HyperSmooth 6.0 handles the violent vibration patterns of 2-stroke MX bikes better than any competitor. The rugged housing is genuinely protective (survives a 6-foot drop onto concrete per GoPro’s testing). At 5.3K/60fps, you have the resolution to crop to the exact angle you want in editing.

Best settings for motocross:

  • 2.7K / 120fps (for slow-motion jump and corner analysis)
  • Wide lens (captures the full bike and body position)
  • HyperSmooth Boost
  • Protune ON, Shutter 1/240s, ISO max 1600

Price: ~$399

2. DJI Osmo Action 5 Pro — Best for Long Moto Days

A full day of riding in the desert or at an enduro event can run 6+ hours. The Osmo Action 5 Pro’s 160-minute battery life at 4K/30fps — significantly better than GoPro — means fewer stops for battery changes during riding. The 1/1.3-inch sensor handles the harsh contrast of bright desert and dark tree canopy better than smaller-sensor cameras.

Best settings for motocross:

  • 4K / 60fps (standard) or 2.7K / 120fps (slow motion)
  • RockSteady 4.0 ON
  • Horizon Steady ON
  • Wide FOV

Price: ~$269

3. Insta360 GO 3S — Best Lightweight Option

At just 35g, the GO 3S is the lightest helmet camera option for motocross. When you’re already wearing a full-face helmet, goggles, neck brace, and chest protector, minimising camera weight matters. The magnetic mounting system makes it easy to move between your helmet, chest protector, and handlebars.

Trade-offs: 2.7K/30fps maximum resolution (not competitive with GoPro/DJI), smaller sensor means weaker low-light performance. But for riders who do social content rather than professional production, the weight and ease-of-use advantages are compelling.

Price: ~$299

Helmet Camera Mounting for Motocross

Chin Mount (Best Choice)

The chin mount is the safest and most stable option for motocross because the chin bar absorbs vibration. In a crash, the camera is more protected than a top mount. Peak Design Sports Chin Mount and GoPro’s own Helmet Chin Mount are both used by professional MX riders.

Side Mount (Avoid)

Side mounts catch air and debris, and in a crash can catch the ground and wrench the helmet. Not recommended for motocross.

Top Mount

Used by some GoPro-sponsored riders for its elevated perspective. More vulnerable in crashes. If you use a top mount, use a breakaway adhesive mount that releases on impact rather than a rigid mount that transfers crash forces to the helmet.

Camera Settings for Jump Footage

Capturing jumps in slow motion is one of the highest-value shots in motocross content. The key settings:

  • Frame rate: 120fps minimum, 240fps if your camera supports it at acceptable resolution
  • GoPro Hero 13: 2.7K/240fps or 4K/120fps
  • DJI Osmo Action 5 Pro: 4K/120fps
  • Shutter speed: Double the frame rate (240fps → 1/480s)
  • This makes jump sequences look professional even from a basic chin mount setup

Protecting Your Camera from Roost and Mud

Debris from other riders’ tyres hits the camera at 50+ mph. Solutions:

  • UV filter over the lens protects the glass and is easy to replace (~$8) vs. a cracked lens element
  • Protective housing for GoPro adds extra protection but note it slightly reduces image quality
  • Post-ride cleaning: Use a blower brush first to remove grit before wiping the lens with a cloth — wiping dry grit scratches the coating

Use our Camera Recommender to get a specific camera recommendation matched to your motocross or off-road riding style and budget.

Frequently Asked Questions

Can a GoPro Hero 13 survive a motocross crash?

GoPro claims the Hero 13 can survive drops onto concrete from 6 feet. In practice, riders report it survives most casual crashes intact. Hard impacts directly onto the camera can crack the housing or lens. For serious racing, a protective case or buying a second camera as backup is worth considering.

What’s better for motocross — 60fps or 120fps?

Record at 120fps if you want the option of slow-motion playback. Standard 60fps footage looks smoother than 30fps at the speeds involved in motocross. Most experienced MX content creators record everything at the highest frame rate available because you can always speed up 120fps to look like 60fps, but you can’t add frames you didn’t capture.

Official resources: GoPro Hero 13 Black official page | Full GoPro camera range.

Do Motorcycle Helmet Cameras Need a Gimbal? Stabilization Explained

DJI RS 3 - Ready When You Are

Stabilization is the most important technical factor in motorcycle helmet camera footage — but there’s genuine confusion about whether you need a physical gimbal, electronic stabilization (EIS), or AI-based software stabilization. This guide explains what each type does, how they compare for motorcycle use, and which approach is right for different riding situations.

The Three Types of Stabilization

1. Electronic Image Stabilization (EIS) — Built into Most Action Cameras

EIS works by using the gyroscope and accelerometer inside the camera to detect motion, then digitally cropping and shifting the frame to compensate. The camera essentially records more than you see, and the processor uses the extra pixels as a buffer to smooth out movement.

Examples: GoPro HyperSmooth 6.0, DJI RockSteady 4.0, Insta360 FlowState.

For motorcycle use: Modern EIS on cameras like the GoPro Hero 13 Black and DJI Osmo Action 5 Pro handles most riding scenarios very well. At motorway speeds on smooth asphalt, EIS produces footage that appears gimbal-smooth. The main limitation is high-frequency vibration — if your engine vibrates intensely at certain RPMs (common with single-cylinder or V-twin engines), some EIS systems struggle.

Crop factor: EIS requires cropping the image, typically losing 10–20% of the frame. On a 4K sensor this is acceptable. On a 1080p camera the crop can be visible.

2. Optical Image Stabilization (OIS) — Rarely Found in Action Cameras

OIS uses a physically moving lens element or sensor to counteract movement mechanically. It’s common in smartphone cameras but rarely found in action cameras due to the size and complexity involved.

For motorcycle use: The Sony RX0 II has OIS but is not a typical helmet camera choice. For practical purposes, you won’t encounter OIS in a helmet camera purchase decision.

3. Physical Gimbal Stabilization — Separate Accessory

A camera gimbal (like the DJI RS 3, RS 4, or OM 6) uses motorised axes to physically keep the camera level regardless of movement. It processes motion 10,000+ times per second and makes mechanical corrections in real time.

Results: Technically the smoothest possible footage — smoother than any EIS system. Professional film and TV productions use gimbals for exactly this reason.

For motorcycle helmet use: Impractical. A gimbal is designed for handheld camera movement, not for mounting to a helmet. The physical size, weight (400–600g for a camera gimbal), battery requirements, and aerodynamic impact make helmet mounting unsafe and unworkable. Gimbals are the right tool for filming motorcycles — from a chase vehicle, a pillion seat, or handheld for stationary shots. They are not the right tool for mounting on your helmet while riding.

What Actually Causes Shaky Motorcycle Footage

Understanding the source of vibration helps you solve it with the right tool:

Vibration Source Frequency Best Fix
Road surface (bumps, potholes) Low frequency EIS handles well
Engine resonance (single/V-twin) Medium frequency (30–100Hz) Anti-vibration mount pad + EIS
Wind buffeting at high speed Low frequency EIS handles well
Helmet wobble from loose fit Low frequency Tighter fit / better mount
Mount looseness (worn quick-release) Random Replace mount hardware

The Anti-Vibration Mount: The Underrated Solution

For motorcycles with significant engine vibration (particularly large V-twins, single-cylinder adventure bikes, and older inline-fours with worn engine mounts), an anti-vibration mount pad placed between the helmet and the camera mount can dramatically improve footage quality.

Options worth trying:

  • GoPro Anti-Vibe Mount (~$20) — designed specifically for this purpose. Absorbs vibration between the camera and mount through internal rubber elements.
  • Generic silicone vibration damper pads (~$8–12 on Amazon) — cut to fit between any mount and the helmet surface.
  • Loctite Blue on mount screws — prevents loosening from vibration over time without permanently bonding.

EIS Comparison: Which Action Camera Has the Best Stabilization for Motorcycles?

Camera EIS System Motorway Performance Rough Roads
GoPro Hero 13 Black HyperSmooth 6.0 Excellent Excellent
DJI Osmo Action 5 Pro RockSteady 4.0 Excellent Very Good
Insta360 X5 FlowState (360°) Excellent Excellent
DJI Osmo Action 3 RockSteady 3.0 Very Good Good
GoPro Hero 11 Black HyperSmooth 5.0 Very Good Good
Generic action cameras Basic/none Poor Unusable

Post-Production Stabilization: The Third Option

If your footage has residual shakiness after EIS, software tools can help in editing:

  • DaVinci Resolve (free) — Stabilization tool in the Color page. Good for low-frequency wobble.
  • GoPro Quik — Auto-stabilizes clips from any GoPro camera. Works well for minor corrections.
  • Adobe Premiere / Warp Stabilizer — Industry standard, produces excellent results but adds significant crop to the frame.
  • Insta360 app (for 360° cameras) — ReFrame tool applies FlowState post-stabilization when you choose your viewpoint.

Verdict: Do You Need a Gimbal for Helmet Camera Footage?

No. For motorcycle helmet mounting, a modern action camera with quality EIS (GoPro Hero 11/13, DJI Osmo Action 3/4/5) combined with a secure mount and anti-vibration pad produces footage that is indistinguishable from gimbal footage for most viewing purposes. Gimbals are the right tool for handheld and vehicle-mounted filming — not for helmet mounting while riding.

Use our Mount Advisor tool to find the best mount combination for your helmet, camera, and riding style — including anti-vibration recommendations for your engine type.

Frequently Asked Questions

My single-cylinder adventure bike creates a lot of vibration — will EIS be enough?

Modern EIS (HyperSmooth 5.0+ or RockSteady 3.0+) handles most single-cylinder vibration well. Add an anti-vibration mount pad as a secondary measure. If you’re still seeing issues, a chin mount (more vibration-dampened position) often produces better results than a top mount for high-vibration engines.

Can I use a handheld gimbal to film from a motorcycle?

Yes — if you have a pillion who can hold the gimbal, or you mount it on a tank bag or tail rack. The DJI RS 3 Mini or DJI OM 6 are good options for passenger-held filming. This is completely different from helmet mounting.

Official resources: GoPro HyperSmooth 6.0 specifications | DJI RockSteady 3.0 specifications.

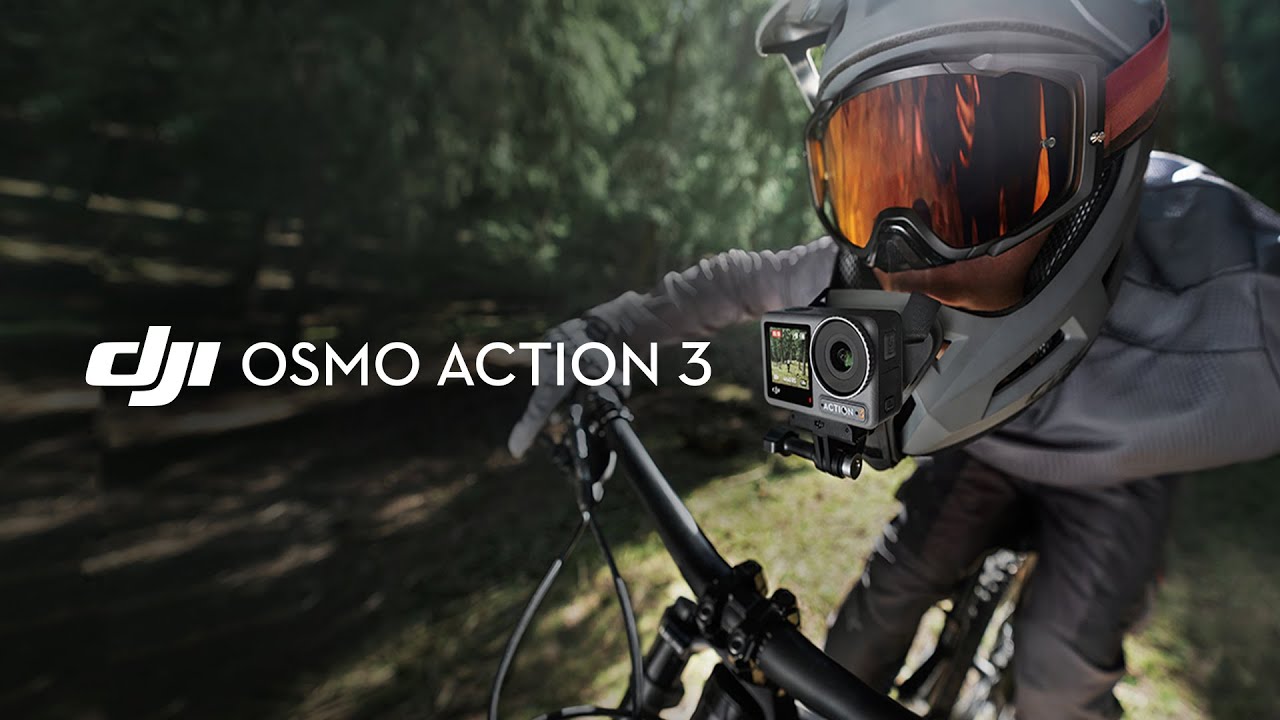
DJI Osmo Action 3 Setup Guide: Best Settings & Mounting for Motorcycle Riders

DJI - This is Osmo Action 3

You’ve got a DJI Osmo Action 3 mounted on your helmet and you’re getting shaky, washed-out, or audio-ruined footage. The camera is capable of excellent results — but the default out-of-box settings are not optimised for motorcycle use. This guide walks through setup, settings, and the specific adjustments that make the difference between amateur and professional-looking ride footage.

Step 1: Choose the Right Mount Position

Before touching a single camera setting, your mount position determines 80% of your footage quality. The wrong position means no amount of stabilization or settings will save it.

Chin Mount (Recommended for Most Riders)

Position: on the chin bar of a full-face helmet, centred or slightly offset.
Why it works: Close to your eye line, sheltered from wind by the chin bar (reducing both noise and vibration), and the most natural perspective for viewers.
Best chin mounts for the Action 3: DJI Helmet Chin Mount ($29), ULANZI U-400 (~$18), Telesin Chin Mount (~$15).

Top Mount (Open-Face and Modular Helmets)

Position: on the top of the helmet, as far forward as possible without exceeding the helmet’s slope.
Why it works: The only practical external option for open-face and modular helmets. Elevated perspective shows more road and scenery.
Downside: More aerodynamic drag at speed; slightly more vibration without the chin bar buffer.

Step 2: Core Camera Settings for Riding

Open the DJI Mimo App First

Before your first ride, connect the Action 3 to the DJI Mimo app (iOS/Android) and update firmware. DJI regularly releases stabilization improvements via firmware — skipping this means potentially running outdated stabilization software.

The Settings That Matter

Resolution and Frame Rate
Set: 4K / 60fps for all standard riding. This gives smooth motion and enough resolution for cropping.
For slow-motion analysis of technique: 2.7K or 1080p / 120fps. True 4K/120fps is not available on the Action 3 (it was added on the Action 4).

Stabilization
Turn on: RockSteady 3.0. This is the electronic stabilization — it must be manually enabled each time, it doesn’t default to ON.
Also enable: Horizon Steady. This runs independently from RockSteady and keeps the horizon level even if the camera tilts. Set to ±45°.

Field of View
Use: Wide (not Ultrawide) for road riding. Ultrawide creates barrel distortion that makes straight roads look curved, and at high speeds the visual distortion becomes disorienting. Switch to Ultrawide for off-road or adventure riding where the wider view adds context to the terrain.

Shutter Speed
The shutter speed rule for video: set to double the frame rate.
At 60fps → use 1/120s
At 120fps → use 1/240s
This gives natural motion blur that matches how our eyes perceive movement. Using a faster shutter makes motion look stuttery; slower makes it look smeared.

ISO
In full daylight: Set ISO max to 800.
Overcast/changing light: 3200.
Dawn/dusk/night riding: 6400.
Lower ISO = less grain in bright conditions. Higher ISO = more light in dark conditions but more noise in the image.

White Balance
Leave on Auto for most riding — the Action 3’s auto white balance is reliable. Set it manually (5600K) only if you’re recording in artificial light (underground car parks, tunnels) where auto tends to drift.

Color Profile
Normal colour: if you’re posting footage directly to Instagram/YouTube without editing.
D-Cinelike: if you’re colour grading in DaVinci Resolve or Premiere. This flat profile retains more dynamic range for post-production.

Step 3: Fix Audio — The Most Overlooked Issue

Internal microphone performance degrades significantly above 80 km/h due to wind noise. Your options:

  • Option A (best): DJI Mic Mini — clips inside the helmet liner near your chin, connects wirelessly to the Action 3. Clear audio at any speed. ~$89.
  • Option B: Foam windscreen — a custom-fit foam cover over the Action 3’s built-in microphone reduces wind noise by ~50%. Third-party covers cost ~$5–10 on Amazon.
  • Option C: Record audio separately — Bluetooth headset audio (Sena, Cardo) recorded from inside the helmet, synced in editing. Best quality but requires editing work.

Step 4: Pre-Ride Checklist

Run through this before every ride to avoid wasting storage or missing footage:

  1. Check battery level — charge if below 50% for rides over 45 minutes
  2. Confirm microSD has enough free space (4K/60fps uses ~4GB/hour)
  3. Confirm stabilization (RockSteady) is ON — it doesn’t persist between power cycles in some firmware versions
  4. Check mount security — pull gently on the camera in all directions
  5. Start recording, check the front screen confirms the footage looks level and framed correctly
  6. Verify audio is picking up correctly with a 10-second test clip

Step 5: Getting Better Footage on the Ride

Vary your speed when filming interesting scenery — faster looks more dramatic; slowing down makes landscape shots feel cinematic. If you have a passenger or ride with others, a following shot at constant speed looks professional.

Use the DJI Mimo app’s timelapse mode for layby shots while you take a break — the camera handles the rest and you get a cinematic landscape clip.

Don’t stop recording at every red light — the urban environment at a standstill is actually interesting context for ride content. Let it roll.

For personalised settings based on your specific riding conditions, use our free Footage Settings Optimizer tool — enter your camera model, typical riding conditions, and content goals to get exact recommended settings.

Frequently Asked Questions

Why is my Osmo Action 3 footage shaky even with RockSteady on?

Most likely causes: (1) RockSteady wasn’t applied at recording — it must be turned on before recording starts, not after. (2) The mount is loose — check that the Action 3 is fully clicked into the mount and the mount itself is secure to the helmet. (3) High-frequency vibration from a specific engine type can occasionally defeat EIS — try a secondary anti-vibration mount pad under the base.

How do I transfer footage from the Action 3 to my phone?

Connect via the DJI Mimo app over Wi-Fi. Enable the Action 3’s Wi-Fi from the settings menu, find it in your phone’s Wi-Fi list (named “DJI_Action3_XXXX”), then open Mimo to access and transfer files. Transfer speed over Wi-Fi is around 10–15 MB/s, so a 4GB clip takes about 4–5 minutes.

Can I use the Osmo Action 3 in rain?

Yes — it’s waterproof to 11 metres without any additional housing. Rain riding is not a concern. Clean the lens after a wet ride with a microfibre cloth to prevent water spot residue.

Official resources: DJI Osmo Action 3 user manual and downloads | DJI Store.

DJI Osmo Action 3 Review: Best Value Motorcycle Helmet Camera

DJI Osmo Action 3 - Ready To Ride

The DJI Osmo Action 3 launched in September 2022 and disrupted the action camera market by delivering genuinely competitive stabilization and the longest battery life in its class — at a lower price than GoPro. Now available for around $149–169, it represents exceptional value for motorcycle riders. Here’s an honest, spec-accurate review.

The Osmo Action 3 is an older model and DJI has since released newer Osmo Action cameras. This review is best read as a value comparison; check availability and DJI’s current lineup before buying.

Camera reviewed: DJI Osmo Action 3 | Typical price: roughly $149–169 (varies; check the current listing)

DJI Osmo Action 3: Full Specifications

Spec Osmo Action 3
Sensor 1/1.7-inch, 12MP
Max Video 4K/120fps, 2.7K/120fps, 1080p/240fps
Stabilization RockSteady 3.0 + Horizon Steady
Field of View 155° (Ultrawide) / 122° (Wide) / 86° (Normal)
Battery Life ~160 min at 1080p/60fps — longest in class
Waterproof 11m without housing
Dual Screen Yes — 2.25″ rear + 1.4″ front
Weight 145g with battery
Operating Temp -10°C to 40°C
Current Price ~$149–169 (Adventure Combo ~$199)

Why Motorcycle Riders Are Choosing the Osmo Action 3

Battery Life That Outlasts Long Rides

At 160 minutes of recording at 1080p/60fps, the Osmo Action 3 is the only action camera in this price range that can handle a full morning ride without a battery change. GoPro Hero 11 manages ~70 minutes at comparable settings. For touring riders, commuters, and anyone who doesn’t want to stop mid-ride to swap batteries, this is the deciding factor.

At 4K/60fps, expect around 95 minutes — still significantly better than the competition. A USB-C power bank connection extends recording indefinitely.

RockSteady 3.0: Real Stabilization Performance

DJI’s RockSteady 3.0 electronic image stabilization handles motorcycle vibration effectively at highway speeds. The Horizon Steady mode keeps the horizon level through ±45° of camera tilt — useful when mounts settle or shift over long rides.

Manufacturer claims and published comparisons suggest the Osmo Action 3 and GoPro Hero 11 (HyperSmooth 5.0) deliver broadly comparable stabilization at highway speeds. Real-world results vary by mount, helmet and road surface.

Dual Screen for Angle Confirmation

The 1.4-inch front-facing touchscreen is a practical feature for motorcycle use: you can confirm your framing after mounting without removing the camera from the helmet. GoPro cameras require the Quik app or a separate monitor to do the same thing.

Best Settings for Motorcycle Use

Road Riding / Motorway

  • Mode: 4K / 60fps
  • Stabilization: RockSteady 3.0 ON
  • Horizon Steady: ON
  • FOV: Wide (less distortion than Ultrawide, better for road footage)
  • Color: D-Cinelike if you edit; Normal if straight-to-social
  • ISO Max: 6400 (daytime) — lower if bright conditions create noise

Track Day / Performance Riding

  • Mode: 4K / 120fps (for slow-motion technique analysis)
  • Stabilization: RockSteady Standard (Boost crops in too much)
  • Shutter: 1/240s at 120fps
  • FOV: Normal or Wide

Adventure / Dual Sport

  • Mode: 2.7K / 60fps
  • Stabilization: RockSteady 3.0 + Horizon Steady ON
  • FOV: Ultrawide (captures more trail/scenery on both sides)

Osmo Action 3 vs. Osmo Action 4 vs. Action 5 Pro: Which to Buy?

Action 3 Action 4 Action 5 Pro
Price ~$149 ~$199 ~$269
Sensor size 1/1.7″ 1/1.3″ 1/1.3″
Max resolution 4K/120fps 4K/120fps 4K/120fps
Battery (4K/60fps) ~95 min ~100 min ~130 min
Low light Good Better (larger sensor) Best in class
Stabilization RockSteady 3.0 RockSteady 3.0 RockSteady 4.0

Buy the Action 3 if budget is the priority — it covers 95% of riding scenarios at the best price per performance. Buy the Action 4 or 5 Pro if you ride frequently at dawn/dusk/night where the larger sensor’s low-light advantage matters.

Mounting the Osmo Action 3 on a Motorcycle Helmet

The Action 3 ships with DJI’s magnetic quick-release mount system. For helmet use, the recommended approach:

  • Chin mount: DJI’s Helmet Chin Mount is compatible with the Action 3 and 4. Third-party options from ULANZI and Telesin also work and are cheaper (~$15–20 vs. DJI’s $29).
  • Top mount: DJI’s Action Camera Universal Mount clips to vented helmet straps. Use a thin foam pad under the adhesive mount on smooth helmets.
  • GoPro adapter: The Action 3 uses a standard 1/4″-20 thread and GoPro-compatible mount, so the entire GoPro accessory ecosystem is compatible.

Verdict

The DJI Osmo Action 3 is a strong-value motorcycle helmet camera among the models compared here. At around $149, it offers 4K stabilization, long rated battery life and a dual-screen design at a price well below the GoPro Hero 13. The main reasons to pay more for the Hero 13 are if you specifically need 5.3K resolution or the expanded modular lens ecosystem.

Use our free Settings Optimizer to dial in the exact configuration for your DJI Osmo Action 3 and riding conditions.

Frequently Asked Questions

Is the DJI Osmo Action 3 waterproof?

Yes — rated to 11 metres without a housing. It handles rain riding, river crossings, and water sports without any additional protection.

What memory card does the Osmo Action 3 need?

A V30-rated microSD card minimum for 4K recording. SanDisk Extreme 128GB or Samsung PRO Endurance 128GB are the most reliable options. Avoid budget cards — they cause recording errors at high bitrates.

Can I use GoPro mounts with the DJI Osmo Action 3?

Yes — DJI includes a GoPro-compatible adapter in the box, so it works with any GoPro mount system including GoPro’s own chin mounts and third-party RAM mounts.

Official resources: DJI Osmo Action 3 official page | Full specifications.

Get Your Download Immediately

Get Instant access to our Digital Helmet Camera ebook

You have Successfully Subscribed!